If you haven’t done task 6 yet, here is the link to my write-up of them:Task 6 Exercise: Threat Hunting with Brim Malware C2 Detection
Getting the VM Started
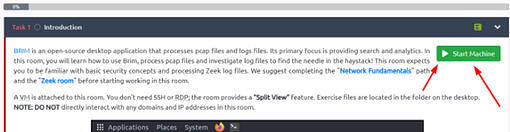
Click the green button, labeled Start Machine, at the top of Task 1.
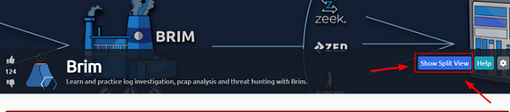
The screen should split in half if it doesn’t go to the top of the page. You will see a blue button labeled Show Split View, click this button.
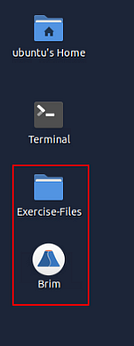
The screen should be split now, you have to wait for the VM to load. When it is finished loading it will look like it does below. You are ready to continue with the tasks ahead.On the desktop, double-click the Exercise-Files directory icon and Brim icon.
When both open, click and drag the task7-crypto-mine.pcapng file from the Exercise-Files directory to the Brim application.
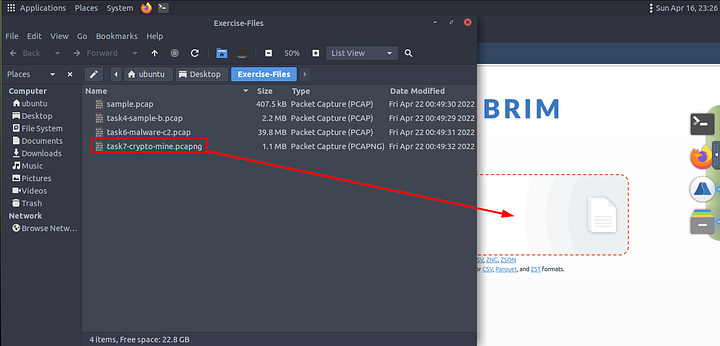
Then Brim will start to import the file.

After the Crypto Mine pcapng loads, we first want to go to the view tab. It is the fourth tab on the right at the top of Brim. Click on it and a drop-down menu will appear, then click the Right Pane choice.

You are now ready to move on to the takes ahead.
Threat Hunting with Brim | Crypto Mining
Cryptocurrencies are frequently on the agenda with their constantly rising value and legal aspect. The ability to obtain cryptocurrencies by mining other than purchasing is becoming one of the biggest problems in today’s corporate environments. Attackers not only compromise the systems and ask for a ransom, but sometimes they also install mining tools (cryptojacking). Other than the attackers and threat actors, sometimes internal threats and misuse of trust and privileges end up installing coin miners in the corporate environment.
Usually, mining cases are slightly different from traditional compromising activities. Internal attacks don’t typically contain major malware samples. However, this doesn’t mean they aren’t malicious as they are exploiting essential corporate resources like computing power, internet, and electricity. Also, crypto mining activities require third party applications and tool installations which could be vulnerable or create backdoors. Lastly, mining activities are causing network performance and stability problems. Due to these known facts, coin mining is becoming one of the common use cases of threat hunters.
Now, open Brim, import the sample pcap and go through the walkthrough.
Let’s investigate a traffic sample to detect a coin mining activity!
Let’s look at the available logfiles first to see what kind of data artefact we could have. The image on the left shows that we don’t have many alternative log files we could rely on. Let’s review the frequently communicated hosts to see if there is an anomaly indicator.
Query: cut id.orig_h, id.resp_p, id.resp_h | sort | uniq -c | sort -r
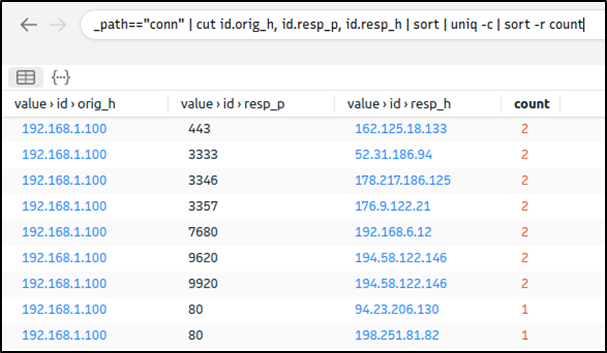
This query provided sufficient data that helped us decide where to focus. The IP address “192.168.xx” draws attention in the first place. Let’s look at the port numbers and available services before focusing on the suspicious IP address and narrowing our search.
Query: _path=="conn" | cut id.resp_p, service | sort | uniq -c | sort -r count
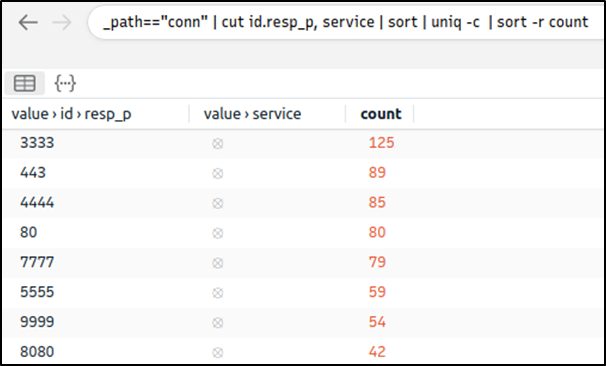
There is multiple weird port usage, and this is not usual. Now, we are one step closer to the identification of the anomaly. Let’s look at the transferred data bytes to support our findings and find more indicators.
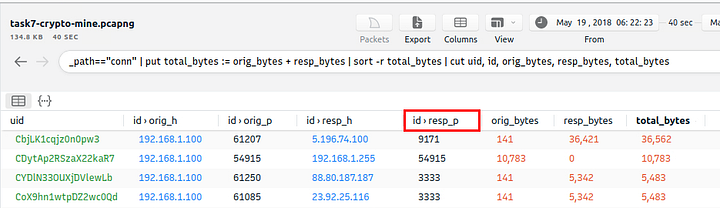
Query: _path=="conn" | put total_bytes := orig_bytes + resp_bytes | sort -r total_bytes | cut uid, id, orig_bytes, resp_bytes, total_bytes
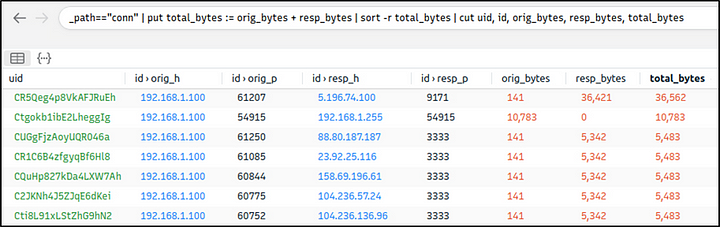
The query result proves massive traffic originating from the suspicious IP address. The detected IP address is suspicious. However, we don’t have many supportive log files to correlate our findings and detect accompanying activities. At this point, we will hunt the low hanging fruits with the help of Suricata rules. Let’s investigate the Suricata logs.
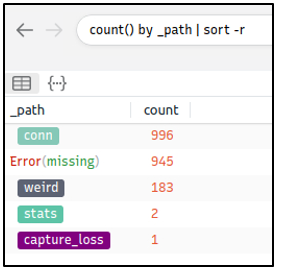
Query: event_type=="alert" | count() by alert.severity,alert.category | sort count
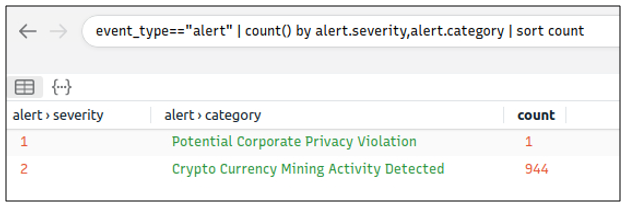
Suricata rules have helped us conclude our hunt quickly, as the alerts tell us we are investigating a “Crypto Currency Mining” activity. Let’s dig deeper and discover which data pool is used for the mining activity. First, we will list the associated connection logs with the suspicious IP, and then we will run a VirusTotal search against the destination IP.
Query: _path=="conn" | 192.168.1.100
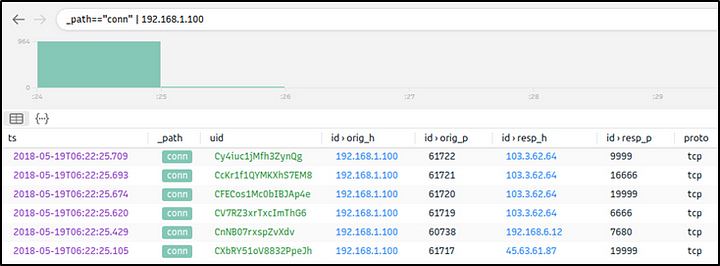
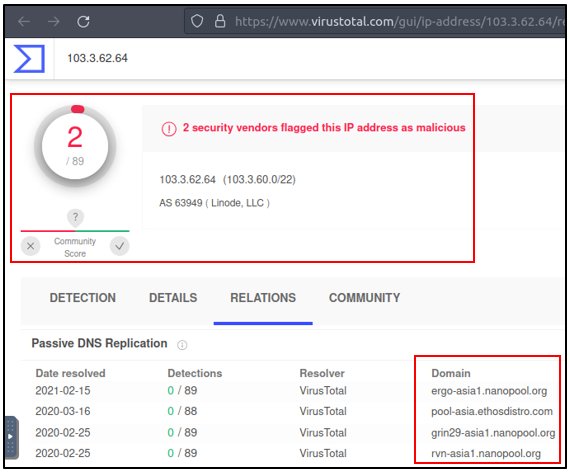
We investigated the first destination IP address and successfully identified the mining server. In real-life cases, you may need to investigate multiple IP addresses to find the event of interest.
Lastly, let’s use Suricata logs to discover mapped out MITRE ATT&CK techniques.
Query: event_type=="alert" | cut alert.category, alert.metadata.mitre_technique_name, alert.metadata.mitre_technique_id, alert.metadata.mitre_tactic_name | sort | uniq -c

Now we can identify the mapped out MITRE ATT&CK details as shown in the table below.

This concludes our hunt for the given case. Now, repeat this exercise in the attached VM and ask the questions below.
Answer the questions below
How many connections used port 19999?
To start off, look to the left side of Brim, in the queries section. Look for the query Connection Received Data and click on it.

Now look to the middle section of Brim, we are going to need to modify the query. But first, we need to figure out the search term. Looking at the question, we need to find the port that it was connected to first, then the number of connections to that port. Since we are looking for the port it was connected to, then the term we need is id.resp_p.
Time to modify the query, delete everything after cut so that the query looks like this: _path=="conn" | put total_bytes := orig_bytes | sort -r total_bytes | cut.

After the cut type id.resp_p | sort | uniq -c | 19999. Id.resp_p is the receiving port, sort will sort the whats left numerically, uniq -c with drop and duplicates and count it, and finally 19999 is searching for that number. so the full query should be _path=="conn" | put total_bytes := orig_bytes | sort -r total_bytes | cut | id.resp | sort | uniq -c | 19999.

You will only have one result in the bottom section, and the answer will be the column next to the port number. Once you see it, type the answer into the TryHackMe answer field and click submit.
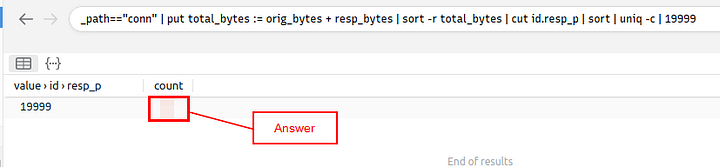
Answer: 22
What is the name of the service used by port 6666?
You can find a hint above in the text. Scroll up till you see the query: _path=="conn" | cut id.resp_p, service | sort | uniq -c | sort -r count, we can use this with only minor modifications.

So let’s modify the query and put it into the Brim query field. You want to delete everything after uniq, then add | 6666. With this query we are looking at the connects because of the _path==”conn”. Then cut, literally cuts out these columns for the query. We then use sort to sort the answers so far, numerically. The uniq parameter takes away any duplicates and only shows one instance in the results. Finally 6666 searches for the number in the results. So the final query is _path=="conn" | cut id.resp_p, service | sort | uniq | 6666, that’s it!! Type the query into the query field on Brim.

Now look below at the results of the query we searched. You will see the answer in the column to the right of the port. Once you see it, type the answer into the TryHackMe answer field, then click submit.
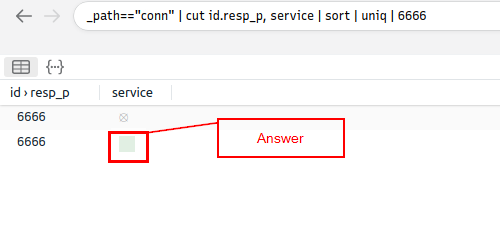
Answer: irc
What is the amount of transferred total bytes to “101.201.172.235:8888”?
To start off, look to the left side of Brim, in the queries section. Look for the query Connection Received Data and click on it.
Now look to the middle section of Brim, we are going to need to modify the query. We need to delete out uid, id, orig_bytes,and resp_bytes from the query.

We are going to add id.resp_h, id.resp_p, in between cut and total_bytes.

To finish up our query we need to add sort | uniq | 101.201.172.235 | 8888 to the end. Then press enter to search this query

Look at the results field under the query, you should only see one result. The column on the right will have the Total Bytes that the question is asking for. Once you see it, type the answer into the TryHackMe answer field, and click submit.
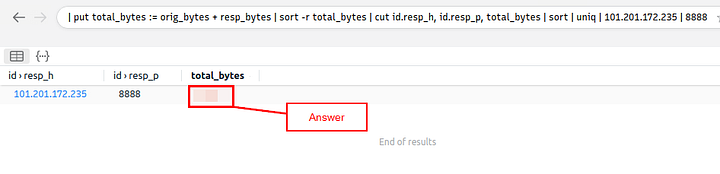
Answer: 3,729
What is the detected MITRE tactic id?
If you look at the last section from the above reading we can see what we need to use in our query. From what we see we can understand how we must lay out the query.

To set up the query, we start with event_type=="alert" when then pipe to the next command. Since we want to see the tactic id and from looking at what the categories look like, the next part should be cut alert.metadata.mitre_tactic_id. Then finish up the query with my favorite two commands here, sort and uniq. So the final command should look like event_type=="alert" | alert.metadata.mitre_tactic_id | sort | uniq.

After typing in the command, press enter to search with the query. You will have two results in the below results field. The first one being the answer the second being an error. Once you see the answer, type it into the TryHackMe answer field, and press enter.
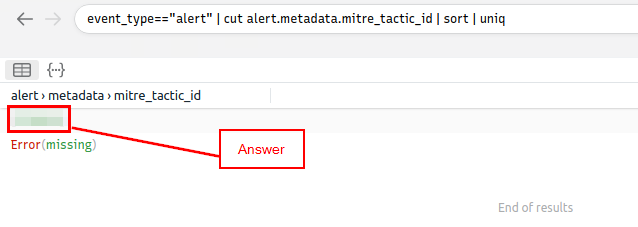
Answer: TA0040
Task 8 Conclusion
Congratulations! You just finished the Brim room.
In this room, we covered Brim, what it is, how it operates, and how to use it to investigate threats.
Now, we invite you to complete the Brim challenge room: Masterminds
🎉🎉🎉Congrats!!! You completed the TryHackMe Brim Room, Awesome Job!!!🎉🎉🎉