Walkthrough on the use of MISP as a Threat Sharing Platform
Task 1 Room Overview
MISP — MALWARE INFORMATION SHARING PLATFORM
This room explores the MISP Malware & Threat Sharing Platform through its core objective to foster sharing of structured threat information among security analysts, malware researchers and IT professionals.
Room Objectives
We will be covering the following areas within the room:
- Introduction to MISP and why it was developed.
- Use cases MISP can be applied to
- Core features and terminologies.
- Dashboard Navigation.
- Event Creation and Management.
- Feeds and Taxonomies.
Room Prerequisites
General familiarity with security concepts is: check out the Pre Security path and the Jr. Security Analyst room.
At the end of the room, we will have an exercise task to test your knowledge of the use of MISP.

Task 2 MISP Introduction: Features & Terminologies
What is MISP?
MISP (Malware Information Sharing Platform) is an open-source threat information platform that facilitates the collection, storage and distribution of threat intelligence and Indicators of Compromise (IOCs) related to malware, cyber attacks, financial fraud or any intelligence within a community of trusted members.
Information sharing follows a distributed model, with supported closed, semi-private, and open communities (public). Additionally, the threat information can be distributed and consumed by Network Intrusion Detection Systems (NIDS), log analysis tools and Security Information and Event Management Systems (SIEM).
MISP is effectively useful for the following use cases:
- Malware Reverse Engineering: Sharing of malware indicators to understand how different malware families function.
- Security Investigations: Searching, validating and using indicators in investigating security breaches.
- Intelligence Analysis: Gathering information about adversary groups and their capabilities.
- Law Enforcement: Using indicators to support forensic investigations.
- Risk Analysis: Researching new threats, their likelihood and occurrences.
- Fraud Analysis: Sharing of financial indicators to detect financial fraud.
What does MISP support?
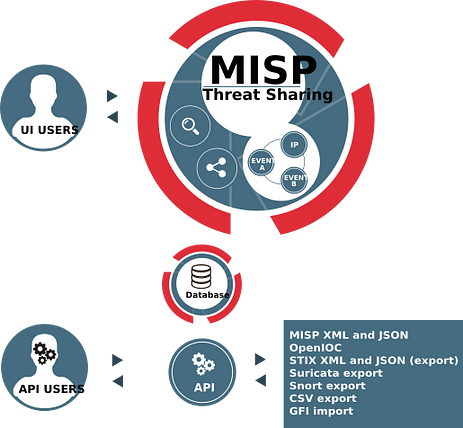
MISP provides the following core functionalities:
- IOC database: This allows for the storage of technical and non-technical information about malware samples, incidents, attackers and intelligence.
- Automatic Correlation: Identification of relationships between attributes and indicators from malware, attack campaigns or analysis.
- Data Sharing: This allows for sharing of information using different models of distributions and among different MISP instances.
- Import & Export Features: This allows the import and export of events in different formats to integrate other systems such as NIDS, HIDS, and OpenIOC.
- Event Graph: Showcases the relationships between objects and attributes identified from events.
- API support: Supports integration with own systems to fetch and export events and intelligence.
The following terms are commonly used within MISP and are related to the functionalities described above and the general usage of the platform:
- Events: Collection of contextually linked information.
- Attributes: Individual data points associated with an event, such as network or system indicators.
- Objects: Custom attribute compositions.
- Object References: Relationships between different objects.
- Sightings: Time-specific occurrences of a given data point or attribute detected to provide more credibility.
- Tags: Labels attached to events/attributes.
- Taxonomies: Classification libraries are used to tag, classify and organise information.
- Galaxies: Knowledge base items used to label events/attributes.
- Indicators: Pieces of information that can detect suspicious or malicious cyber activity.
Task 3 Using the System
For you to understand how MISP works and follow along in the task, launch the attached machine and use the credentials provided to log in to the Analyst Account on https://LAB_WEB_URL.p.thmlabs.com/. Wait 1 minute for the URL and lab to start up.
Username: Analyst@THM.thm
Password: Analyst1234&
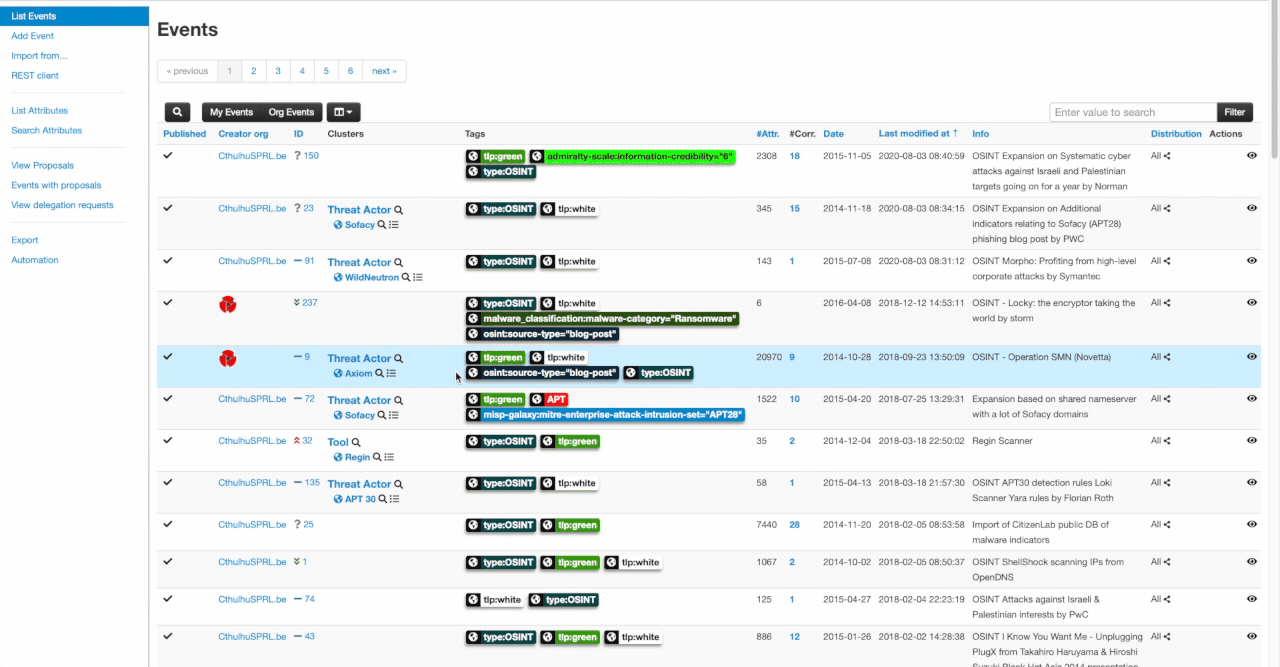
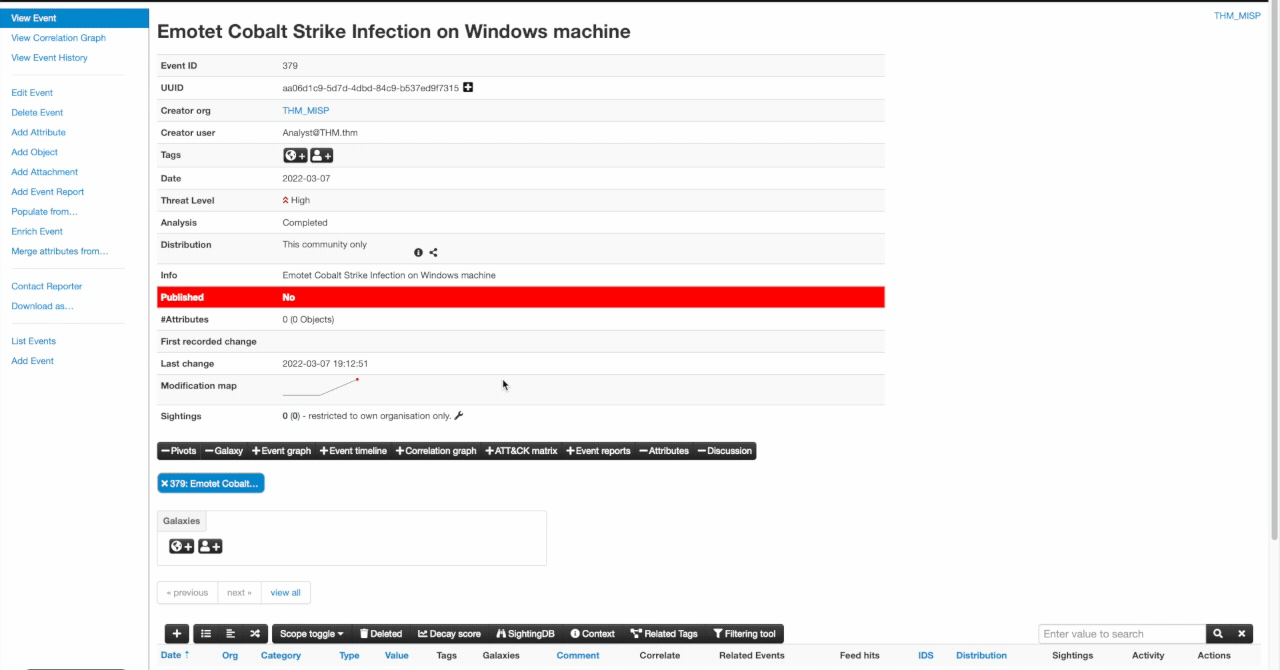
Dashboard
The analyst’s view of MISP provides you with the functionalities to track, share and correlate events and IOCs identified during your investigation. The dashboard’s menu contains the following options, and we shall look into them further:
- Home button: Returns you to the application’s start screen, the event index page or the page set as a custom home page using the star in the top bar.
- Event Actions: All the malware data entered into MISP comprises an event object described by its connected attributes. The Event actions menu gives access to all the functionality related to the creation, modification, deletion, publishing, searching and listing of events and attributes.
- Dashboard: This allows you to create a custom dashboard using widgets.
- Galaxies: Shortcut to the list of MISP Galaxies on the MISP instance. More on these on the Feeds & Taxonomies Task.
- Input Filters: Input filters alter how users enter data into this instance. Apart from the basic validation of attribute entry by type, the site administrators can define regular expression replacements and blocklists for specific values and block certain values from being exportable. Users can view these replacement and blocklist rules here, while an administrator can alter them.
- Global Actions: Access to information about MISP and this instance. You can view and edit your profile, view the manual, read the news or the terms of use again, see a list of the active organisations on this instance and a histogram of their contributions by an attribute type.
- MISP: Simple link to your baseurl.
- Name: Name (Auto-generated from Mail address) of currently logged in user.
- Envelope: Link to User Dashboard to consult some of your notifications and changes since the last visit. Like some of the proposals received for your organisation.
- Log out: The Log out button to end your session immediately.
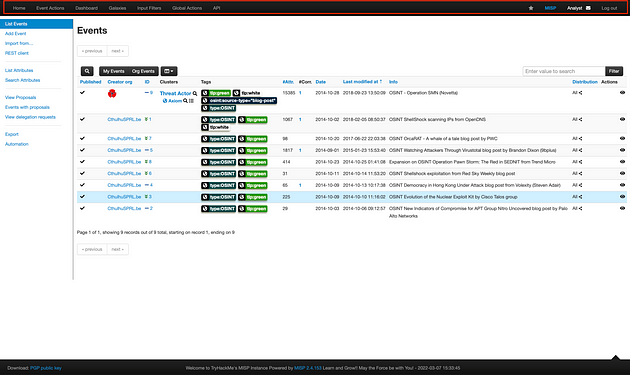
Home Dashboard showing available events
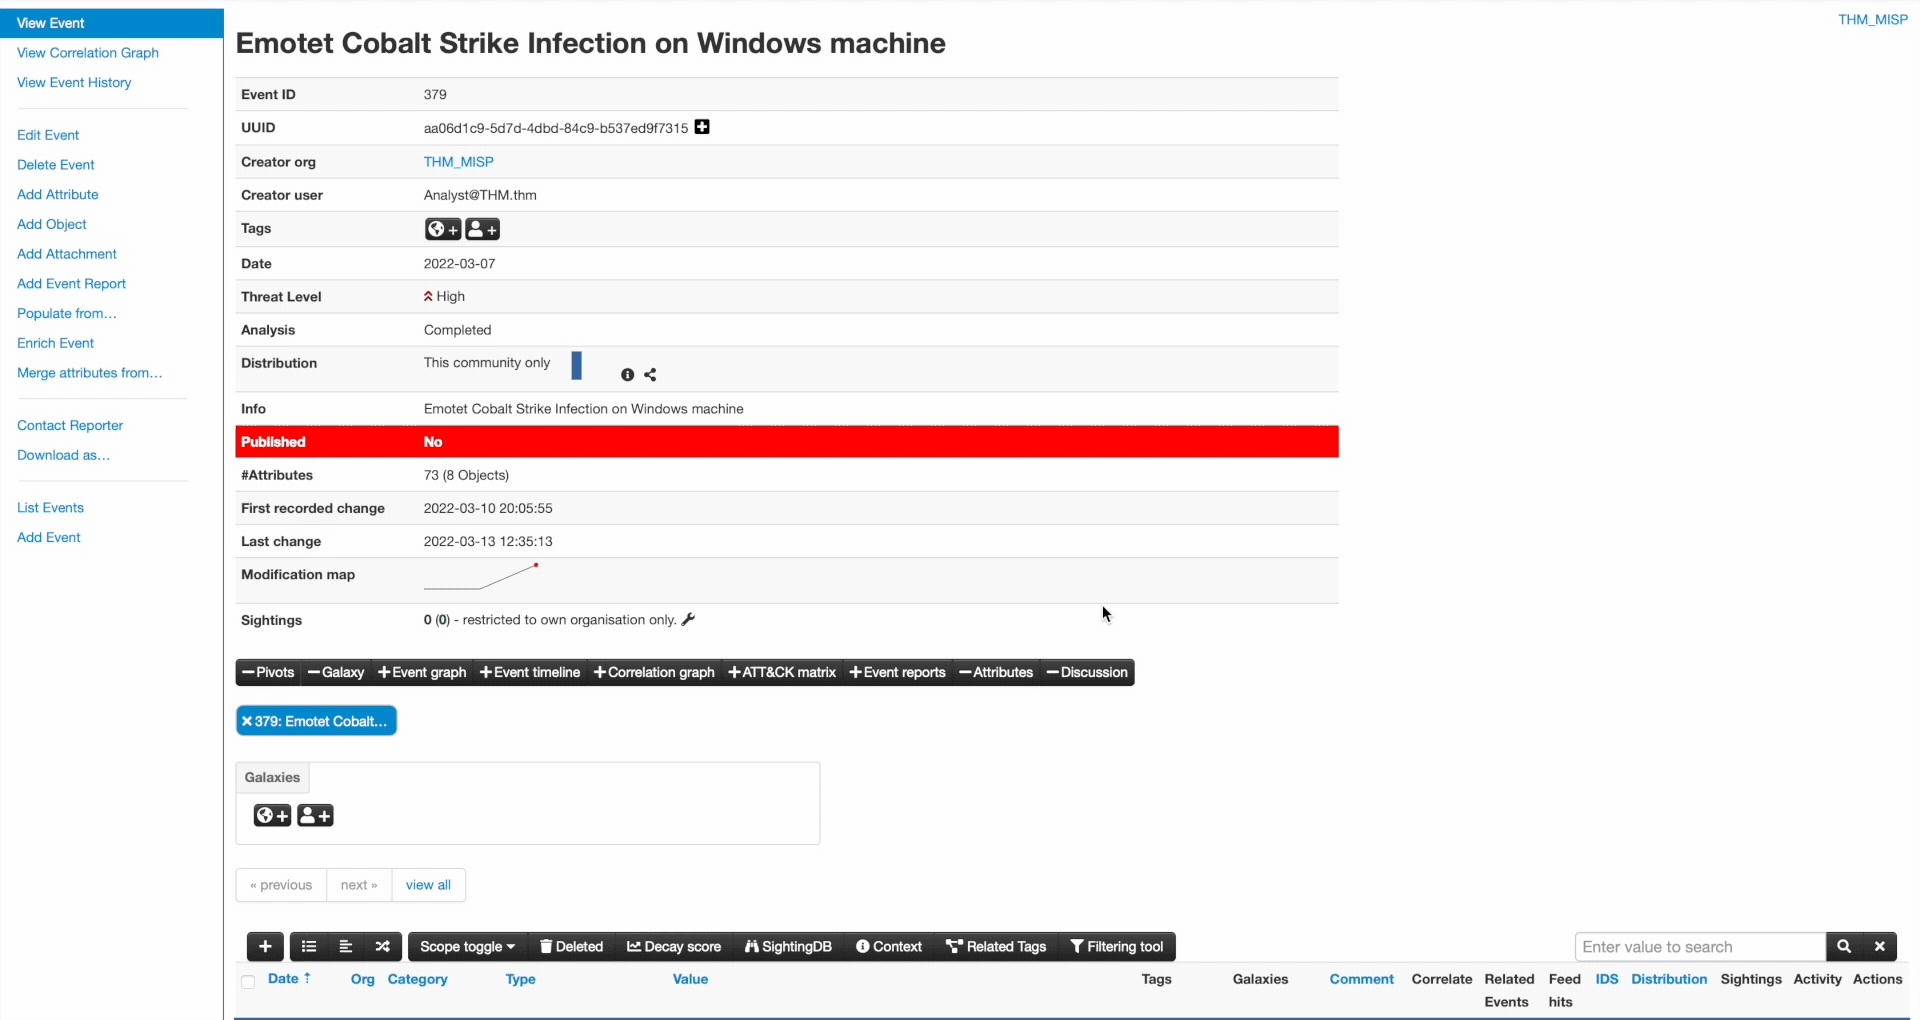
Event Management
The Event Actions tab is where you, as an analyst, will create all malware investigation correlations by providing descriptions and attributes associated with the investigation. Splitting the process into three significant phases, we have:
- Event Creation.
- Populating events with attributes and attachments.
- Publishing.
We shall follow this process to create an event based on an investigation of Emotet Epoch 4 infection with Cobalt Strike and Spambot from malware-traffic-analysis.net. Follow along with the examples provided below.
Event Creation
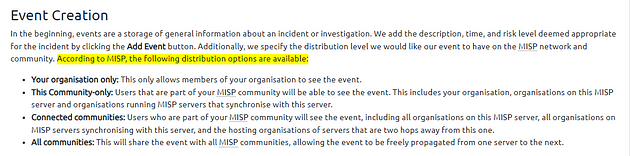
In the beginning, events are a storage of general information about an incident or investigation. We add the description, time, and risk level deemed appropriate for the incident by clicking the Add Event button. Additionally, we specify the distribution level we would like our event to have on the MISP network and community. According to MISP, the following distribution options are available:
- Your organisation only: This only allows members of your organisation to see the event.
- This Community-only: Users that are part of your MISP community will be able to see the event. This includes your organisation, organisations on this MISP server and organisations running MISP servers that synchronise with this server.
- Connected communities: Users who are part of your MISP community will see the event, including all organisations on this MISP server, all organisations on MISP servers synchronising with this server, and the hosting organisations of servers that are two hops away from this one.
- All communities: This will share the event with all MISP communities, allowing the event to be freely propagated from one server to the next.
Additionally, MISP provides a means to add a sharing group, where an analyst can define a predefined list of organisations to share events.
Event details can also be populated by filling out predefined fields on a defined template, including adding attributes to the event. We can use the email details of the CobaltStrike investigation to populate details of our event. We will be using the Phishing E-mail category from the templates.
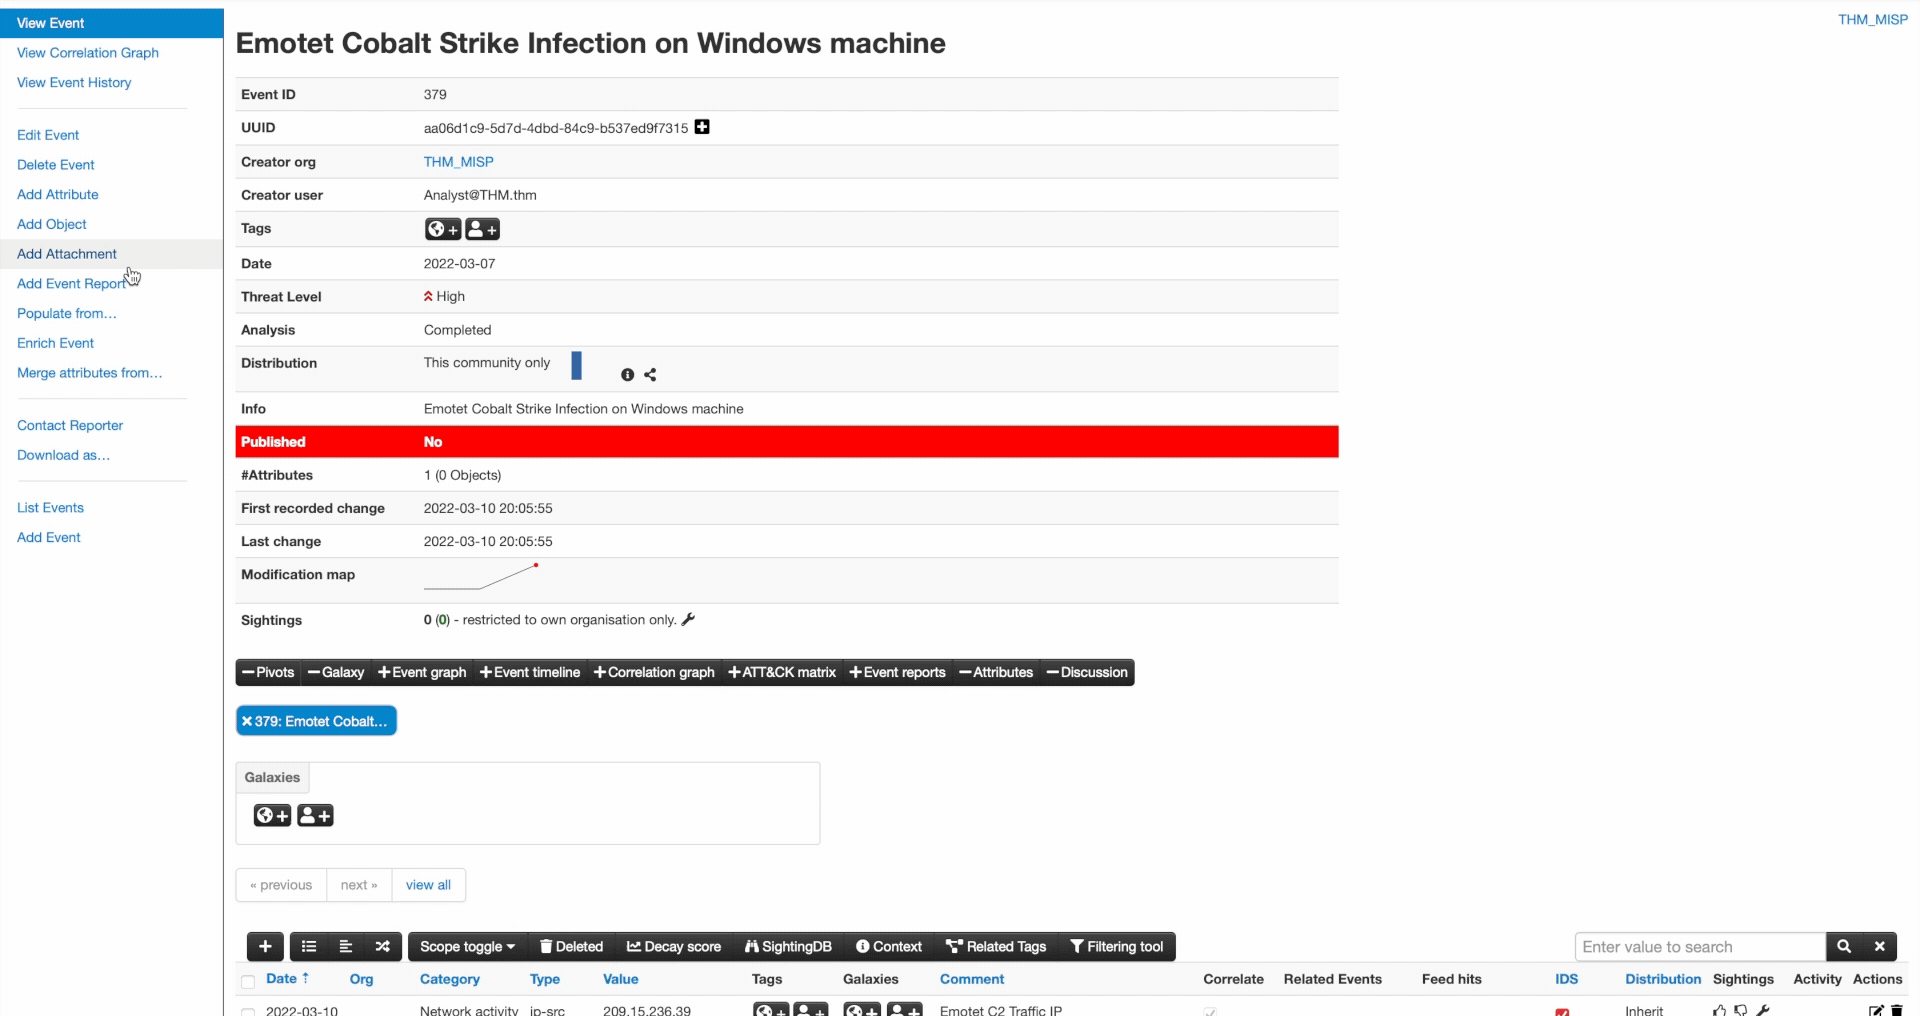
Attributes & Attachments
Attributes can be added manually or imported through other formats such as OpenIOC and ThreatConnect. To add them manually, click the Add Attribute and populate the form fields.
Some essential options to note are:
- For Intrusion Detection System: This allows the attribute to be used as an IDS signature when exporting the NIDS data unless it overrides the permitted list. If not set, the attribute is considered contextual information and not used for automatic detection.
- Batch import: If there are several attributes of the same type to enter (such as a list of IP addresses, it is possible to join them all into the same value field, separated by a line break between each line. This will allow the system to create separate lines for each attribute.
In our example below, we add an Emotet Epoch 4 C2 IP address associated with the infection as our attributes, obtained from the IOC text file.
The analyst can also add file attachments to the event. These may include malware, report files from external analysis or simply artefacts dropped by the malware. We have added the Cobalt Strike EXE binary file to our event in our example. You also have to check the Malware checkbox to mark the file as malware. This will ensure that it is zipped and passworded to protect users from accidentally downloading and executing the file.
Publish Event
Once the analysts have created events, the organisation admin will review and publish those events to add them to the pool of events. This will also share the events to the distribution channels set during the creation of the events.
Answer the questions below
Since the answer can be found above I won’t be posting the answer here, follow along so that you can better find the answer.
How many distribution options does MISP provide to share threat information?
Scroll up to the Event creation section. In the final sentance of the first paragraph, it describes the following distribution options. All you need to do is count the number of options listed below that statement. Once you have count them, type your answer into the TryHackMe answer field, then click submit.
Which user has the role to publish events?
This answer can be found in the final section of the task. Reading through the first sentance the answer should stand out to you. Once you find it, highlight copy (ctrl + c) and paste (ctrl + v) or type, the answer into the TryHackMe answer field then click submit.

You have finished these tasks and can move onto Task 4 Feeds & Taxonomies, Task 5 Scenario Event, & Task 6 Conclusion.