If you haven’t done Task 5 & 6 yet, here is the link to my write-up of it: Task 5 Tool Overview 2 & Task 6 Version Differences.
Getting VM Started
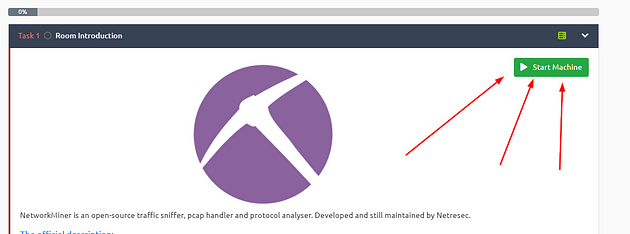
Go back to Task 1, at the top of the task is a green button labeled Start Machine. Click the green button to start the VM.
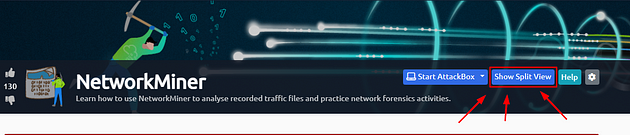
If the screen doesn’t split in half with the VM on the right and Tasks on the left. Then scroll to the top of the page, you will see a Blue button labeled Show Split View, click this button to split the screen.
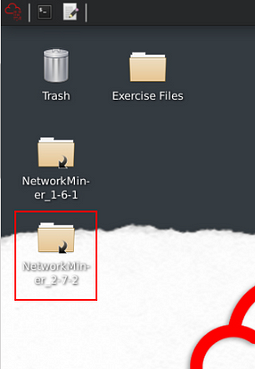
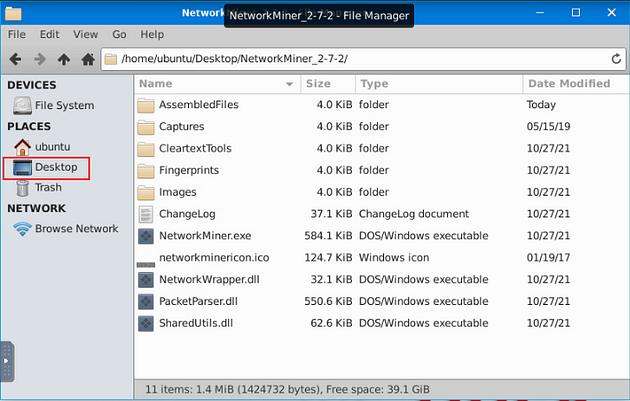
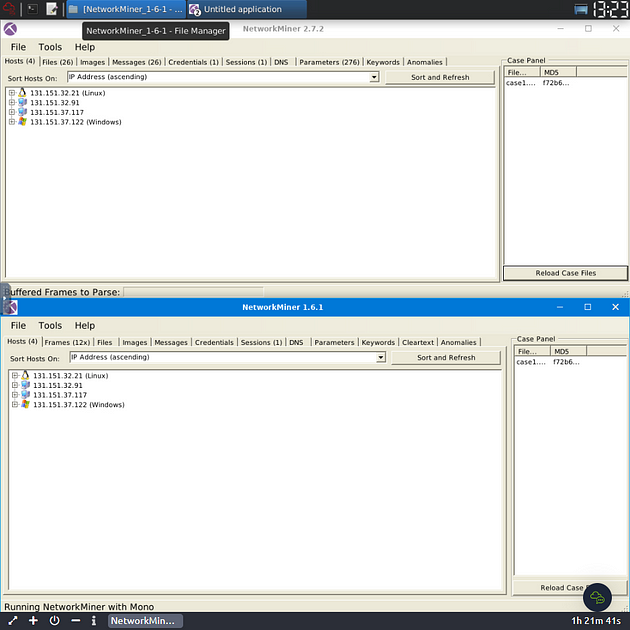
We need to use both versions of NetworkMiner, so we will open up 2.7.2 up first, then 1.6.1. Time to open NetworkMiner 2.7.2, double-click on the NetworkMiner_2–7–2 folder.
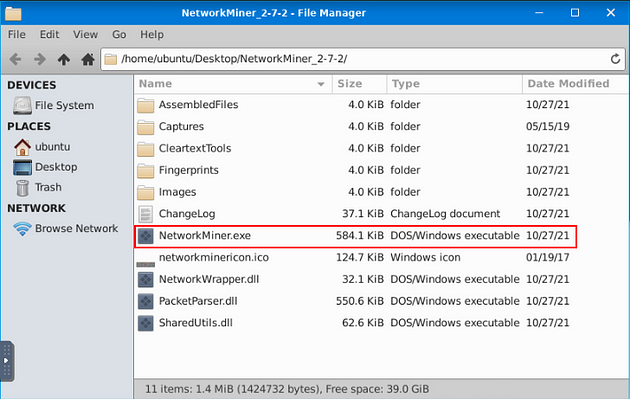
When the directory opens, double-click on NetworkMiner.exe, then give it time to open.
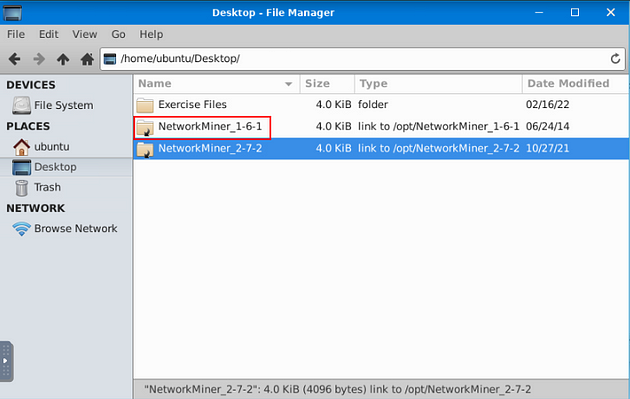
NetworkMiner 2.7.2 will open, let’s open NetworkMiner 1.6.1 now. Look at the top of the VM, on the taskbar is a tab for the File Manager. Click on this tab.
Click on the Desktop icon, on the left side of the window.
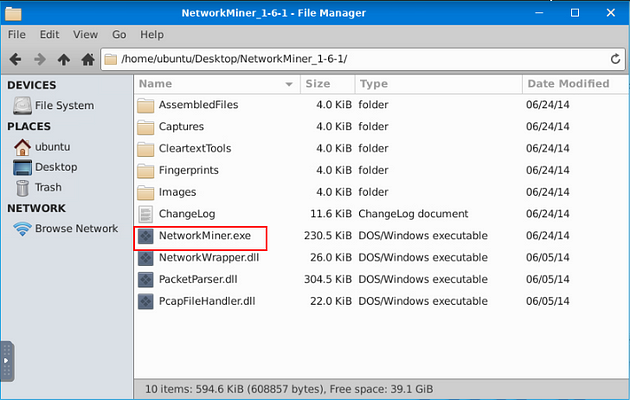
Double-Click on NetworkMiner_1–6–1 folder.
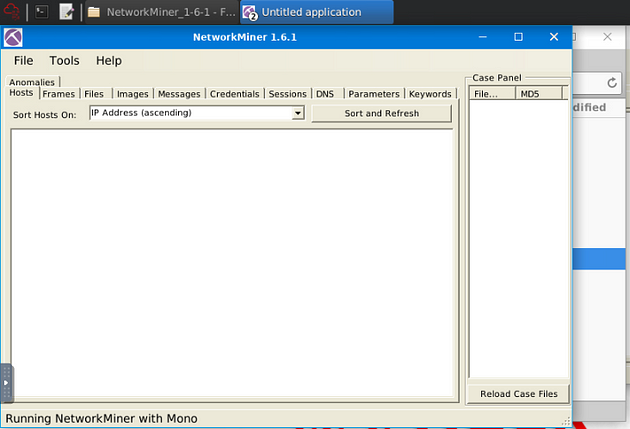
Double-Click on NetworkMiner.exe executable.
NetworkMiner 1.6.1 is now open, before we get started, one more aesthetic issue I want to take care of.
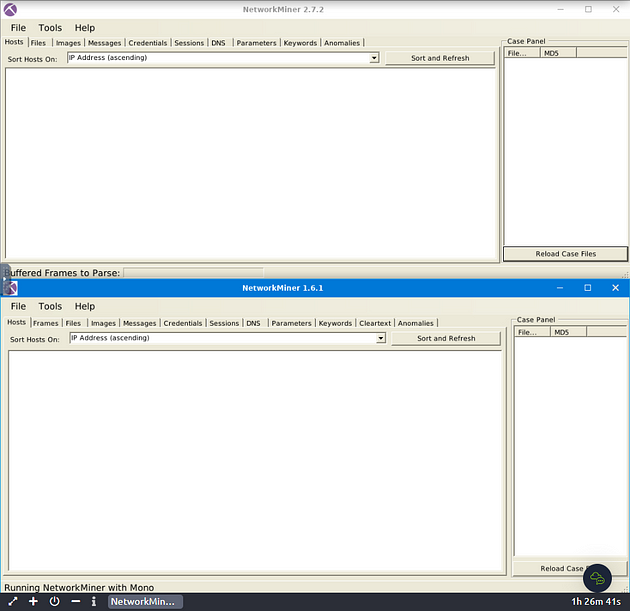
I sized both NetworkMiner versions so that you can see them at the same time on the VM. You are now ready to go along with this Task. See you at the Question.
Task 7 Exercises

Exercises
You’ve learned what NetworkMiner is and how to use it. Let’s put this into practice!
Answer the questions below
Use case1.pcap
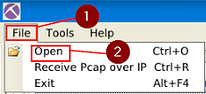
In NetworkMiner 2.7.2 version and 1.6.1 version are the same in the way to open a pcap file. Use this process to open the pcap in both versions. At the top left of the window is the File Tab. Click it, a dropt-down menu will appear, click the Open tab.
A window will pop-up, and you will be in your current directory. On the left side of this window is a quick find bar, click on the Desktop icon.
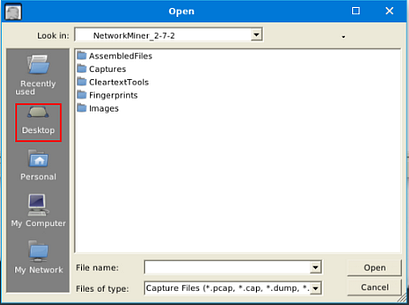
Double-click on the Exercise Files.
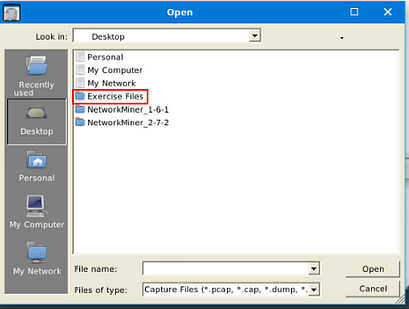
Double-click on the case1.pcap file, this will open it in NetworkMiner.

You are now ready to start finding answers to the questions.
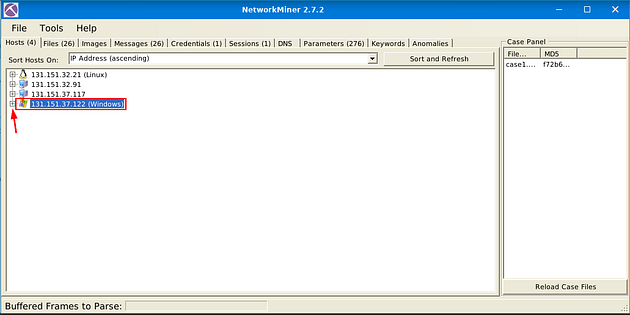
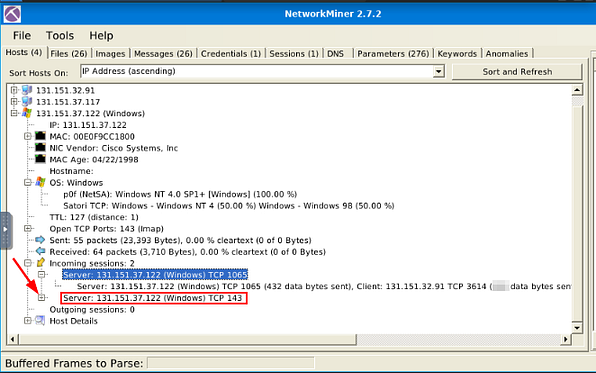
What is the OS name of the host 131.151.37.122?
In NetworkMiner 2.7.2, you will be on the Host tab already, if you look at the last IP address it matches the one we are looking for. Click on the small + icon next to the Windows icon to expand.
Move down to the OS: Windows section, click the small + icon on the left side to expand this section.
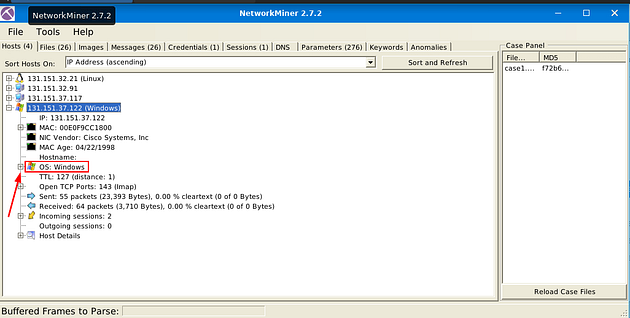
Look down at the Satori TCP: section, the answer is right after the name of the section. Once you find it, type the answer in the TryHackMe answer field, then click submit.
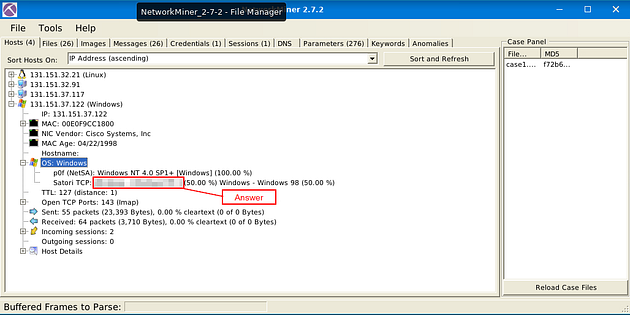
Answer: Windows — Windows NT 4
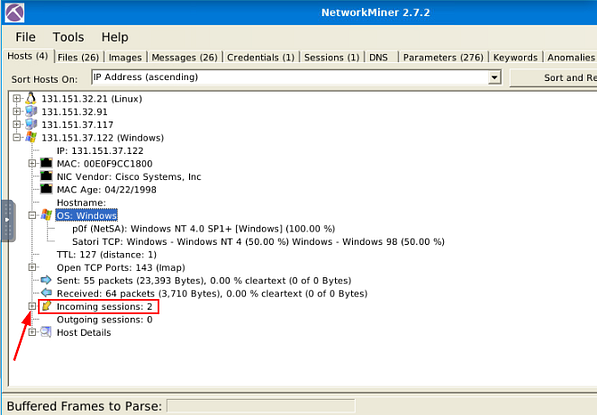
Investigate the hosts 131.151.37.122 and 131.151.32.91.
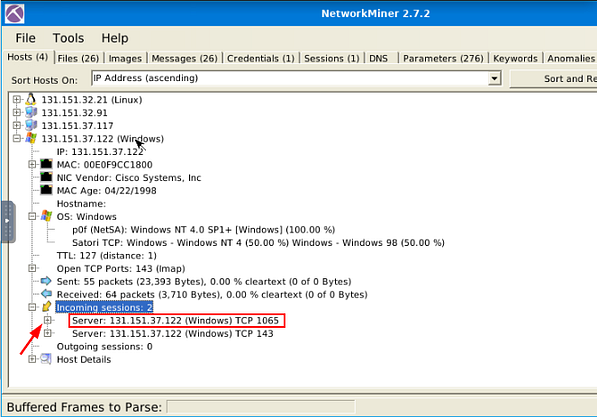
How many data bytes were received from host 131.151.32.91 to host 131.151.37.122 through port 1065?
Head back to NetworkMiner 2.7.2, staying in the current IP address section. Look towards the bottom till you find the Incoming Sessions: section, click the small + icon on the left side of this section, to expand it.
There are two Incoming Sessions ports, the question asks us to look at port 1065. So click on the small + icon on the left side of the Server: section with port 1065, to expand it.
If you look in the drop-down information about this server, look for the IP address 131.151.32.91 (this is the one given to us in the question). Once you find it, right after the protocol and port is a parenthesis, inside is the integer value of the data bytes sent. This is the answer to the question, type the answer in the TryHackMe answer field, then click submit.
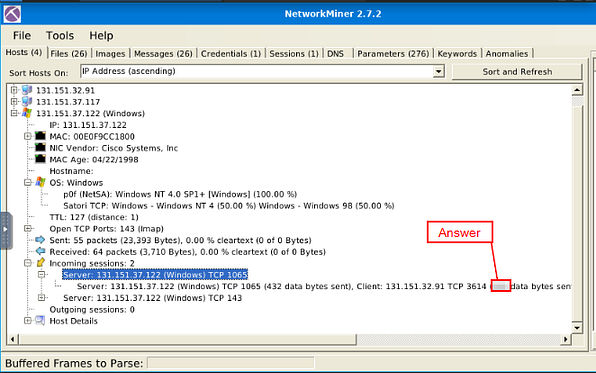
Answer: 192
Investigate the hosts 131.151.37.122 and 131.151.32.21.
How many data bytes were received from host 131.151.37.122 to host 131.151.32.21 through port 143?
Head back to NetworkMiner 2.7.2, we are staying in the Incoming Sessions: section. This time, click on the small + next to the Server:, this is located below the previous questions Server:.
If you look in the drop-down information about this server, look for the IP address 131.151.37.122, the reason we use this IP address is the question wants to know how many data bytes were sent to the Client IP address. Once you find it, right after the protocol and port is a parenthesis, inside is the integer value of the data bytes sent. This is the answer to the question, type the answer in the TryHackMe answer field, then click submit.
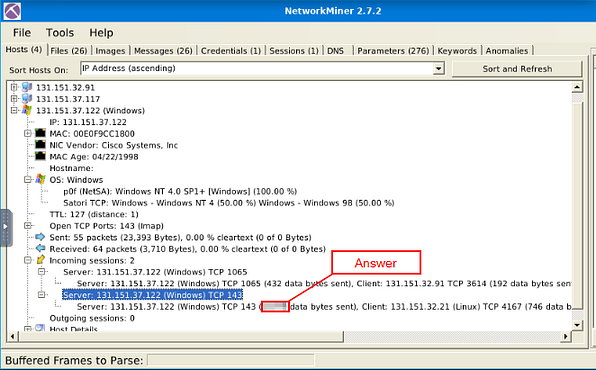
Answer: 20769
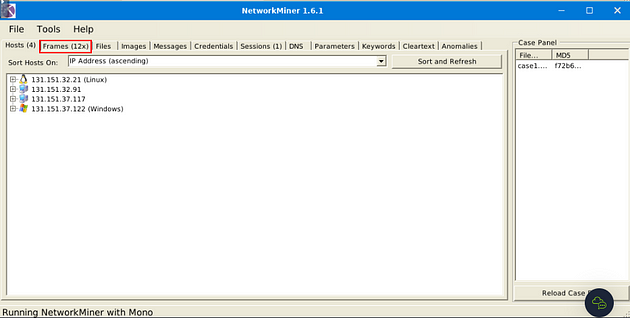
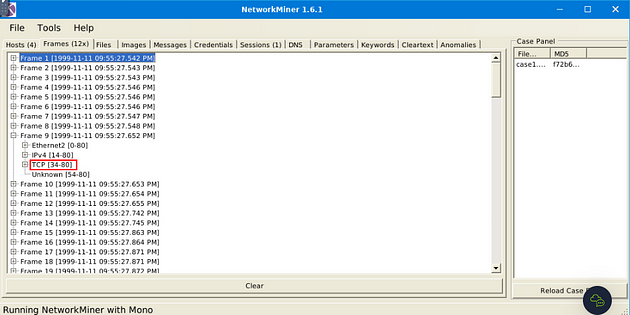
What is the sequence number of frame 9?
Heading to NetworkMiner 1.6.1, look at the menu tabs for the Frames tab, and click on it.
Look for Frame 9, once you find it click on the small + icon to expand the Frame.
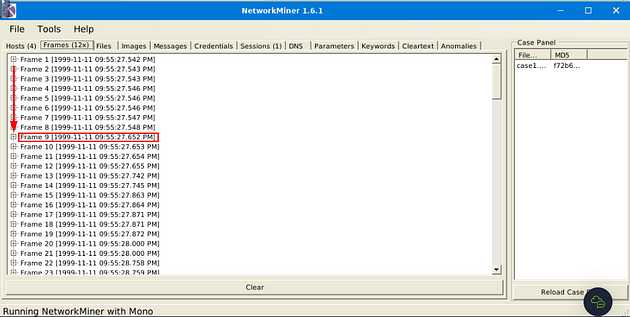
After you have expanded the frame, now click on the small + icon next to TCP.
The fourth result down is the Sequence Number section. The integer after the equals is the answer. Once you find it, type the answer in the TryHackMe answer field, then click submit.
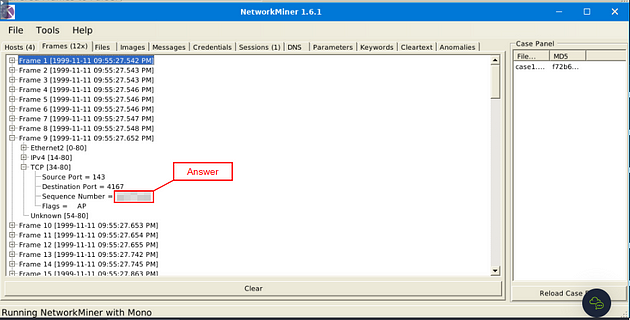
Answer: 2AD77400
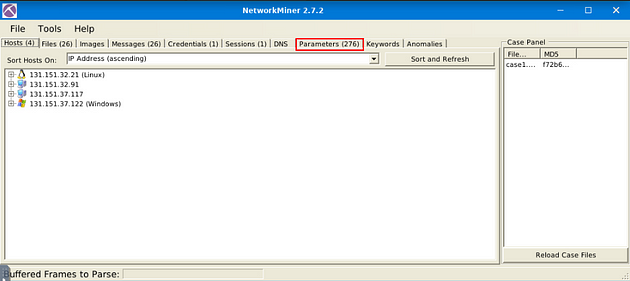
What is the number of the detected “content types”?
Going back to the NetworkMiner 2.7.2, this time you want to click on the Parameters Tab.
So we have to add and change some parameters, first one is the Filter Keyword, type content type into the field. Next, move over to the first drop-down menu on the right, change it to AllWords. Move to the next drop-down menu to the right, on this menu change it to Parameter name. Now you are ready to click the apply button.
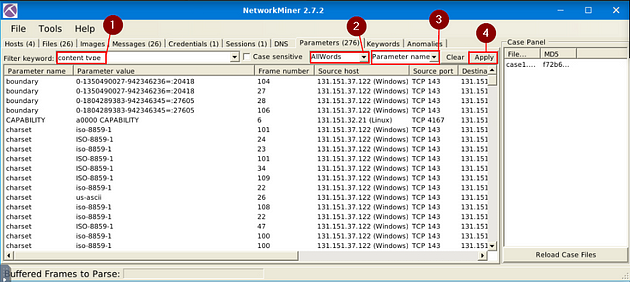
Now that you have filtered the content, look to the Parameter Value column. Count the different types in this column, the number of these different types is the answer to the question. Once you figure it out, type the answer in the TryHackMe answer field, then click submit.
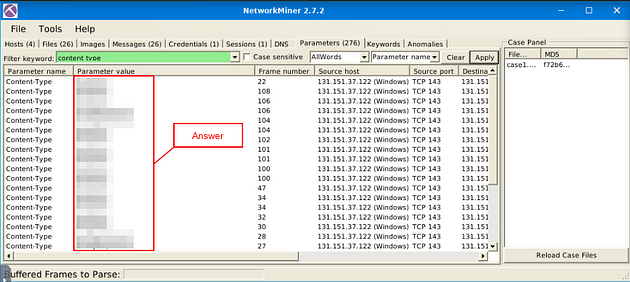
Answer: 2
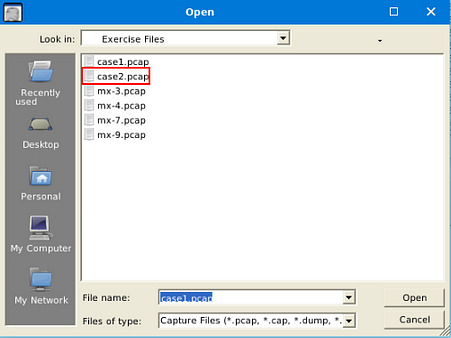
Use case2.pcap
In NetworkMiner 2.7.2 version, I only used version 2.7.2 because the VM kept crashing when I loaded the pcap into version 1.6.1. Use this process to open the pcap in both versions. At the top left of the window is the File Tab. Click it, a dropt-down menu will appear, click the Open tab.
A window will pop-up, and you will be in your the directory that you last used, which will be the one we need. Double-Click on case2.pcap to open it in NetworkMiner.
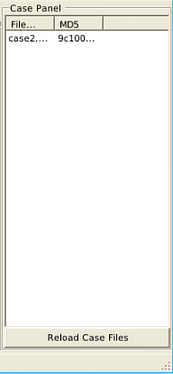
After opening the file, you will see it appears in the Case Panel on the right. You are now ready to answer the rest of the questions.
Investigate the files.
What is the USB product’s brand name?
Back in NetworkMiner 2.7.2, click on the Files menu tab.
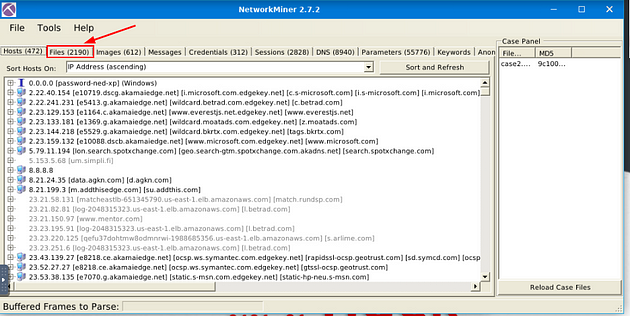
Once on the Files menu tab, type usb in the Filter Keywords field. Then click Apply.
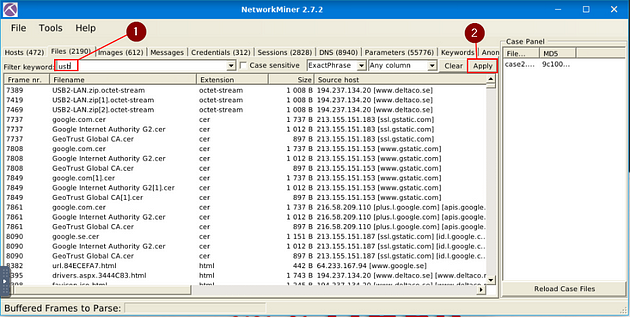
Looking down through the results, one stands out to me. In the Filename column, we see hi-Speed-usb2.0_ax99772.htm. To me, this indicates that it is referring to the actual USB device. So if we move to the right into the Source Host column, we can see a domain name, this domain is the brand of USB and the answer to this question. Once you find it, type the answer in the TryHackMe answer field, then click submit.
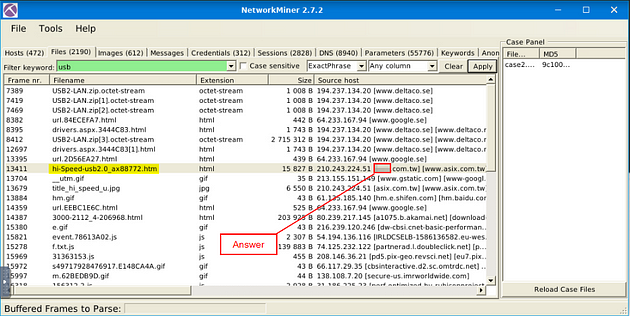
Answer: Asix
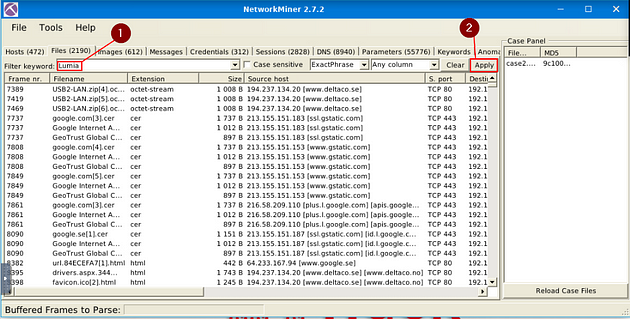
What is the name of the phone model?
This one takes some researching in NetworkMiner 2.7.2, so to start off click on the Images menu tab.
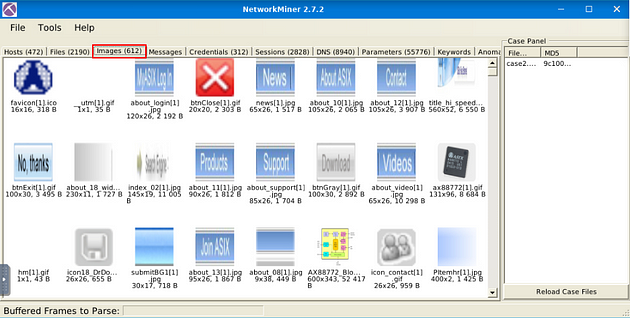
Now being in the Images menu tab, scroll down through looking for images of phones. When you are about three quarters of the way down, you will see one, and a name Lumia.
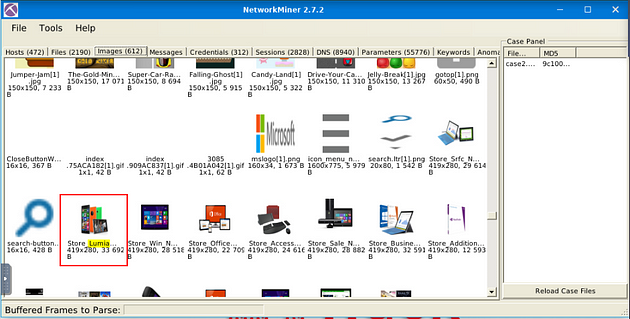
Time to head over to Files, so click on the Files menu tab.

Once on the Files menu tab, type Lumia in the Filter Keywords field, then click Apply.
As we can see, we have two possible results. At first glance of both of these, the first one sounds like a store navigation, the second though with MMD could stand for Multimedia device. So If we look right after MMD we see Lumia and a set of numbers, this is the answer to the question. Type the answer into the TryHackMe answer field, then click submit.
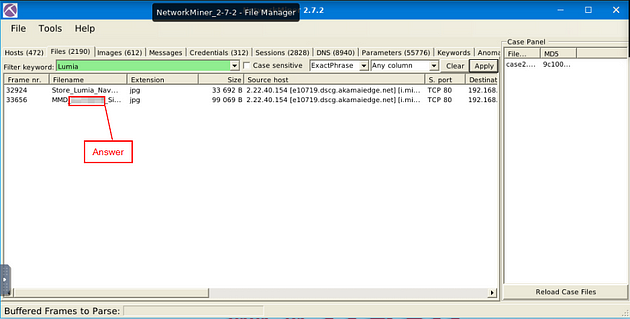
Answer: Lumia 535
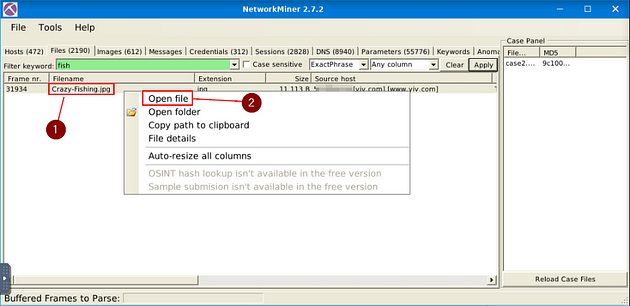
What is the source IP of the fish image?
Going back to NetworkMiner 2.7.2, we are staying in the Files menu tab. Click the Clear button, this is located to the left of the Apply button.
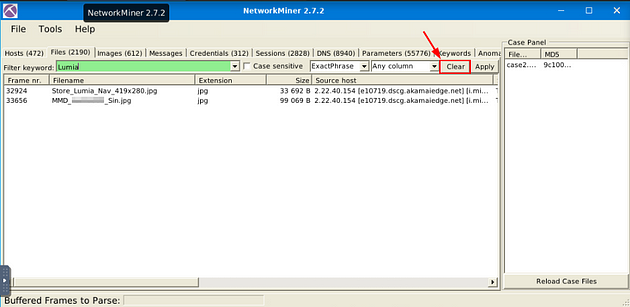
Type in the Filter Keyword field fish, then click Apply.
There is only one result, right-click on this result. In the drop-down menu, you will see Open File, click on it.
As we can see, this is the picture of the fish. So, look at the Source Host column, this will give you the IP address the question is asking for. Once you find it, type the answer into the TryHackMe answer field, then click submit.
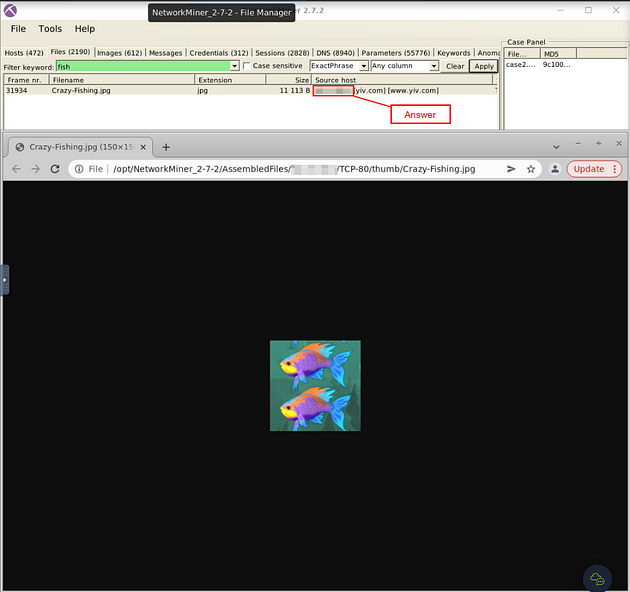
Answer: 50.22.95.9
What is the password of the “homer.pwned.se@gmx.com”?
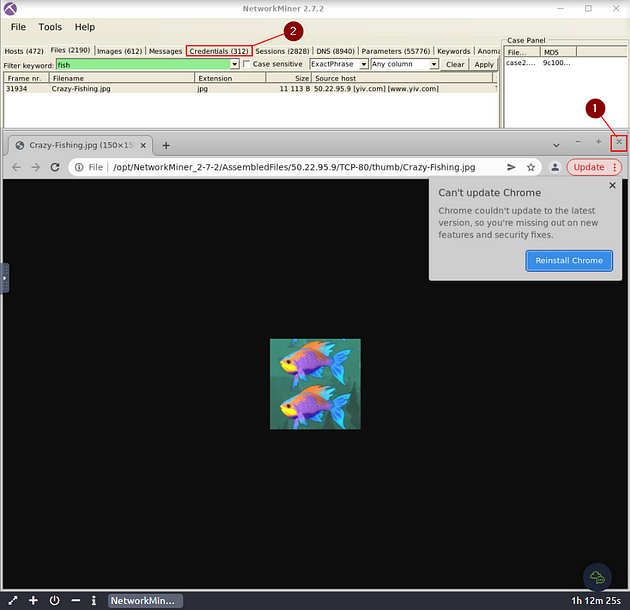
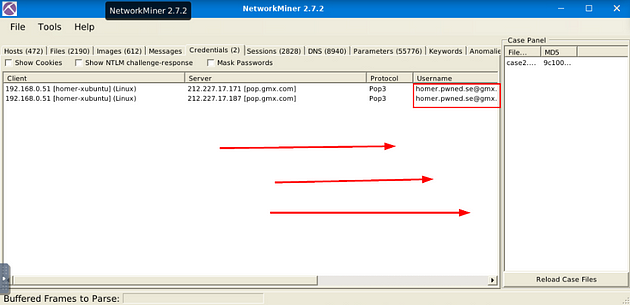
Going back to NetworkMiner 2.7.2, we will need to go to the Credentials Menu Tab. But first, click the X at the top right of the Chrome window, to close it. Then click on the Credentials Menu tab.
Now that we are on the Credential menu tab, we have 312 results, to narrow down the results we can uncheck the boxes for Show NTLM Challenge-Response and Show Cookies, as this is information that we don’t need.
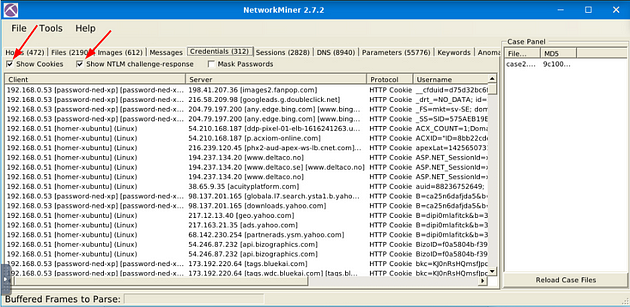
Now we only have two results, looking at the Username column we can see that we are in the right place. Scroll to the right till you can see the Password column.
Once you can see the Password column, you will be able to see the password for the email address, and thus the answer to the question. Type the answer into the TryHackMe answer field, then click submit.
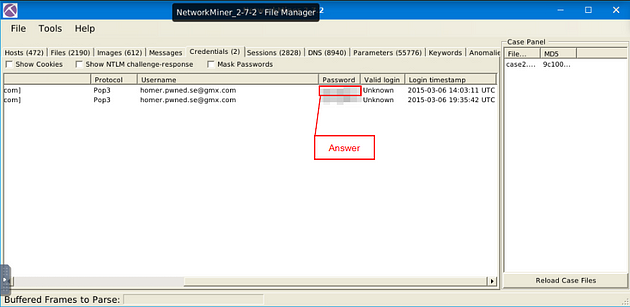
Answer: spring2015
What is the DNS Query of frame 62001?
For the last time, go back to NetworkMiner 2.7.2, click on the DNS Menu tab.
In the Filter Keyword field, type 62001, for the Frame number. Next move over to the right to the second drop-down menu, in this menu you can choose what column you want to filter the keyword through, choose Frame nr.. Then you can click Apply.
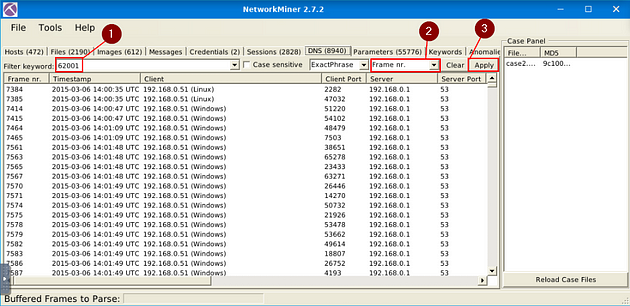
As we can see, we have two results from our Filter Keyword search. Now scroll to the right till you have reached the DNS Query column.
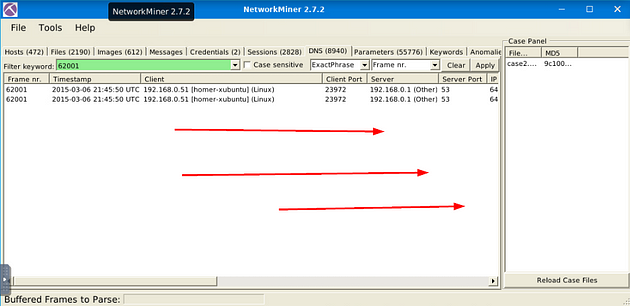
Once you can see the DNS Query column, you will see the domain name, and thus the answer to the question. Type the answer into the TryHackMe answer field, then click submit.
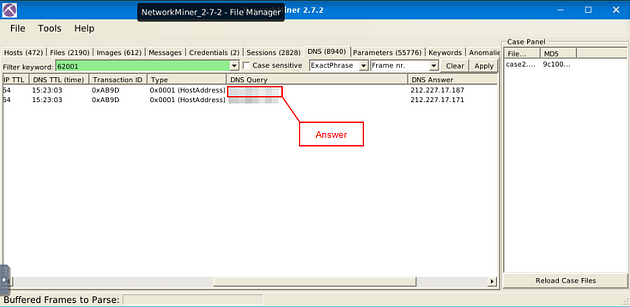
Answer: pop.gmx.com
Task 8 Conclusion
Congratulations! You just finished the NetworkMiner room.
In this room, we covered NetworkMiner, what it is, how it operates, and how to investigate pcap files. As I mentioned in the tasks before, there are a few things to remember about the NetworkMiner;
- Don’t use this tool as a primary sniffer.
- Use this tool to overview the traffic, then move forward with Wireshark and tcpdump for a more in-depth investigation.
If you like this content, make sure you visit the following rooms later on THM;
🎉🎉🎉CONGRATS!!! You have completed the NetworkMiner Room!!!🎉🎉🎉