Let’s cover the basics of Osquery.
Task 1 Introduction
Osquery is an open-source agent created by Facebook in 2014. It converts the operating system into a relational database. It allows us to ask questions from the tables using SQL queries, like returning the list of running processes, a user account created on the host, and the process of communicating with certain suspicious domains. It is widely used by Security Analysts, Incident Responders, Threat Hunters, etc. Osquery can be installed on multiple platforms: Windows, Linux, macOS, and FreeBSD.
Learning Objective
In this introductory room, the following learning objectives are covered:
- What is Osquery, and what problem it solves?
- Osquery in Interactive Mode
- How to use the interactive mode of Osquery to interact with the operating system
- How to join two tables to get a single answer
Note: It is highly beneficial if you’re already familiar with SQL queries. If not, check out this SQL Tutorial.
Task 2 Connect with the Lab
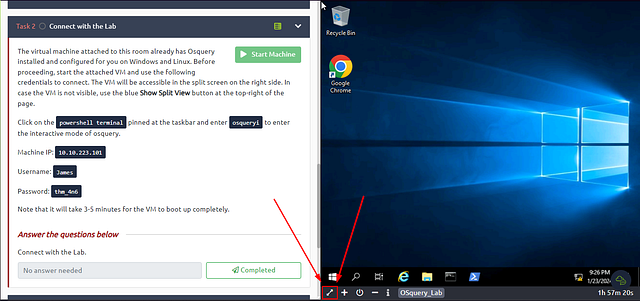
The virtual machine attached to this room already has Osquery installed and configured for you on Windows and Linux. Before proceeding, start the attached VM and use the following credentials to connect. The VM will be accessible in the split screen on the right side. In case the VM is not visible, use the blue Show Split View button at the top-right of the page.
Click on the powershell terminal pinned at the taskbar and enter osqueryi to enter the interactive mode of osquery.
Machine IP: MACHINE_IP
Username: James
Password: thm_4n6
Note that it will take 3–5 minutes for the VM to boot up completely.
Answer the questions below
Connect with the Lab.
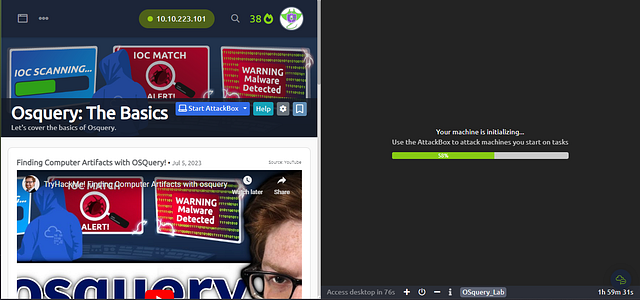
Start by clicking on the green Start Machine Button at the top of Task 2.
Scroll to the top of the webpage. Once at the top, look for the blue box labeled Show Split View. When you find it, click on it.
The Screen will split, and you will have to wait till the machine loads. It may take a couple of minutes.
Once the machine is fully loaded and ready. Click on the expanding arrows located in the bottom left corner of the machine’s window. This will open the VM in a new Tab and give you a Full Screen View.
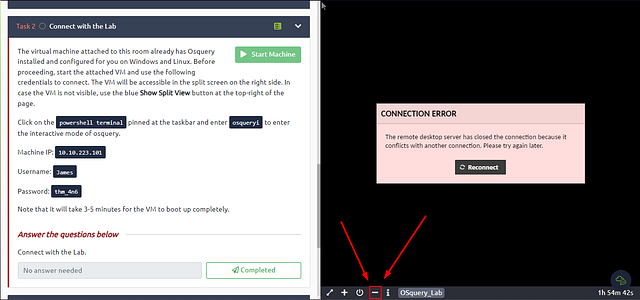
Once the new tab is loaded, go back to your TryHackMe window with the Split View. You can now click on the -(minus symbol) located in the bottom right split window. This will exit split view and give your TryHackMe Task window the full window use again.
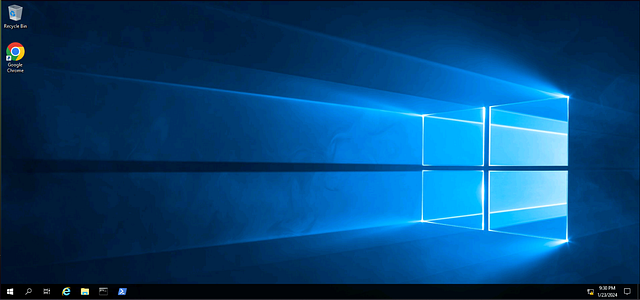
Heading back over to the VM Tab. We need to start PowerShell. We can do this by clicking on the PowerShell icon located on the taskbar at the bottom of the desktop.
In the PowerShell window, type osqueryi, and press enter to run the command. Give it a couple of seconds, and then you are greeted with the osquery> prompt. Meaning, you are ready to start running OSQuery commands.
Task 3 Osquery: Interactive Mode
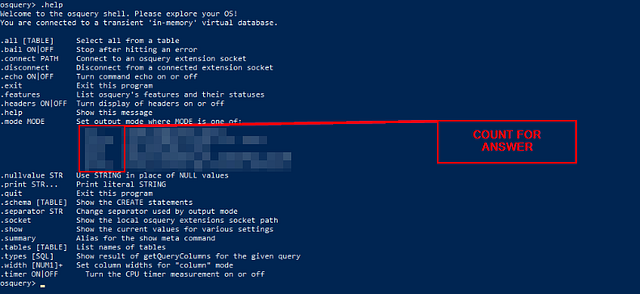
One of the ways to interact with Osquery is by using the interactive mode. Open the terminal and run osqueryi. To understand the tool, run the .help command in the interactive terminal, as shown below:
1
2
3
4
5
6
7
8
9
10
11
12
13
14
15
16
17
18
19
20
21
22
23
24
25
26
27
28
29
30
31
32
33
root@analyst$ osqueryi
Using a virtual database. Need help, type '.help'
osquery> .help
Welcome to the osquery shell. Please explore your OS!
You are connected to a transient 'in-memory' virtual database.

.all [TABLE]     Select all from a table
.bail ON|OFF     Stop after hitting an error
.connect PATH    Connect to an osquery extension socket
.disconnect      Disconnect from a connected extension socket
.echo ON|OFF     Turn command echo on or off
.exit            Exit this program
.features        List osquery's features and their statuses
.headers ON|OFF  Turn display of headers on or off
.help            Show this message
.mode MODE       Set output mode where MODE is one of:
                   csv      Comma-separated values
                   column   Left-aligned columns see .width
                   line     One value per line
                   list     Values delimited by .separator string
                   pretty   Pretty printed SQL results (default)
.nullvalue STR   Use STRING in place of NULL values
.print STR...    Print literal STRING
.quit            Exit this program
.schema [TABLE]  Show the CREATE statements
.separator STR   Change separator used by output mode
.socket          Show the local osquery extensions socket path
.show            Show the current values for various settings
.summary         Alias for the show meta command
.tables [TABLE]  List names of tables
.types [SQL]     Show result of getQueryColumns for the given query
.width [NUM1]+   Set column widths for "column" mode
.timer ON|OFF      Turn the CPU timer measurement on or off
Note: As per the documentation, meta-commands are prefixed with a ..
List the tables
To list all the available tables that can be queried, use the .tables meta-command.
For example, if you wish to check what tables are associated with processes, you can use .tables process.
1
2
3
4
5
6
7
8
9
10
11
12
13
14
15
16
17
root@analyst$ osqueryi
Using a virtual database. Need help, type '.help'
osquery> .table
=> appcompat_shims
  => arp_cache
  => atom_packages
  => authenticode
  => autoexec
  => azure_instance_metadata
  => azure_instance_tags
  => background_activities_moderator
  => bitlocker_info
  => carbon_black_info
  => carves
  => certificates
  => chassis_info
  => chocolatey_packages
To list all the tables with the term user in them, we will use .tables user as shown below:
1
2
3
4
5
6
7
root@analyst$ osqueryi
Using a virtual database. Need help, type '.help'
osquery> .table user
  => user_groups
  => user_ssh_keys
  => userassist
  => users
In the above example, four tables are returned that contain the word user.
Understanding the table Schema
Table names are not enough to know what information it contains without actually querying it. Knowledge of columns and types (known as a schema ) for each table is also helpful.
We can list a table’s schema with the following meta-command: .schema table_name
Here, we are interested in understanding the columns in the user’s table.
1
2
3
4
root@analyst$ osqueryi
Using a virtual database. Need help, type '.help'
osquery> .schema users
CREATE TABLE users(`uid` BIGINT, `gid` BIGINT, `uid_signed` BIGINT, `gid_signed` BIGINT, `username` TEXT, `description` TEXT, `directory` TEXT, `shell` TEXT, `uuid` TEXT, `type` TEXT, `is_hidden` INTEGER HIDDEN, `pid_with_namespace` INTEGER HIDDEN, PRIMARY KEY (`uid`, `username`, `uuid`, `pid_with_namespace`)) WITHOUT ROWID;
The above result provides the column names like username, description, PID followed by respective datatypes like BIGINT, TEXT, INTEGER, etc. Let us pick a few columns from this schema and use SQL query to ask osquery to display the columns from the user table using the following syntax:
SQL QUERY SYNTAX: select column1, column2, column3 from table;
1
2
3
4
5
6
7
8
9
10
11
12
13
14
root@analyst$ osqueryi
Using a virtual database. Need help, type '.help'
osquery>select gid, uid, description, username, directory from users;
+-----+------+------------------------------------------------------------+----------------------+-------------------------------------------+
| gid | uid  | description                                                | username           | directory                                   |
+-----+------+-------------------------------------------------------------------------------------------------------------------------------+
| 544 | 500  | Built-in account for administering the computer/domain     | Administrator      |                                             |
| 581 | 503  | A user account managed by the system.                      | DefaultAccount     |                                             |
| 546 | 501  | Built-in account for guest access to the computer/domain   | Guest              |                                             |
| 544 | 1002 |                                                            | James              | C:\Users\James                              |
| 18  | 18   |                                                            | SYSTEM             | %systemroot%\system32\config\systemprofile  |
| 19  | 19   |                                                            | LOCAL SERVICE      | %systemroot%\ServiceProfiles\LocalService   |
| 20  | 20   |                                                            | NETWORK SERVICE    | %systemroot%\ServiceProfiles\NetworkService |
+-----+------+------------------------------------------------------------+--------------------+---------------------------------------------+
Display Mode
Osquery comes with multiple display modes to select from. Use the .help option to list the available modes or choose 1 of them as shown below:
1
2
3
4
5
6
7
8
9
10
11
12
13
14
15
16
17
root@analyst$ osqueryi
Using a virtual database. Need help, type '.help'
osquery>.help
Welcome to the osquery shell. Please explore your OS!
You are connected to a transient 'in-memory' virtual database.
...
...
...
.mode MODE       Set output mode where MODE is one of:
                   csv      Comma-separated values
                   column   Left-aligned columns see .width
                   line     One value per line
                   list     Values delimited by .separator string
                   pretty   Pretty printed SQL results (default)
...
...
...
The schema API online documentation can be used to view a complete list of tables, columns, types, and column descriptions.
Answer the questions below
How many tables are returned when we query “table process” in the interactive mode of Osquery?
Using the command .table process, which was given above, to show the tables related to processes. Once you run the command, count the number of processes from the output. This number is the answer. Type it into the TryHackMe Answer field, then click Submit.
Answer: 3
Looking at the schema of the processes table, which column displays the process id for the particular process?
Using the command .schema process, will list the schema for all the tables that relate to processes. The first Column is related to Process ID, so you will look at the first entries on the schema. Once you find it, type the answer into the TryHackMe answer field. The click Submit.
Answer: pid
Examine the .help command, how many output display modes are available for the .mode command?
Using the command .help will display the help menu. Look for .mode, once you find it you will see the different modes you can set the output to. Count these different modes, then take the number you count and type it into the TryHackMe answer field. Then click Submit.
Answer: 5


