If you haven’t done task 6 yet, here is the link to my write-up of it: Task 6 Troubleshooting Rule Syntax Errors.
Opening the VM
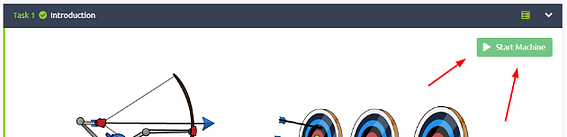
Click the green Start Machine button in the top of Task 1.
The screen will split in half, with the VM on the right and the Tasks on the left. If the screen didn’t split in half go to the next step, if it did split in half skip the next step.
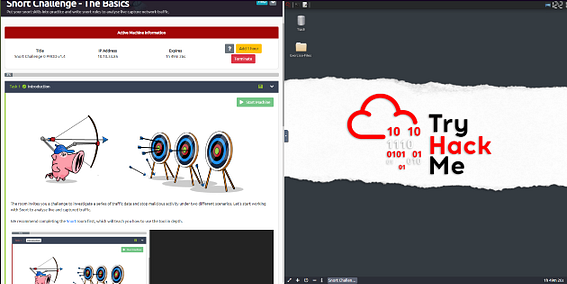
Scroll to the top of the page, you will see a blue bottom labeled Show Split View, click this button to split the page in half.

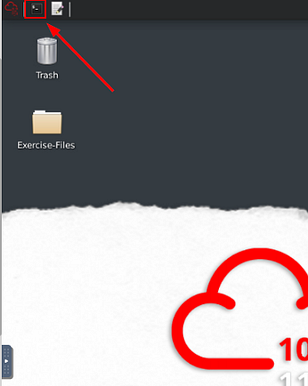
Now that we have our screen split and we have our VM, we need a terminal to work in. At the top left of the VM is a terminal icon, it is hard to see, click this icon to open a terminal window.
Once you have your terminal window, you are good to go with the tasks ahead.
Task 7 Using External Rules (MS17–010)
Let’s use external rules to fight against the latest threats!
Answer the questions below
Navigate to the task folder.
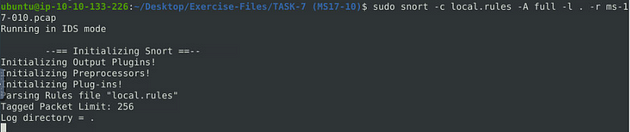
First, let’s navigate to the correct folder, use the following command cd Desktop/Exercise-Files/TASK-7\ \(MS17-10\)/. Then using the command ls to see the contents of the directory. You are now ready to proceed.

Use the given pcap file.
Use the given rule file (local.rules) to investigate the ms1710 exploitation.
So TryHackMe already has a rule ready for us to use and wants us to use it. So using the local.rules file, we can use the command sudo snort -c local.rules -A full -l . -r ms-17-010.pcap, and press enter to run it.
What is the number of detected packets?
When the Snort is done, look in the Action Stats section, this is the last section of the scan. Look in for Alerts, the number to the right is the answer to the question, Once you find it, type this answer into the TryHackMe answer field, then click submit.
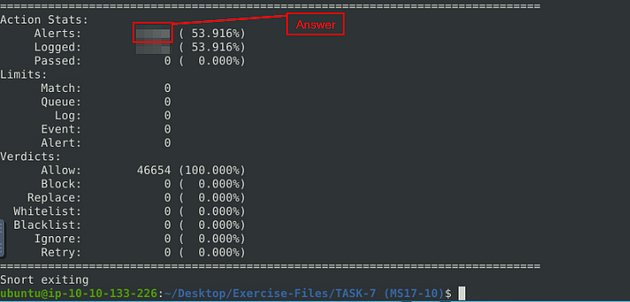
Answer: 25154
Clear the previous log and alarm files.
Run the command ls so we know what the names of the files

Let’s remove the log file first, to do this we can use the command sudo rm snort.log.1672250642, then press enter. If it is ready for you to add another command, then you entered it correctly.

For the alarm file, we can use gedit. The command will be sudo gedit alert, then press enter to open the alert file in gedit.
Click anywhere inside the alert file, then use the keyboard shortcut to select all, ctrl + a . The text editor should fill up blue, meaning that all the text is selected.
Press the Deleted button on the keyboard, everything will be gone.

Save (ctrl + s) and X out of the text editor window, and your back in the terminal.

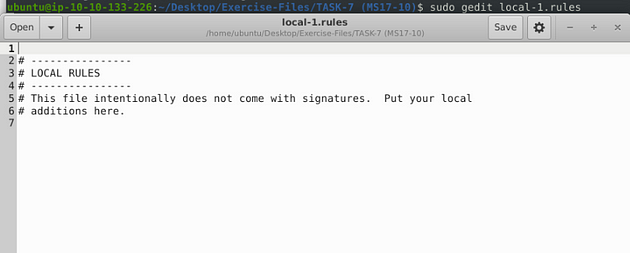
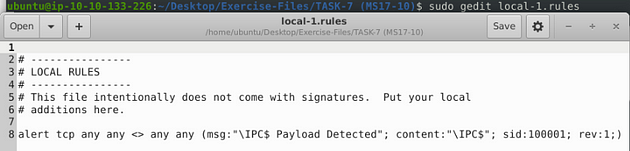
Use local-1.rules empty file to write a new rule to detect payloads containing the “\IPC$” keyword.
Open local-1.rules in a text editor, with the command sudo gedit local-1.rules.
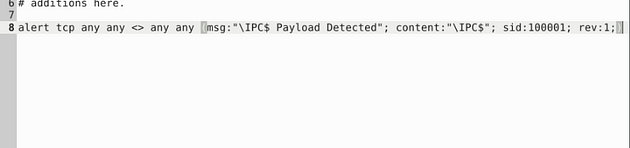
So when writing this rule, we start by making it an alert so we will be notified if/when it happens. Next is the protocol, I went with tcp as it seems to be the protocol of choice for the most part. Then, since we don’t have an IP address or port on either side, we make both on the source and destination sides any. Next is the msg: section, this is where we make it descriptive to what we could see, so we know from a glance what why the alert was triggered. I made it "\IPC$ Payload Detected". Then the content: section which is what will be used to search against and alerted if found. So I used what was given by TryHackMe and that was "\IPC$". Finally the last two sections are the sid: and the rev:, the sid: section should be 100001 and the rev: should be 1. Altogether, the command is alert tcp any any <> any any (msg:"\IPC$ Payload Detected"; content:”\IPC$”; sid:100001; rev:1;). After you have that typed into the rule file, it’s time to save.
Save (ctrl + s) and X out of the text editor window, and your back in the terminal.
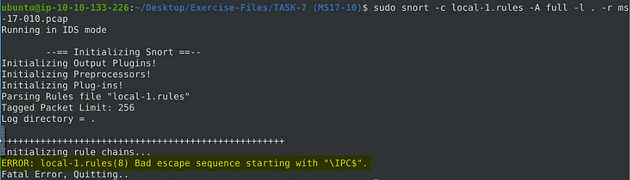
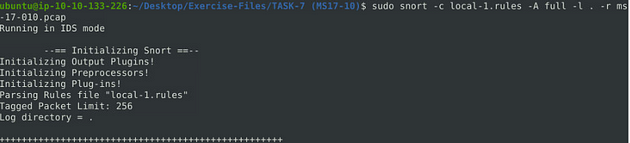
Time to run our rule through snort with the command sudo snort -c local-1.rules -A full -l . -r ms-17-010.pcap. Press enter to run Snort, unfortunately we have an error!!! So we have to go about this another way.
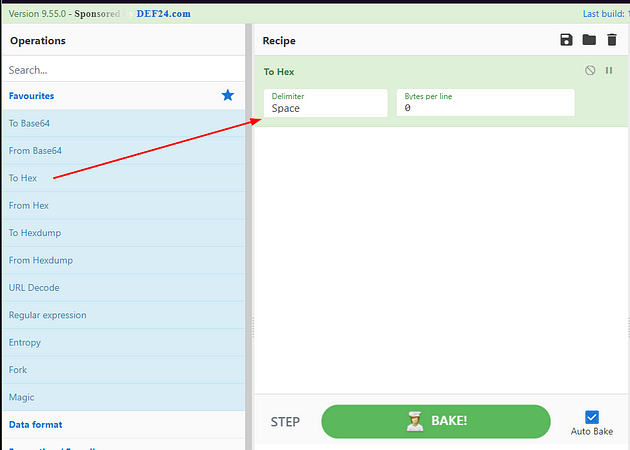
Let’s head over to CyberChef (use the link I provided). Once at CyberChef, go to the Operations column on the left. Drag and drop To Hex into the Recipe Column in the center.
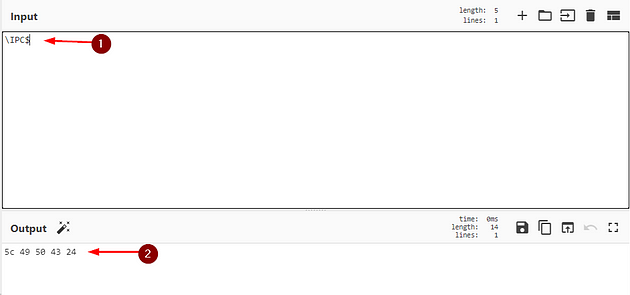
Move over to the Input section on the right, type in \IPC$, the Output section in the bottom should autopopulate with the hex value of the Input text.
Head back to the terminal and open the local-1.rules file again in gedit with sudo gedit local-1.rules.
Now replace what is currently in the content: section with the hex value, remembering to use quotes and pipes. It should look like this "|5c 49 50 43 24|".

Save (ctrl + s) and X out of the text editor window, and your back in the terminal.
What is the number of detected packets?
Time to run our rule through snort again, with the command sudo snort -c local-1.rules -A full -l . -r ms-17-010.pcap. Press enter to run Snort, this time no error.
When the Snort is done, look in the Action Stats section, this is the last section of the scan. Look in for Alerts, the number to the right is the answer to the question, Once you find it, type this answer into the TryHackMe answer field, then click submit.
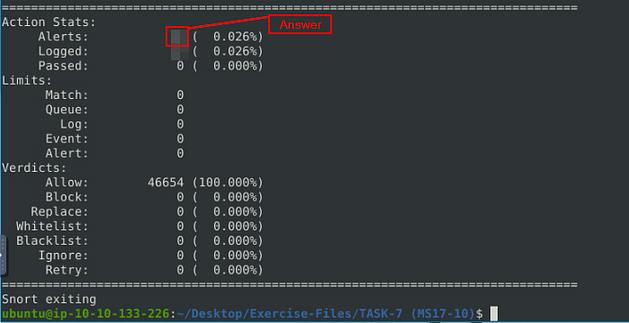
Answer: 12
Investigate the log/alarm files.
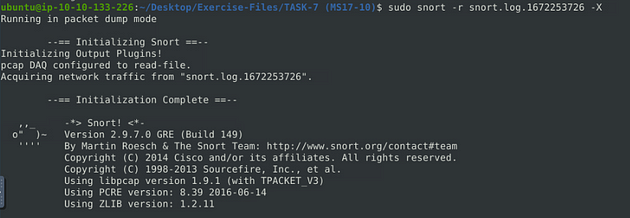
We can look at the file with the command sudo snort -r snort.log.1672253726, your log file name maybe be different. Press enter to have Snort output the results to the terminal.
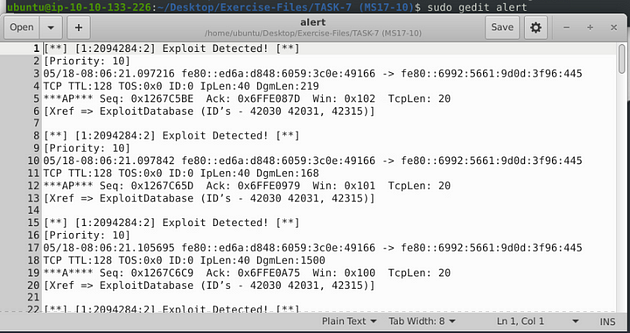
What is the requested path?
Scroll up to the first packet, if you look to the text on the right side of the hex output, you will see an IP address. This is the answer along with the letters after it. Once you find it, type this answer into the TryHackMe answer field, then click submit.
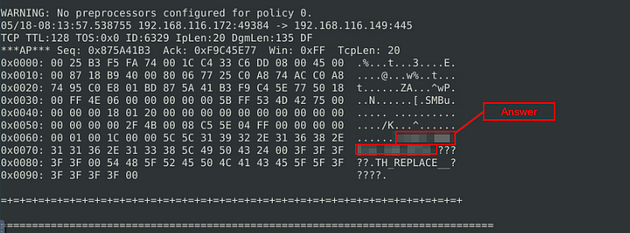
Answer: \192.168.116.138\IPC$
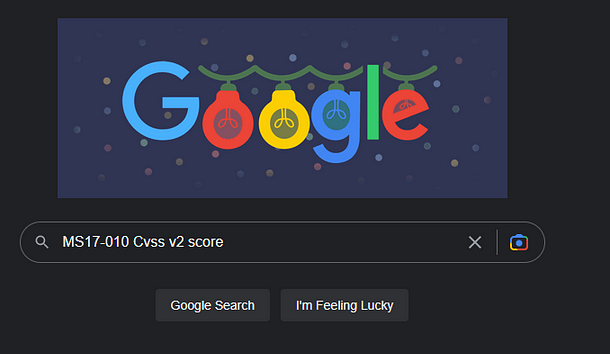
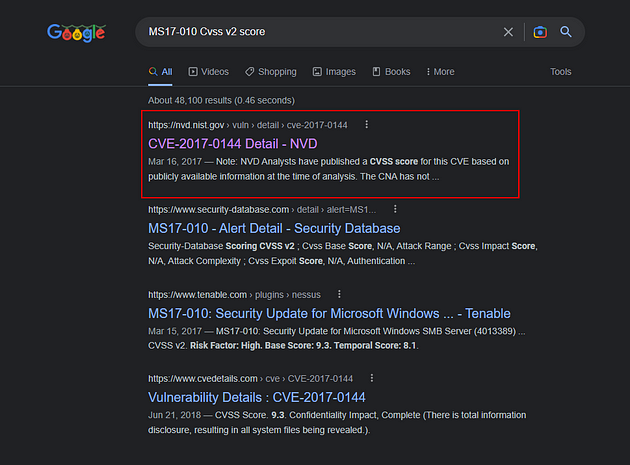
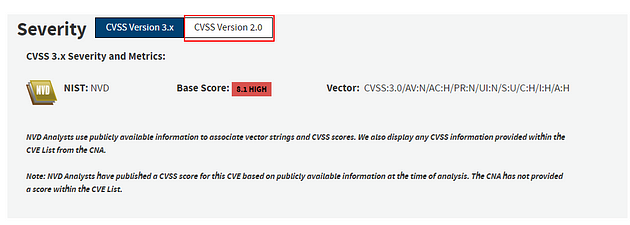
What is the CVSS v2 score of the MS17–010 vulnerability?
We won’t need the VM for this answer, but we will need a trusty friend by the name of Google. Head over to Google and search MS17–010 CVSS v2 score.
The first result back is from NIST, so let’s head on in and check it out. Click the link.
When the page loads we and kinda of see what we are looking for so scroll down a little bit.
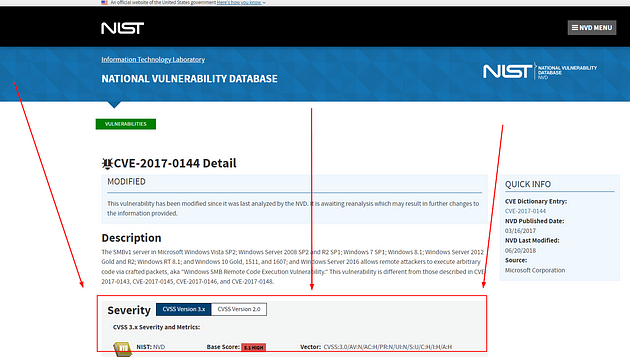
Now that it’s in better view we can see that it is on version 3.x but we want version 2. So click the white box labeled CVSS Version 2.0.
The number will change, and will be the answer you are looking for. Type the answer into the TryHackMe answer field, then click submit.
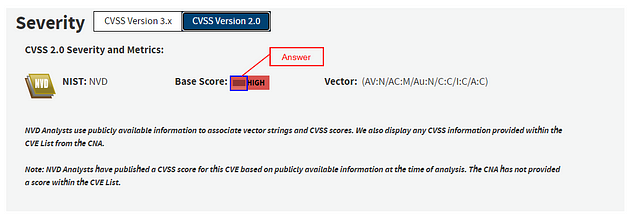
Answer: 9.3
You have finished these tasks, and can now move onto Task 8 Using External Rules (Log4j) & Task 9 Conclusion.