This is a subscribers only room on TryHackMe. It was created by TryHackMe. Here it the link to said room, TryHackMe Room — Summit.
Can you chase a simulated adversary up the Pyramid of Pain until they finally back down?

Task 1 Challenge
Objective
After participating in one too many incident response activities, PicoSecure has decided to conduct a threat simulation and detection engineering engagement to bolster its malware detection capabilities. You have been assigned to work with an external penetration tester in an iterative purple-team scenario. The tester will be attempting to execute malware samples on a simulated internal user workstation. At the same time, you will need to configure PicoSecure’s security tools to detect and prevent the malware from executing.
Following the Pyramid of Pain’s ascending priority of indicators, your objective is to increase the simulated adversaries’ cost of operations and chase them away for good. Each level of the pyramid allows you to detect and prevent various indicators of attack.
Room Prerequisites
Completing the preceding rooms in the Cyber Defence Frameworks module will be beneficial before venturing into this challenge. Specifically, the following:
Connection Details
Please click Start Machine to deploy the application, and navigate to https://LAB_WEB_URL.p.thmlabs.com once the URL has been populated.
Start by clicking on the green Start Machine box in the top right of the Task 1 section.
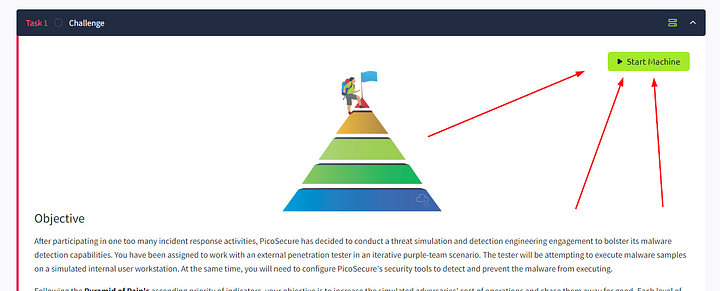
Once the URL is available, give it a click. You should be greated with the following below
Note: It may take a few minutes to deploy the machine entirely. If you receive a “Bad Gateway” response, wait a few minutes and refresh the page.
Answer the questions below
What is the first flag you receive after successfully detecting sample1.exe?
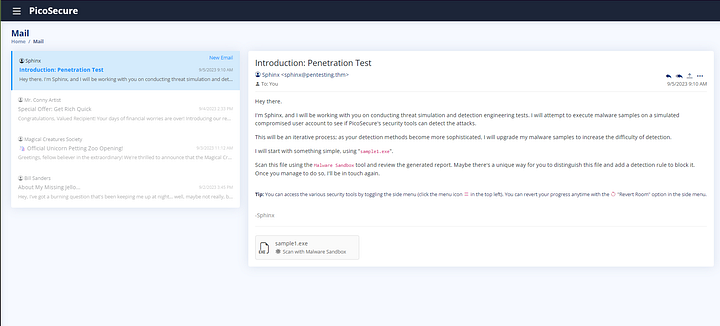
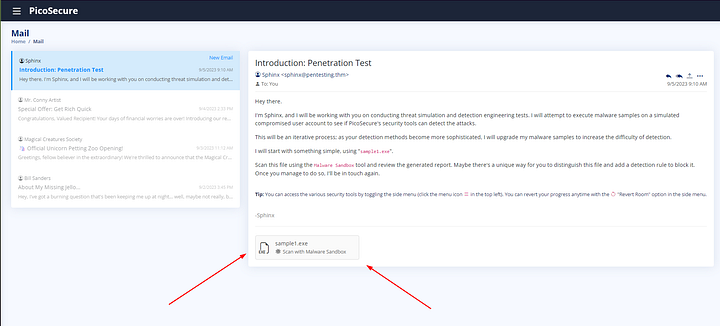
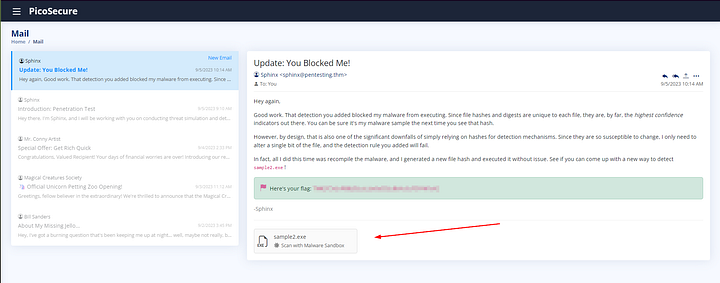
From the VM URL page, first read through the email from Sphinx. Afterwards we have a sample to check out. Click on the sample1.exe box at the bottom of the email to move over to the Malware Sandbox tool.
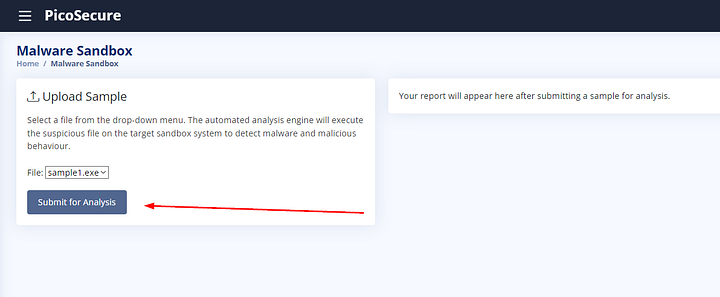
We can analysis the sample by clicking the bluish/gray box labeled Submit for Analysis.
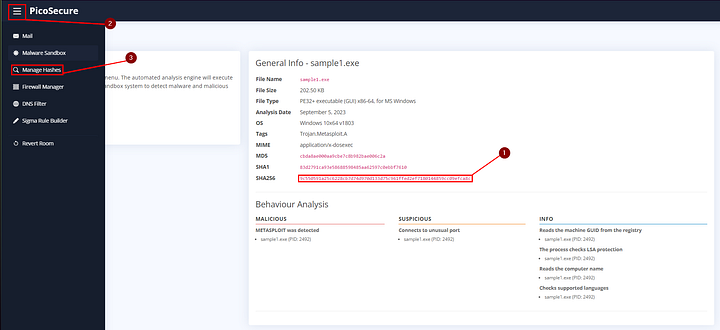
After the analysis has completed, we will have the General Info for sample1.exe. Remebering from the Pyramid of Pain, Hashes are Trival and can easily be change. But we can use them here to detect sample1.exe. So copy the SHA256 hash, then click on the hamburger in the top left of the screen. From the drop-down menu, click on Manage Hashes.
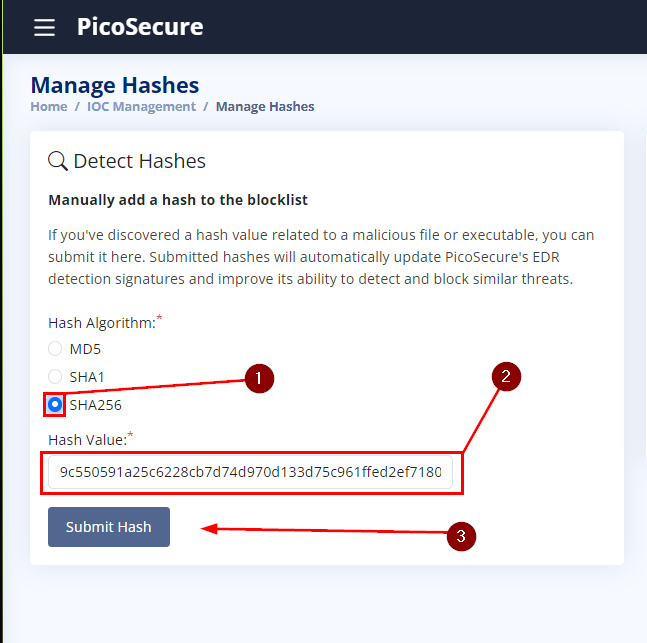
In Manage Hashes, we can add the SHA256 hash that was detected. To do this, click on the circle to the left of SHA256 which will make it blue and have it selected. Then paste the hash value in the box below it. Finally, click the bluish/gray Submit Hash button.
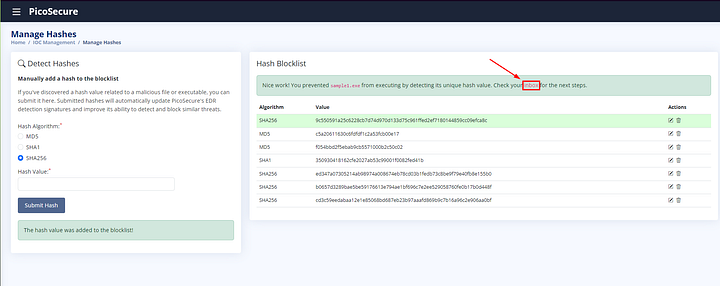
If done correctly, you will see The hash value was added to the blocklist! After which you will see Nice work! You prevented _sample1.exe_ from executing by detecting its unique hash value. Check your inbox for the next steps. Click on the inbox link from the statement above the Hash Blocklist.
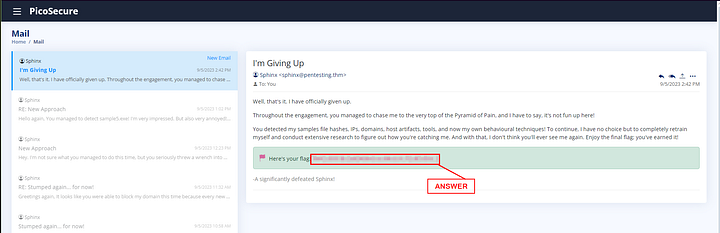
An email update has appeared in the Mail section. Read through it as it gives great information. At the end of the email you will find the flag and the answer to the question. Copy and paste it into the THM answer field, then click Submit.
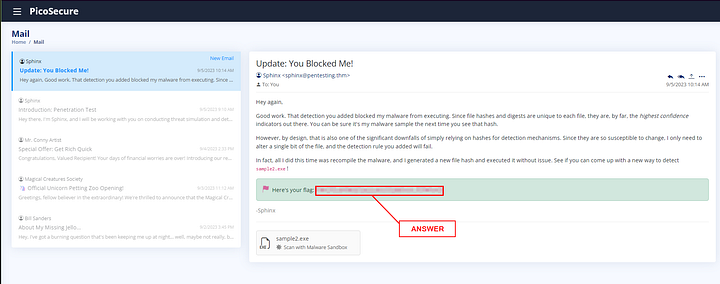
ANSWER: THM{f3cbf08151a11a6a331db9c6cf5f4fe4}
What is the second flag you receive after successfully detecting sample2.exe?
Reading through the new email, Sphinx has recompiled the malware and was able to run it again. They gave us the sample to analyze again, so click on the sample at the bottom of the email to hop over to the Malware analysis screen.
We are now at the Malware Sandbox screen. Before we can analyze, we need to change the sample to sample2.exe. This can be done by clicking the down caret on the File: drop-down box. In the drop-down select choose sample2.exe. Finally click the bluish/gray Submit for Analysis button

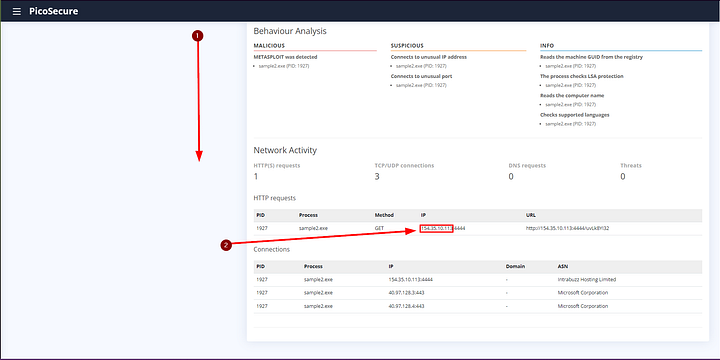
After the analysis of the file has completed, we can review the findings. If you scroll down to the bottom we can see this time we have some new findings in the way of Network Activity. As per the next stage up on the pyramid we want to look at the IP address. As we can see the IP address 154.35.10.113 goes to a very suspicious URL. Highlight and copy the IP address, then we need to head to the firewall to block it.
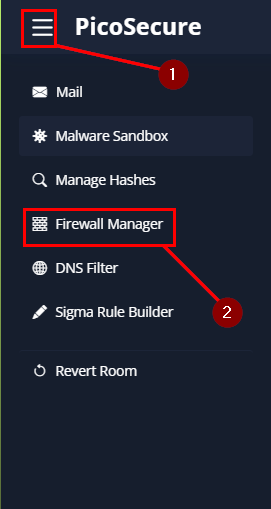
So get to the Firewall Manager, click on the hamburger in the top left of the window. In the drop-down you will see Firewall Manager, click on it.
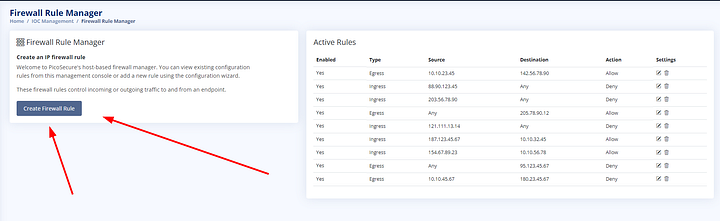
Next you will need to click on the Create Firewall Rule button.
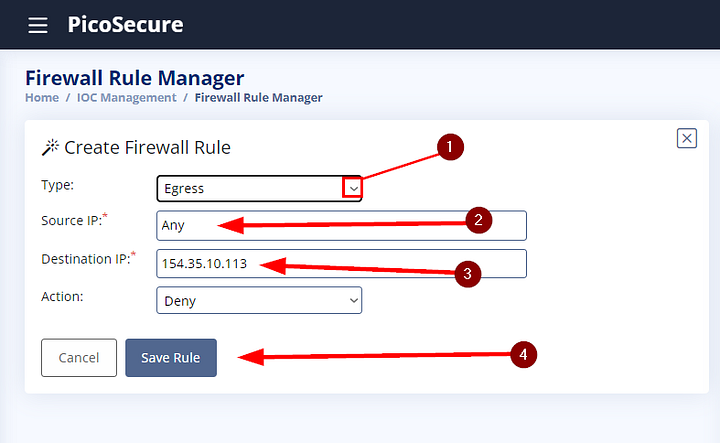
New options will propagate indicating to Create Firewall Rule. For the Type we want to choose Egress as that mean leaving (I think of it as E as in Escape). Next up is Source IP, for it to work on all systems of the company, you will want to type Any. What this means is that it will cover any system reaching out to the destination IP. Which brings us to the next section, Destination IP. This is where you will paste the IP address from the Malware Analysis page. Lastly the Action section, you will want to keep it as Deny. This is so that any system reaching out to 154.35.10.113 will be deny and not allow to connect. Now click on the Save Rule button.
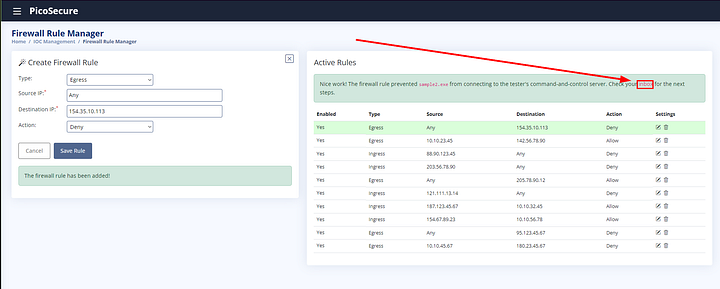
After clicking Save Rule, it will be indicated that sample2.exe was blocked. Additionally, it will let us know we have a new email. Click on the inbox link to head over and read it.
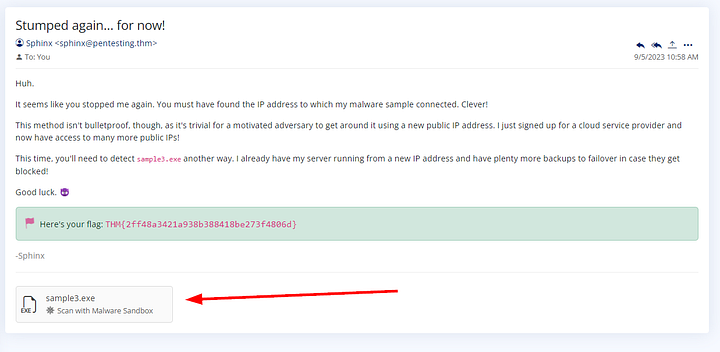
Again, the flag can be found towards the bottom of the email. Copy and paste it into the THM answer field, then click Submit.
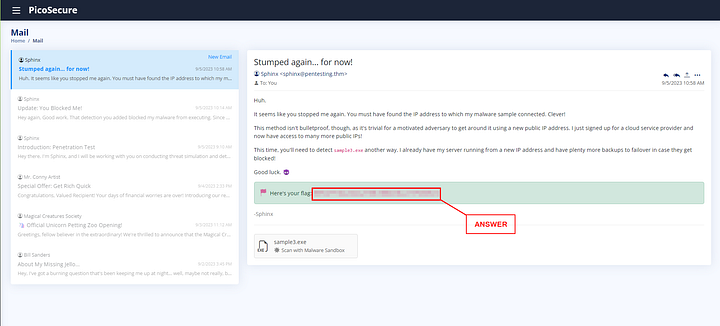
ANSWER: THM{2ff48a3421a938b388418be273f4806d}
What is the third flag you receive after successfully detecting
As before, read through the email as it gives great insight. Once you have finished click on sample3.exe at the bottom to move over to the Malware Sandbox page.
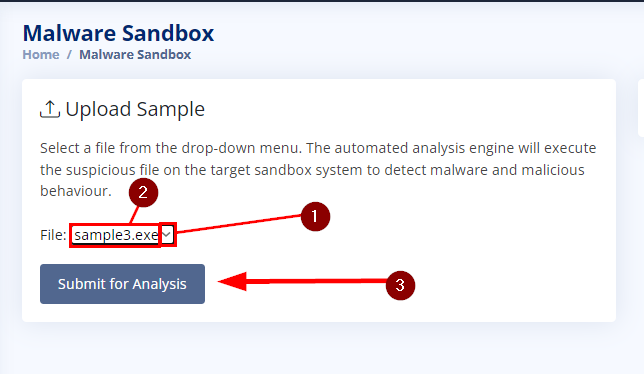
On the Malware Sandbox page, click the down caret. This will drop-down all the samples we have access to. Click on sample3.exe, then click on the Submit for Analysis button.
When the analaysis has completed, we can read the Behaviour Analysis. This section gives you an idea of what the Malware is doing. After you have done this, it’s time to scroll down and look at the artifacts.
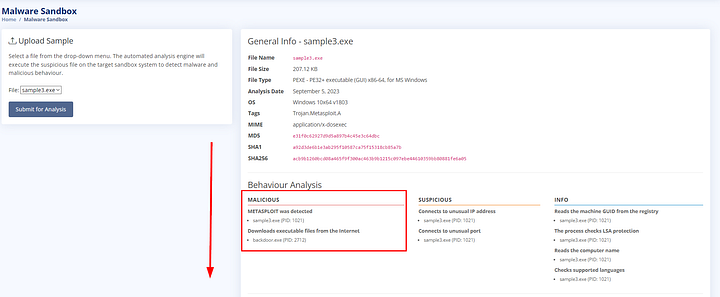
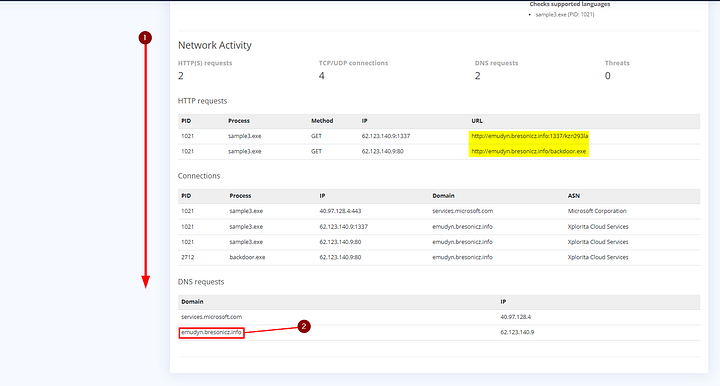
Scrolling down we can see we have some more information this time. As we can see, there is a suspicious looking domain appearing in our results. Highlight the suspicious domain from the Domain section at the bottom. Now lets head over to the DNS Filter page.
Click on the hamburger in the top left of the window. In the drop-down you will see DNS Filter, click on it.

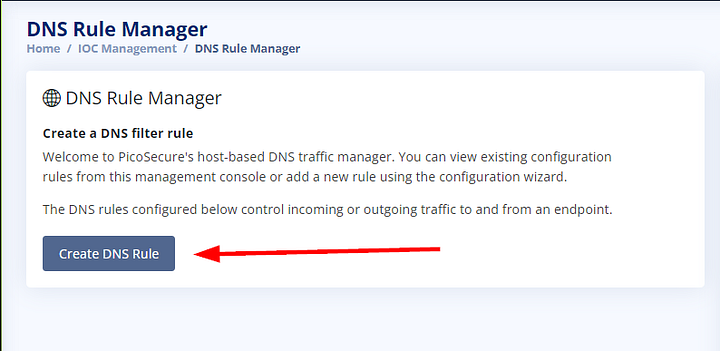
Once on the DNS Rule Manager page, click on the Create DNS Rule.
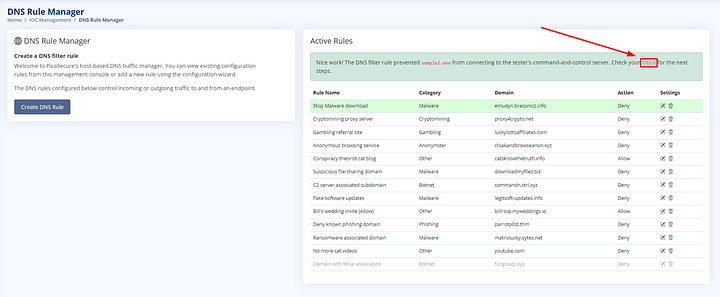
Starting at the top, we need to name the rule. This can be however you want to name it. I chose Stop Malware download, which goes back to what we saw in the Behavior Analysis section. Next up is the Category section, we can leave this as Malware. Following that section is Domain Name, which we can paste in the domain from the analysis page. The last section is Action, which can be left to Deny. Our rule basically means that any traffic going to or coming from emudyn.bresonicz.info will be denied. The last step is to click the Save Rule button.

After clicking Save Rule, it will be indicated that sample3.exe was blocked. Additionally, it will let us know we have a new email. Click on the inbox link to head over and read it.
The flag can be found towards the bottom of the email. Copy and paste it into the THM answer field, then click Submit.
ANSWER: THM{4eca9e2f61a19ecd5df34c788e7dce16}
What is the fourth flag you receive after successfully detecting sample4.exe?
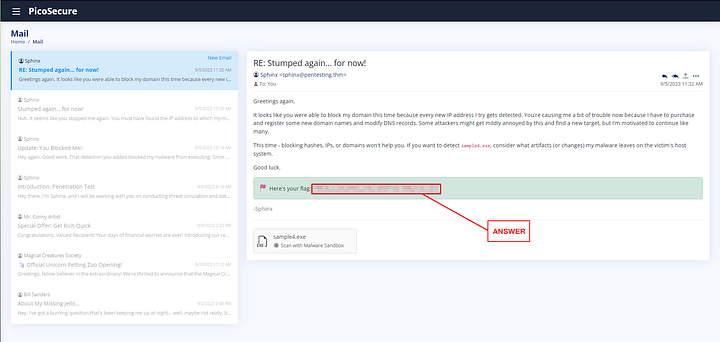
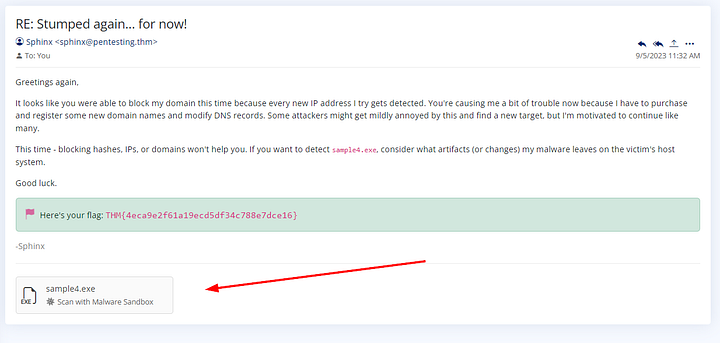
Read through the email again. Once you have finished click on sample4.exe at the bottom to move over to the Malware Sandbox page.
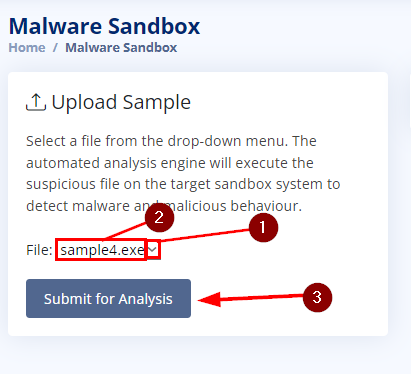
On the Malware Sandbox page, click the down caret. This will drop-down all the samples we have access to. Click on sample4.exe, then click on the Submit for Analysis button.
After the analysis has completed, we can take a look at the Behaviour Analysis section. In it we can see the Malwave Disables Windows Defender Real-time monitoring. With this knowledge, let’s scroll down to see how Sphinx accomplished this.
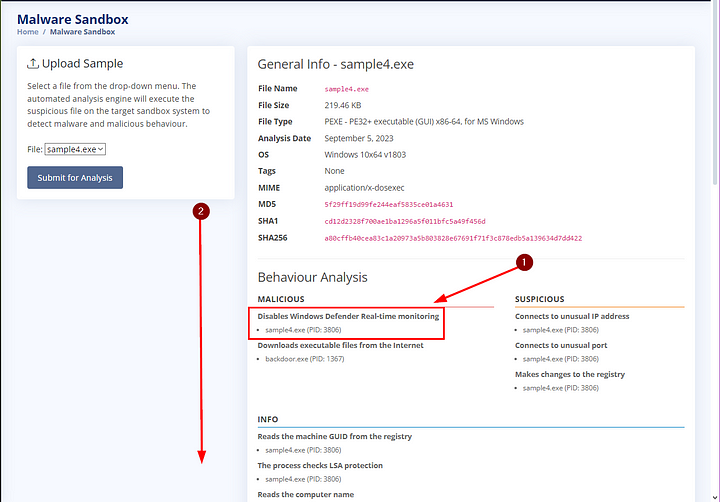
We have a new section called Registry Activity, in this section we can see registry modifications that were made during the malware execution. Since we saw in the Behavior Analysis that Windows Defender was disabled. Its safe to say that out of the three registry events that top one is the one we are looking for. Highlight and copy all the infomation from registry event and paste it notepad for the time being. Now lets head over to Sigma Rule Builder to create a Sigma rule that detects when this registry value has changed to 1.

Click on the hamburger in the top left of the window. In the drop-down you will see Sigma Rule Builder, click on it.
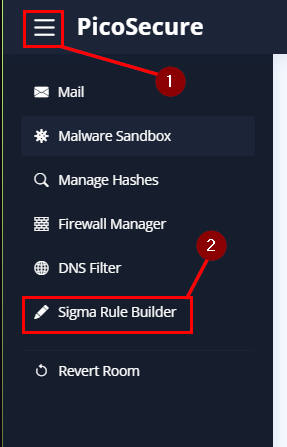
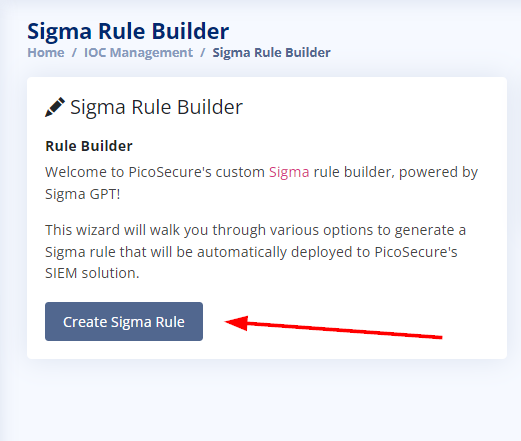
On the Sigma Rule Builder we need to click on the Create Sigma Rule button to open the options to create the Sigma rule.
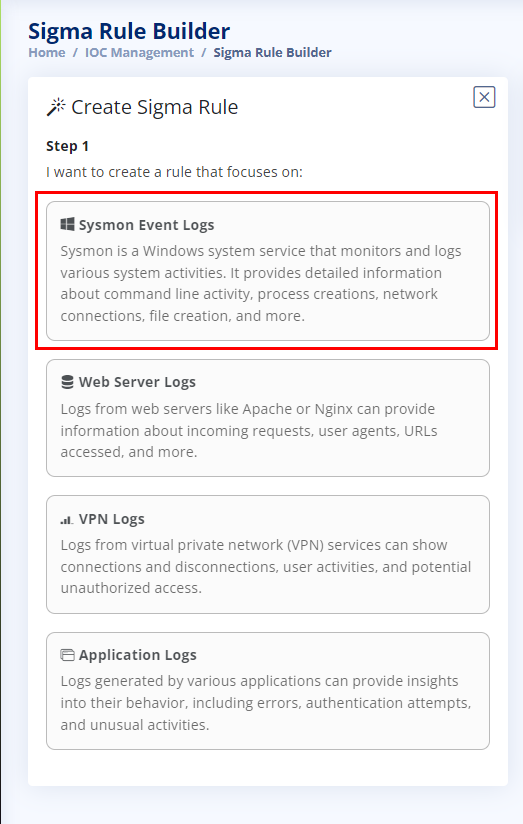
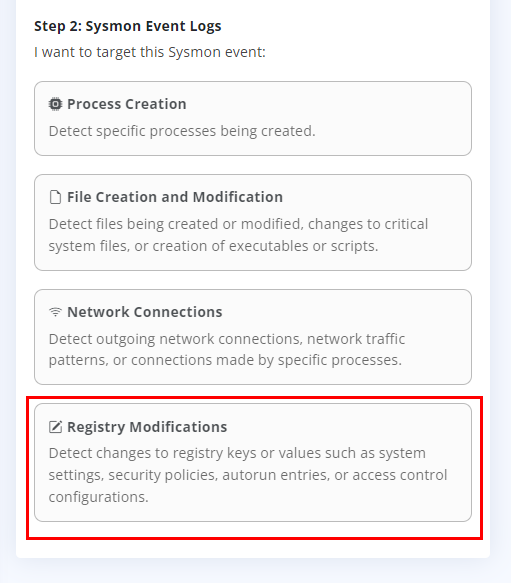
We are given four options to start step 1 of creating our Sigma Rule. Read through the options, a registry change doesn’t apply to Web Server Logs, VPN Logs, or Application Logs. Meaning that Sysmon Event Logs are our best option at this point. Click on Sysmon Event Logs.
We are given another four choices. Looking them over the obvious choice is Registry Modifications, as we know that the Malware made a registry value change. Click on Registry Modifications.
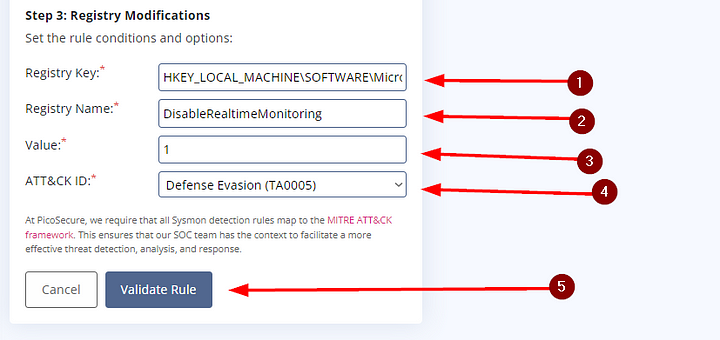
Using the information we copied and pasted into our notepad, we will use it to fill out the final step of our Sigma Rule Creation. Starting with the Registry Key, paste HKEY_LOCAL_MACHINE\SOFTWARE\Microsoft\Windows Defender\Real-Time Protection into this input field. Next up is the Resgistry Name, which we will use DisableRealtimeMonitoring. The Value that the registry entry was changed to was 1. Lastly, we need to map it to a MITRE ATT&CK ID. Looking over the list we can see Defense Evasion (TA0005). Since the Malware disables Windows Defender, it’s safe to say it is trying to evade our defenses. Lastly, we need to click on Validate Rule. Which will create the Sigma rule and Validate that it detects the Malware.
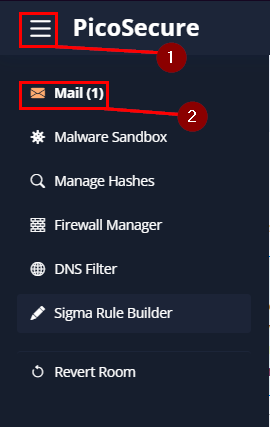
After clicking Validate Rule, you will see a quick pop up at the top of the window (so fast I didn’t get a chance to screenshot it) indicating that the rule did detect the Malware. Additionally, a sound that you have a new message will play as well. Let’s head to our Mailbox to see what Sphinx has to say. Again, click the hamburger in the top left of the window. Then click on Mail(1).
The flag can be found towards the bottom of the new email. Copy and paste it into the THM answer field, then click Submit.
ANSWER: THM{c956f455fc076aea829799c0876ee399}
What is the fifth flag you receive after successfully detecting sample5.exe?
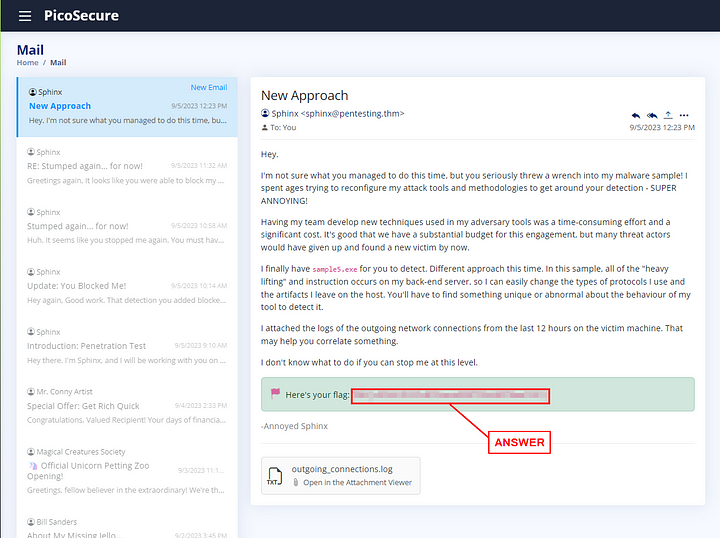
Read through the email. Once you have finished click on outgoing_connections.log at the bottom of the email.

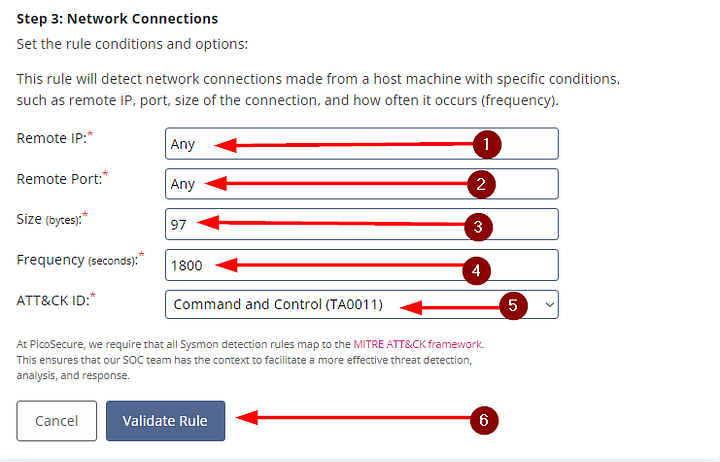
You will be able to view the attachment on the right side of the window. Looking over the outgoing_connections.log file, lets find some patterns. Starting with the Destination Column the IP address 51.102.10.19 appear a lot. Looking at the Date and Time column in correlation to IP address that appears, it seems to occur every 30 mins. Next shifting over to the Port column, we can see that the connection always occurs over port 443. Lastly, looking at Size column, the Packet Size always sticks to 97 bytes. We should have all the information we need to create a Sigma rule to detect this type of traffic, let’s head over and create it.

Click on the hamburger in the top left of the window. In the drop-down you will see Sigma Rule Builder, click on it.
On the Sigma Rule Builder we need to click on the Create Sigma Rule button to open the options to create the Sigma rule.
Starting with Step 1, we are working with a log file. So the best option at hand is Sysmon Event Logs. So click on Sysmon Event Logs.

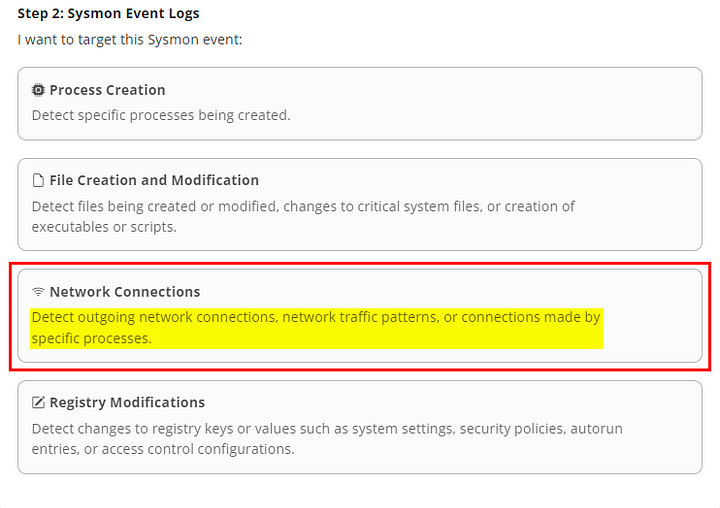
Next up is Step 2. We know that the outgoing_connections.log file deals with
Lastly, we need to click on Validate Rule. Which will create the Sigma rule and Validate that it detects the Malware.
After clicking Validate Rule, you will see a quick pop up at the top of the window (so fast I didn’t get a chance to screenshot it) indicating that the rule did detect the Malware. Additionally, a sound that you have a new message will play as well. Let’s head to our Mailbox to see what Sphinx has to say. Again, click the hamburger in the top left of the window. Then click on Mail(1).
The flag can be found towards the bottom of the new email. Copy and paste it into the THM answer field, then click Submit.
ANSWER: THM{46b21c4410e47dc5729ceadef0fc722e}
What is the final flag you receive from Sphinx?
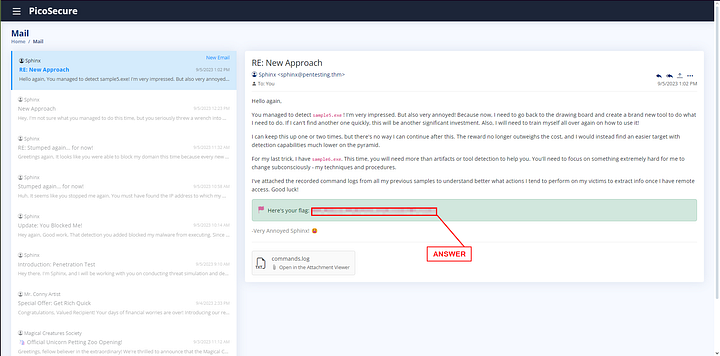
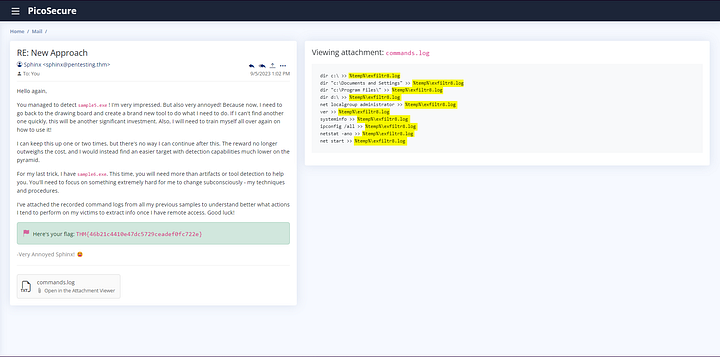
Read through the email. Once you have finished click on commands.log at the bottom of the email.
You should be able to view the attachment on the right side of the screen now. Parsing through the log, we can see that Sphinx has their malware sending information to %temp%\exfiltr8.log file. This should give us enough information to create a Sigma rule. Let’s head over and make one.
Click on the hamburger in the top left of the window. In the drop-down you will see Sigma Rule Builder, click on it.
On the Sigma Rule Builder we need to click on the Create Sigma Rule button to open the options to create the Sigma rule.
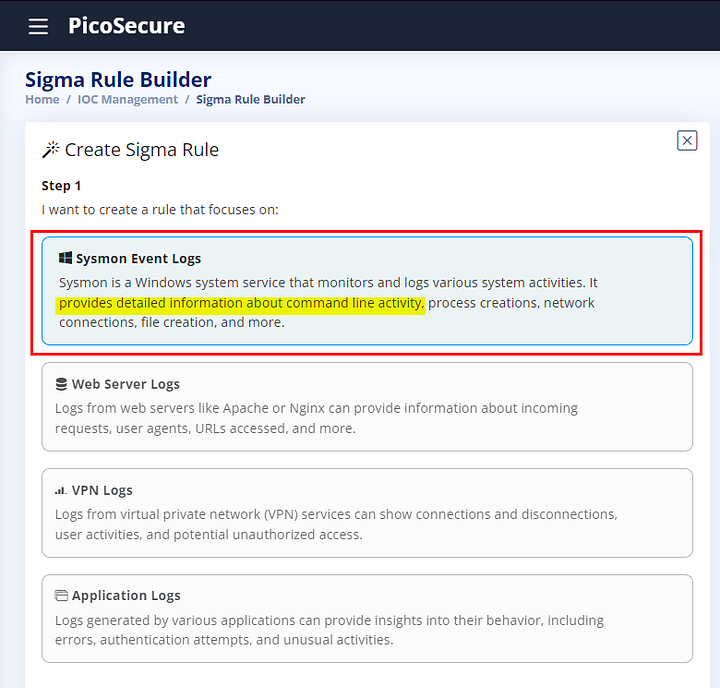
Looking through the chooses again, Sysmon Event Logs appears to be the best choice. As it encompasses detailed information about command line activity. Click on Sysmon Event Logs.
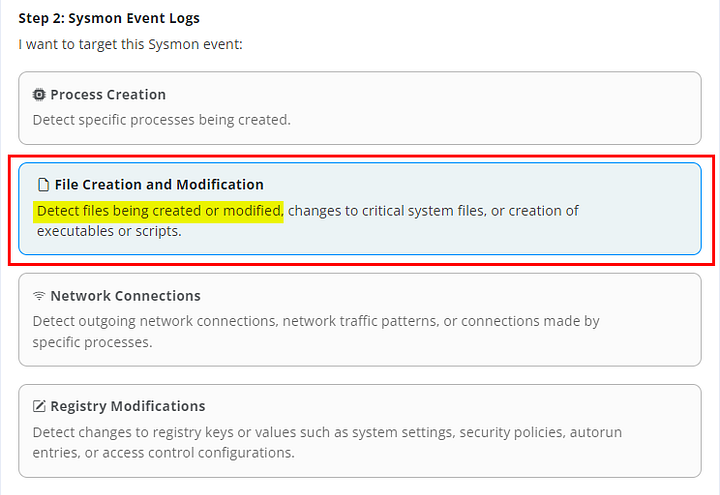
Looking at the commands.log file, we know that Sphinx’s malware is creating a file in the %temp% directory, then adding information to it for exfiltration. With this knowledge, we are going to click on File Creation and Modification to choose it.
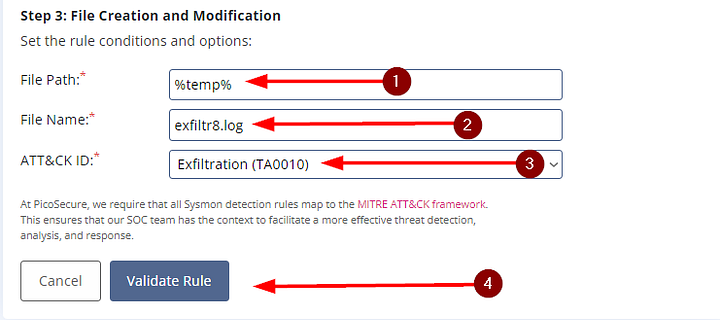
Now before the rule can be created, we need to add the information we gained from the connection.log file. Starting with the file path is where the file is located, this would be %temp% . Next up is the filename, which is exfiltr8.log . Lastly, we have choose the correct ATT&CK ID what matches what the Sphinx is trying to do. In this case, they are trying to Exfiltrate data meaning Exfiltration (TA0010) is what we want to choose. Finally, click on the Validate Rule button.
After clicking Validate Rule, you will see a quick pop up at the top of the window (again, so fast I didn’t get a chance to screenshot it) indicating that the rule did detect the Malware. Additionally, a sound that you have a new message will play as well. Let’s head to our Mailbox to see what Sphinx has to say. Again, click the hamburger in the top left of the window. Then click on Mail(1).
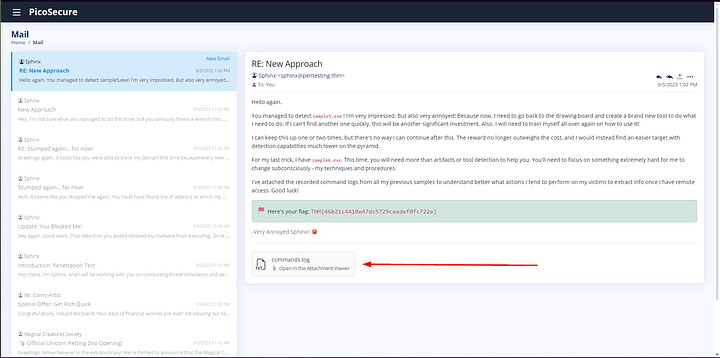
Once you are back at your Inbox, you will see the new email. The final flag can be found at the bottom of the email. Copy and paste it into the THM answer field, then click Submit.
ANSWER: THM{c8951b2ad24bbcbac60c16cf2c83d92c}