If you haven’t done tasks 3, 4, and 5 yet, here is the link to my write-up of them: Task 3 Statistics-Protocol Details, Task 4 Packet Filtering-Principles, & Task 5 Packet Filtering-Protocol Filters
Getting the VM Started
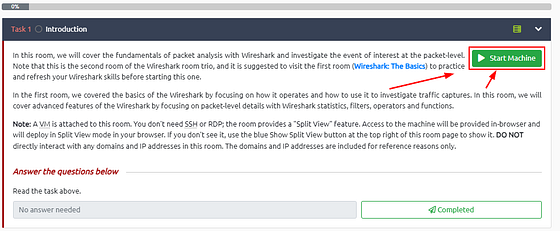
Starting at Task 1, you will see the green Start Machine button. Click this button to get the VM Started.
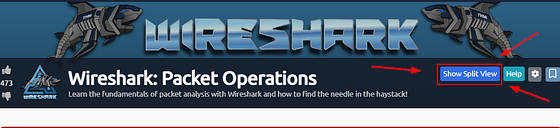
Scroll to the top where the banner is. On the right side of the page, you will see the blue Show Split view. Click this blue button.
The page will split, now just wait till the VM loads.
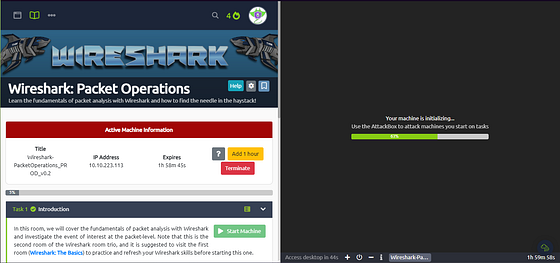
Once the VM loads, click the View in Full Screen icon in the bottom left of the VM.
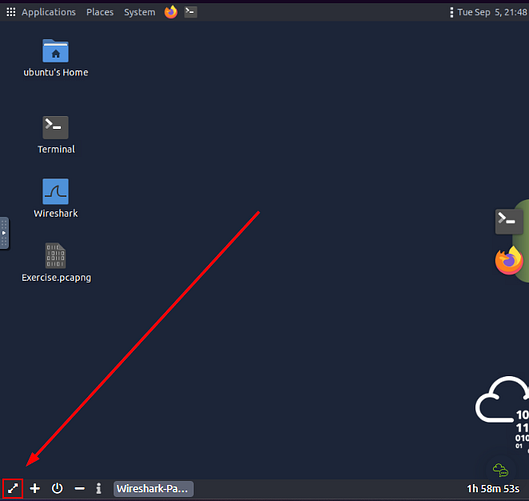
A new browser tab should open with the VM in it.
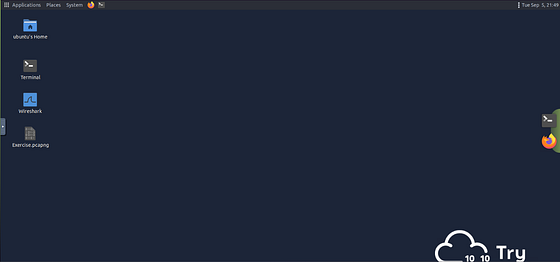
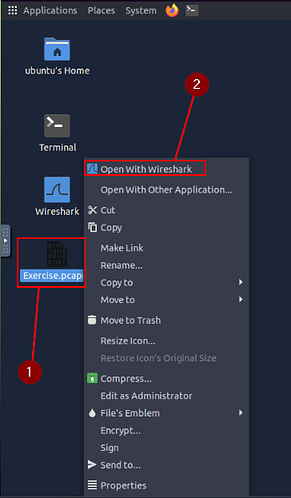
Right-click on Exercise.pcapng, then on the drop-down menu click the Open With Wireshark.
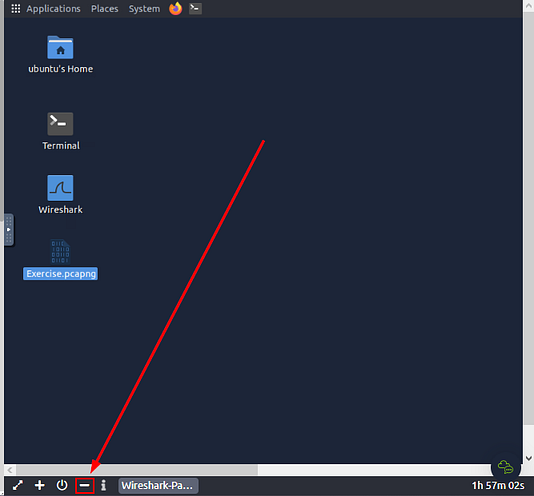
While Wireshark loads, head back to the THM Task Tab. At the bottom of the VM you will see a minus ( — ), this represents Exit Split View. Click the — to allow the THM task to incapsilate the entire window. This won’t close out of your VM instance, it will just be on the other tab.
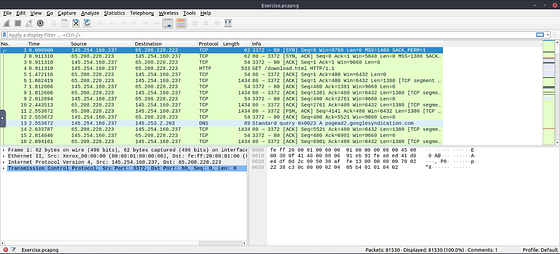
Now head back to the broswer tab that the VM instance is in. Wireshark should be open and ready to use.
Task 6 Advanced Filtering
So far, you have learned the basics of packet filtering operations. Now it is time to focus on specific packet details for the event of interest. Besides the operators and expressions covered in the previous room, Wireshark has advanced operators and functions. These advanced filtering options help the analyst conduct an in-depth analysis of an event of interest.
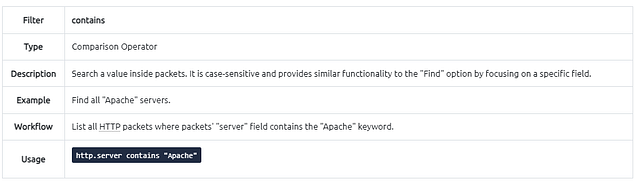
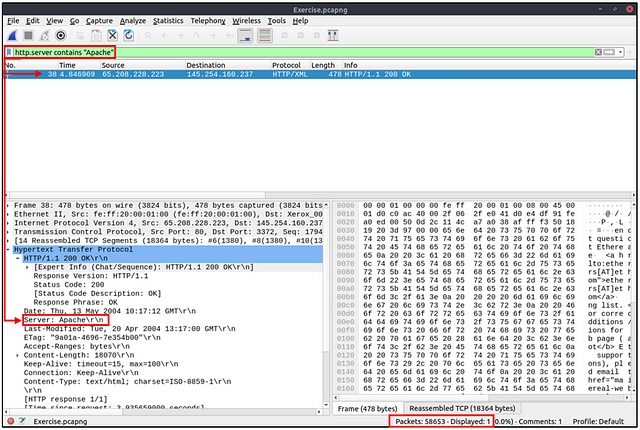
Filter: “contains”
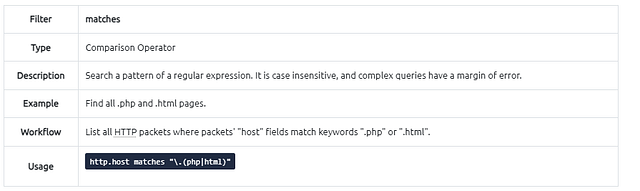
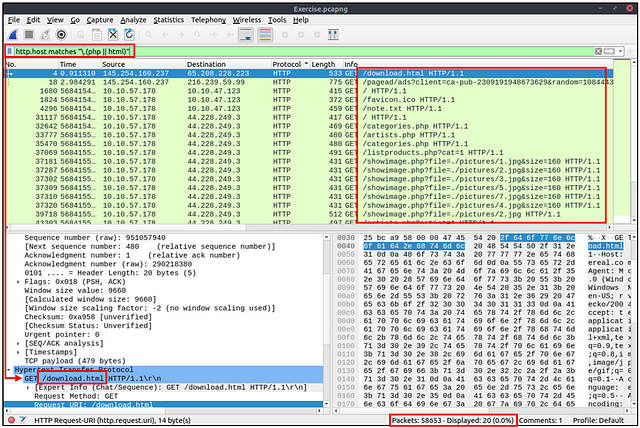
Filter: “matches”
Filter: “in”

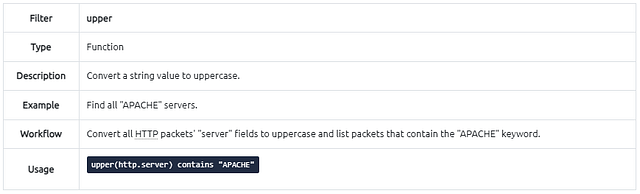
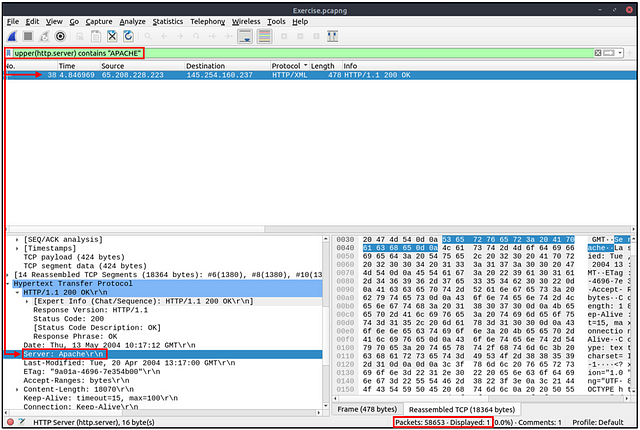
Filter: “upper”
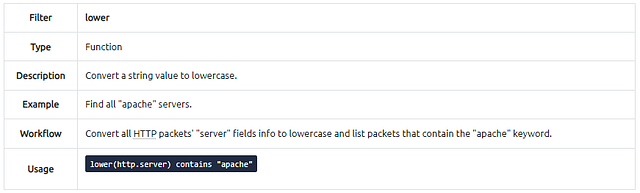
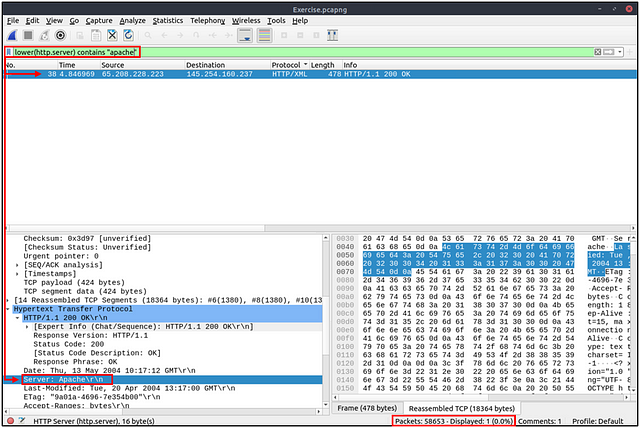
Filter: “lower”
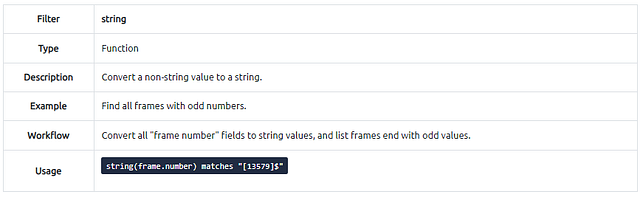
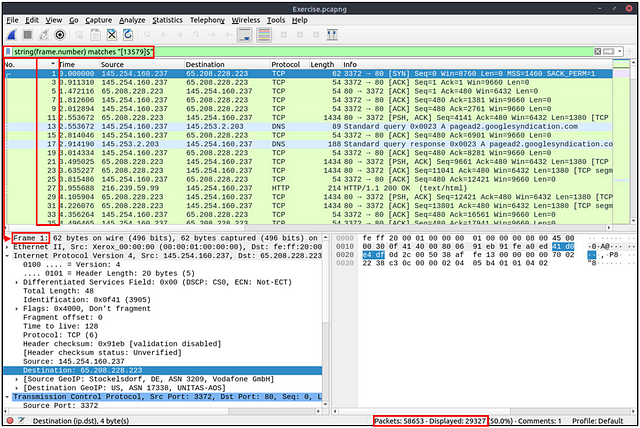
Filter: “string”
Bookmarks and Filtering Buttons
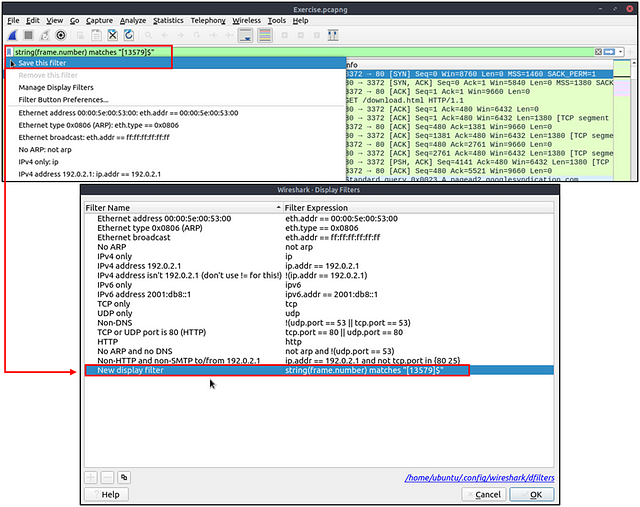
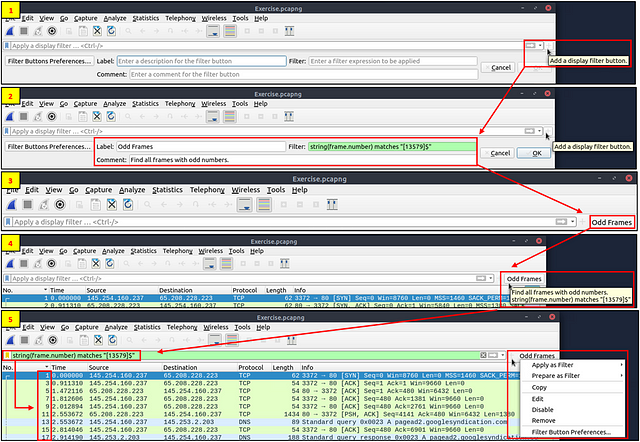
We’ve covered different types of filtering options, operators and functions. It is time to create filters and save them as bookmarks and buttons for later usage. As mentioned in the previous task, the filter toolbar has a filter bookmark section to save user-created filters, which helps analysts re-use favourite/complex filters with a couple of clicks. Similar to bookmarks, you can create filter buttons ready to apply with a single click.
Creating and using bookmarks.
Creating and using display filter buttons.
Profiles
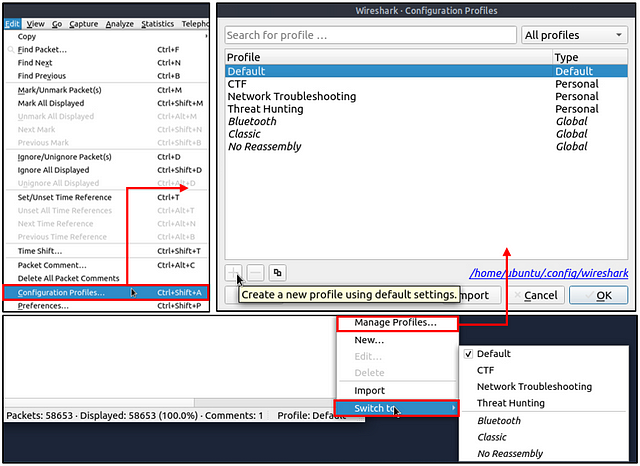
Wireshark is a multifunctional tool that helps analysts to accomplish in-depth packet analysis. As we covered during the room, multiple preferences need to be configured to analyse a specific event of interest. It is cumbersome to re-change the configuration for each investigation case, which requires a different set of colouring rules and filtering buttons. This is where Wireshark profiles come into play. You can create multiple profiles for different investigation cases and use them accordingly. You can use the “Edit → Configuration Profiles” menu or the “lower right bottom of the status bar → Profile” section to create, modify and change the profile configuration.
Answer the questions below
Find all Microsoft IIS servers. What is the number of packets that did not originate from “port 80”?
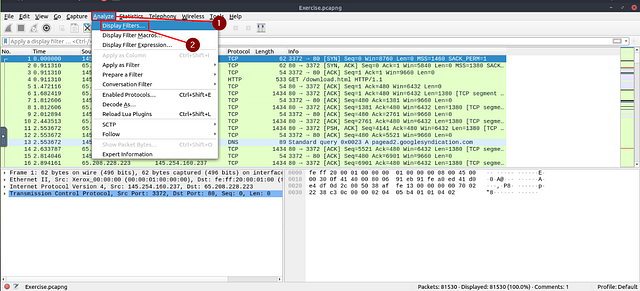
To start this one I needed a quick refresher on how to do is not, in the Wireshark filters. To do this go to the Menu bar at the top of the Wireshark and click Analyze. From the drop-down menu, click Display filters…
The window will pop-up for Display Filters. Looking through the differnt examples we can find 3 examples of how to add an is not type expression to the filter. We also find one that is not so good, but will work. Knowing how to craft our filter now, click the OK button in the bottom right of the window to close it.
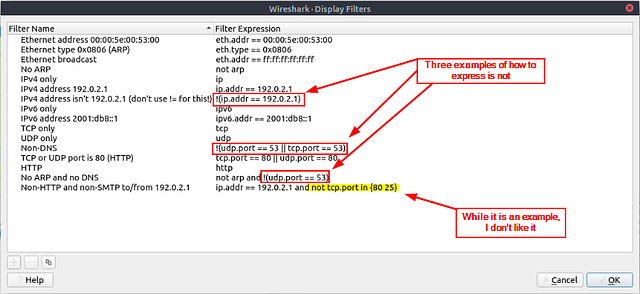
Click on the mint green Filter Bar, time to craft our filter! From the question, we know we are looking for a Microsoft IIS Server. Reading back over the Contains filter section, we should know how to craft the first part of this filter. Since it is a server we are looking for, we want to use the syntax http.server. Followed by what this section should contain, contains "Microsoft". Great we have the first part of our filter, time to build the second. If we remember from the Display Filters window, to filter if something is not in a packet we use !(_place command here_). So filtering out any that use port 80 the syntax would be !(tcp.port == 80). The full filter will be http.server contains "Microsoft" and !(tcp.port == 80), then press enter to use this filter on the pcapng.

Look at the bottom right of the Wireshark window. You are looking for the word Displayed:. The numbers to the right of Displayed, is the answer. Type the answer in the THM answer field, and then click submit.
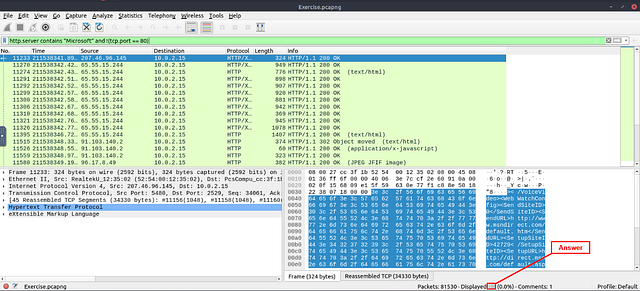
Answer: 21
Find all Microsoft IIS servers. What is the number of packets that have “version 7.5”?
We need to first find out where the version number is displayed. To do this look in the Packet Detail section. If you look at Server, you will see Microsoft — IIS. After which you will see a number, this is the version of Microsoft IIS. Now we know where the version number is, let’s go make a filter.
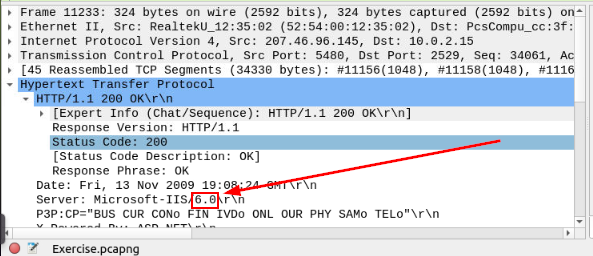
Click on the mint green Filter Bar, time to craft our filter! Since we are still looking for the Microsoft-IIS server, we can keep the first part of the filter. Additionally, since the we know that the version number is on the same line as type of server (Microsoft-IIS). We can craft the filter to reflect that. So the filter should be http.server contains “Microsoft” and http.server contains “7.5”. Now press enter to use this filter on the pcapng.

Look at the bottom right of the Wireshark window. You are looking for the word Displayed:. The numbers to the right of Displayed, is the answer. Type the answer in the THM answer field, and then click submit.
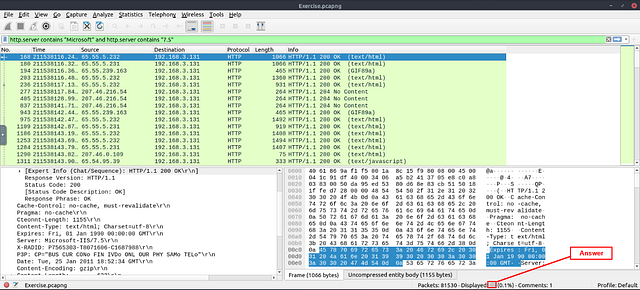
Answer: 71
What is the total number of packets that use ports 3333, 4444 or 9999?
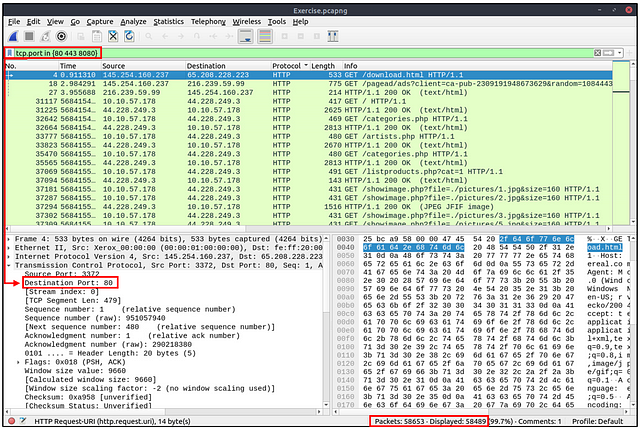
Click on the mint green Filter Bar, time to craft our filter! Since we are looking for ports, we want to start off the filter with tcp.port. Along with in since we are looking for a range of port numbers. Finally finishing off with the port numbers that need to be in {} (curly brackets) to signify the ports, {3333 4444 9999}. Side note, these ports are used since attackers commonly use these ports in metasploitable and other reverse shells. So the finally filter should be tcp.port in {3333 4444 9999}. Now press enter to use this filter on the pcapng.

Look at the bottom right of the Wireshark window. You are looking for the word Displayed:. The numbers to the right of Displayed, is the answer. Type the answer in the THM answer field, and then click submit.
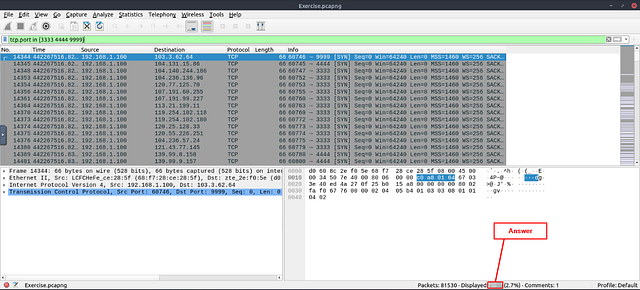
Answer: 2235
What is the number of packets with “even TTL numbers”?
Click on the mint green Filter Bar, time to craft our filter! Going back to Task 5 we had to search for packets that had a TTL of < 10. To find the TTL we use ip.ttl . Now we need to convert this input to a string, so that it can match to our regex (regular expression) later on. We do this by placing our ip.ttl inside of the string() function, so it looks like string(ip.ttl). The quilifier we need is matches , to indicate that the TTL will match to our regex. Finally, to match it to an even number we use the regex "[02468]$" . This regex is showing the number at the end ($), must match an even ([02468]). All together the filter should look like string(ip.ttl) matches "[02468]$" . Now press enter to use this filter on the pcapng.

Look at the bottom right of the Wireshark window. You are looking for the word Displayed:. The numbers to the right of Displayed, is the answer. Type the answer in the THM answer field, and then click submit.
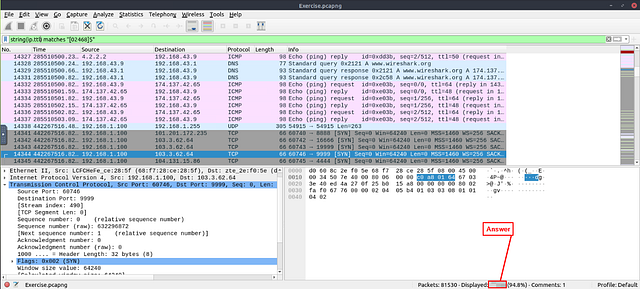
Answer: 77289
Change the profile to “Checksum Control”. What is the number of “Bad TCP Checksum” packets?
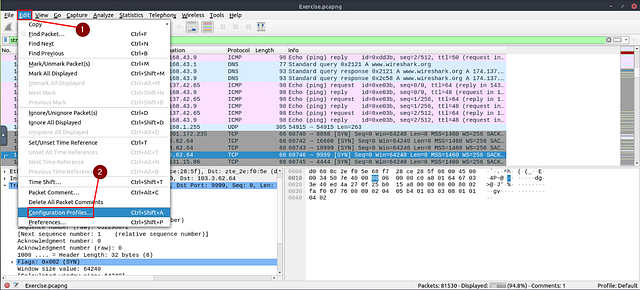
This time instead of creating the filter, right off the bat. We need to first change the profile. To do this go to the menu bar at the top of the window. Click on the Edit option, then from the drop-down menu click Configuration Profiles…
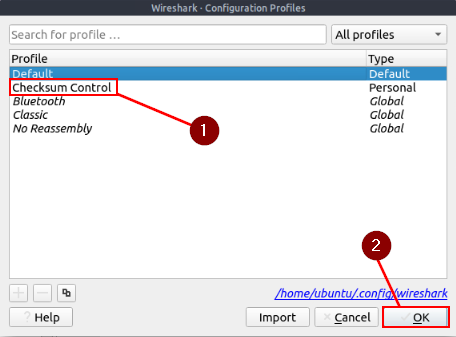
The Configuration profile window will pop-up, look for the Checksum Control. Once you find it, click on it then click on the OK button in the bottom right of the window.
Click on the mint green Filter Bar, time to craft our filter! I started by typing in tcp.checksum, and Wireshark gave me a drop down of possible filters I may want to use. Since the question wants us to find the Bad Checksum, I felt that the filter tcp.checksum_bad.expert, was the correct filter. After selecting it, I press enter to use this filter on the pcapng.
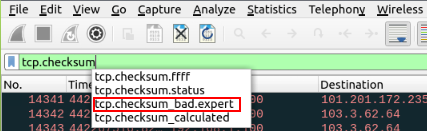
This turned out to be the correct filter we were looking for. Look at the bottom right of the Wireshark window. You are looking for the word Displayed:. The numbers to the right of Displayed, is the answer. Type the answer in the THM answer field, and then click submit.
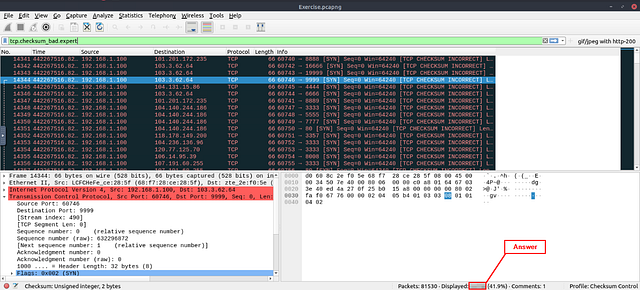
Answer: 34185
Use the existing filtering button to filter the traffic. What is the number of displayed packets?
For this question, THM already has the filter created for us. You need to look at the end of the mint green filter bar. You should see gif/jpeg with http-200, click on this to apply the filter then search using it.

Look at the bottom right of the Wireshark window. You are looking for the word Displayed:. The numbers to the right of Displayed, is the answer. Type the answer in the THM answer field, and then click submit.
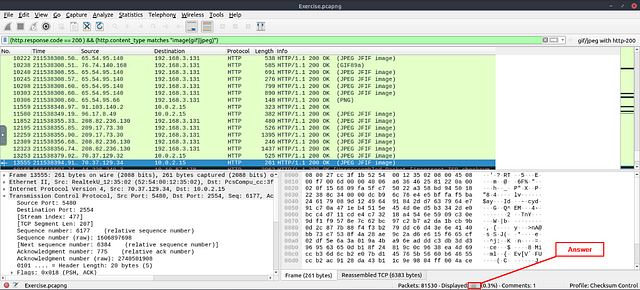
Answer: 261
Task 7 Conclusion
Congratulations!
You just finished the “Wireshark: Packet Operations” room. In this room, we covered Wireshark statistics, filters, operators and functions.
Want to learn more? We invite you to complete the Wireshark: Traffic Analysis room to improve your Wireshark skills by investigating suspicious traffic activities.