If you haven’t done task 1, 2, & 3 yet, here is the link to my write-up of it: Task 1 Introduction, Task 2 Network Security Monitoring and Zeek, & Task 3 Zeek Logs.
Getting the VM Started
Click the green button labeled Start Machine, in the top of Task 1.
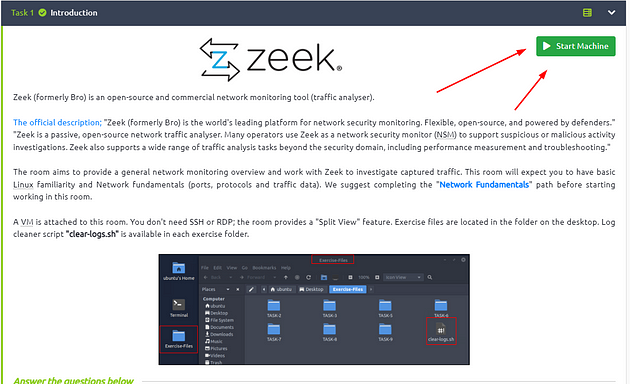
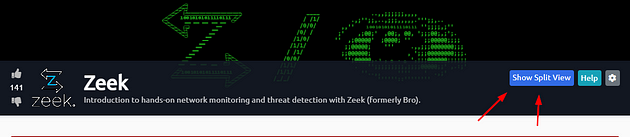
The screen should split in half, if it doesn’t go to the top of the page. You will see a blue button labeled Show Split View, click this button.
The screen should be split now, you just have to wait for the VM to load. When it is finshed loading it will look like it does below. You are ready to continue with the tasks ahead.

Task 4 CLI Kung-Fu Recall: Processing Zeek Logs
CLI Kung-Fu Recall: Processing Zeek Logs
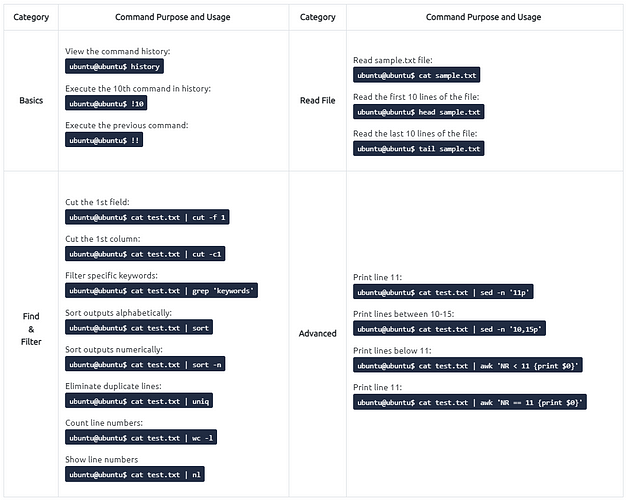
Graphical User Interfaces (GUI) are handy and good for accomplishing tasks and processing information quickly. There are multiple advantages of GUIs, especially when processing the information visually. However, when processing massive amounts of data, GUIs are not stable and as effective as the CLI (Command Line Interface) tools.
The critical point is: What if there is no “function/button/feature” for what you want to find/view/extract?
Having the power to manipulate the data at the command line is a crucial skill for analysts. Not only in this room but each time you deal with packets, you will need to use command-line tools, Berkeley Packet Filters (BPF) and regular expressions to find/view/extract the data you are looking for. This task provides quick cheat-sheet like information to help you write CLI queries for your event of interest.

Task 5 Zeek Signatures
Zeek Signatures
Zeek supports signatures to have rules and event correlations to find noteworthy activities on the network. Zeek signatures use low-level pattern matching and cover conditions similar to Snort rules. Unlike Snort rules, Zeek rules are not the primary event detection point. Zeek has a scripting language and can chain multiple events to find an event of interest. We focus on the signatures in this task, and then we will focus on Zeek scripting in the following tasks.
Zeek signatures are composed of three logical paths; signature id, conditions and action. The signature breakdown is shown in the table below;

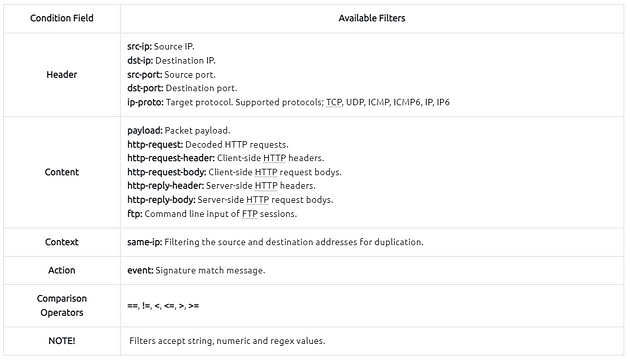
Now let’s dig more into the Zeek signatures. The below table provides the most common conditions and filters for the Zeek signatures.
Run Zeek with signature file
ubuntu@ubuntu$ zeek -C -r sample.pcap -s sample.sig

| **Example | Cleartext Submission of Password** |
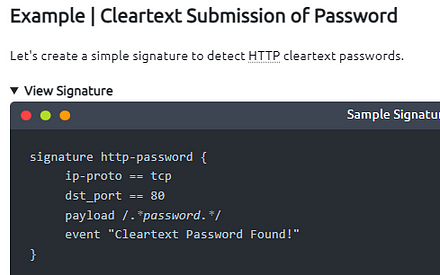
Let’s create a simple signature to detect HTTP cleartext passwords.
signature http-password { ip-proto == tcp dst_port == 80 payload /.password./ event “Cleartext Password Found!” }
#signature: Signature name. #ip-proto: Filtering TCP connection. #dst-port: Filtering destination port 80. #payload: Filtering the “password” phrase. #event: Signature match message.
Remember, Zeek signatures support regex. Regex “.*” matches any character zero or more times. The rule will match when a “password” phrase is detected in the packet payload. Once the match occurs, Zeek will generate an alert and create additional log files (signatures.log and notice.log).
Signature Usage and Log Analysis
1
2
3
4
5
6
7
8
9
10
ubuntu@ubuntu$ zeek -C -r http.pcap -s http-password.sig
ubuntu@ubuntu$ ls
clear-logs.sh  conn.log  files.log  http-password.sig  http.log  http.pcap  notice.log  packet_filter.log  signatures.log
ubuntu@ubuntu$ cat notice.log  | zeek-cut id.orig_h id.resp_h msg
10.10.57.178 44.228.249.3 10.10.57.178: Cleartext Password Found!
10.10.57.178 44.228.249.3 10.10.57.178: Cleartext Password Found!

ubuntu@ubuntu$ cat signatures.log | zeek-cut src_addr dest_addr sig_id event_msg
10.10.57.178  http-password 10.10.57.178: Cleartext Password Found!
10.10.57.178  http-password 10.10.57.178: Cleartext Password Found!
As shown in the above terminal output, the signatures.log and notice.log provide basic details and the signature message. Both of the logs also have the application banner field. So it is possible to know where the signature match occurs. Let’s look at the application banner!
Log Analysis
1
2
3
4
ubuntu@ubuntu$ cat signatures.log | zeek-cut sub_msg
POST /userinfo.php HTTP/1.1\x0d\x0aHost: testphp.vulnweb.com\x0d\x0aUser-Agent: Mozilla/5.0 (X11; Ubuntu; Linux x86_64; rv:98.0) Gecko/20100101 Firefox/...
ubuntu@ubuntu$ cat notice.log  | zeek-cut sub
POST /userinfo.php HTTP/1.1\x0d\x0aHost: testphp.vulnweb.com\x0d\x0aUser-Agent: Mozilla/5.0 (X11; Ubuntu; Linux x86_64; rv:98.0) Gecko/20100101 Firefox/...
We will demonstrate only one log file output to avoid duplication after this point. You can practice discovering the event of interest by analysing notice.log and signatures.log.
| **Example | FTP Brute-force** |
Let’s create another rule to filter FTP traffic. This time, we will use the FTP content filter to investigate command-line inputs of the FTP traffic. The aim is to detect FTP “admin” login attempts. This basic signature will help us identify the admin login attempts and have an idea of possible admin account abuse or compromise events.
1
2
3
4
5
signature ftp-admin {
     ip-proto == tcp
     ftp /.*USER.*dmin.*/
     event "FTP Admin Login Attempt!"
}
Let’s run the Zeek with the signature and investigate the signatures.log and notice.log.
FTP Signature
1
2
3
4
ubuntu@ubuntu$ zeek -C -r ftp.pcap -s ftp-admin.sig
ubuntu@ubuntu$ cat signatures.log | zeek-cut src_addr dst_addr event_msg sub_msg | sort -r| uniq
10.234.125.254 10.121.70.151 10.234.125.254: FTP Admin Login Attempt! USER administrator
10.234.125.254 10.121.70.151 10.234.125.254: FTP Admin Login Attempt! USER admin
Our rule shows us that there are multiple logging attempts with account names containing the “admin” phrase. The output gives us great information to notice if there is a brute-force attempt for an admin account.
This signature can be considered a case signature. While it is accurate and works fine, we need global signatures to detect the “known threats/anomalies”. We will need those case-based signatures for significant and sophistical anomalies like zero-days and insider attacks in the real-life environment. Having individual rules for each case will create dozens of logs and alerts and cause missing the real anomaly. The critical point is logging logically, not logging everything.
We can improve our signature by not limiting the focus only to an admin account. In that case, we need to know how the FTP protocol works and the default response codes. If you don’t know these details, please refer to RFC documentation.
Let’s optimise our rule and make it detect all possible FTP brute-force attempts.
This signature will create logs for each event containing “FTP 530 response”, which allows us to track the login failure events regardless of username.
1
2
3
4
5
signature ftp-brute {
     ip-proto == tcp
     payload /.*530.*Login.*incorrect.*/
     event "FTP Brute-force Attempt"
}
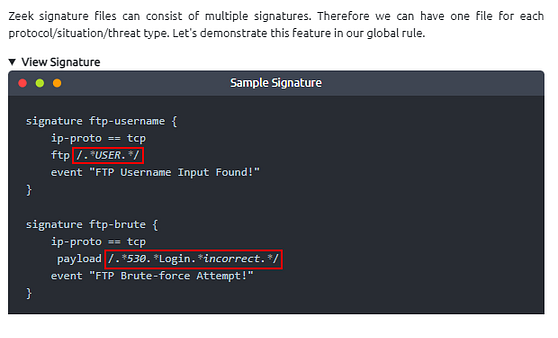
Zeek signature files can consist of multiple signatures. Therefore we can have one file for each protocol/situation/threat type. Let’s demonstrate this feature in our global rule.
1
2
3
4
5
signature ftp-username {
    ip-proto == tcp
    ftp /.*USER.*/
    event "FTP Username Input Found!"
}
1
2
3
4
5
signature ftp-brute {
    ip-proto == tcp
     payload /.*530.*Login.*incorrect.*/
    event "FTP Brute-force Attempt!"
}
Let’s merge both of the signatures in a single file. We will have two different signatures, and they will generate alerts according to match status. The result will show us how we benefit from this action. Again, we will need the “CLI Kung-Fu” skills to extract the event of interest.
This rule should show us two types of alerts and help us to correlate the events by having “FTP Username Input” and “FTP Brute-force Attempt” event messages. Let’s investigate the logs. We’re grepping the logs in range 1001–1004 to demonstrate that the first rule matches two different accounts (admin and administrator).
FTP Signature
1
2
3
4
5
6
ubuntu@ubuntu$ zeek -C -r ftp.pcap -s ftp-admin.sig
ubuntu@ubuntu$ cat notice.log | zeek-cut uid id.orig_h id.resp_h msg sub | sort -r| nl | uniq | sed -n '1001,1004p'
  1001 CeMYiaHA6AkfhSnd 10.234.125.254 10.121.70.151 10.234.125.254: FTP Username Input Found! USER admin
  1002 CeMYiaHA6AkfhSnd 10.234.125.254 10.121.70.151 10.121.70.151: FTP Brute-force Attempt! 530 Login incorrect.
  1003 CeDTDZ2erDNF5w7dyf 10.234.125.254 10.121.70.151 10.234.125.254: FTP Username Input Found! USER administrator
  1004 CeDTDZ2erDNF5w7dyf 10.234.125.254 10.121.70.151 10.121.70.151: FTP Brute-force Attempt! 530 Login incorrect.
Snort Rules in Zeek?
While Zeek was known as Bro, it supported Snort rules with a script called snort2bro, which converted Snort rules to Bro signatures. However, after the rebranding, workflows between the two platforms have changed. The official Zeek document mentions that the script is no longer supported and is not a part of the Zeek distribution.
Answer the questions below
Each exercise has a folder. Ensure you are in the right directory to find the pcap file and accompanying files. Desktop/Exercise-Files/TASK-5
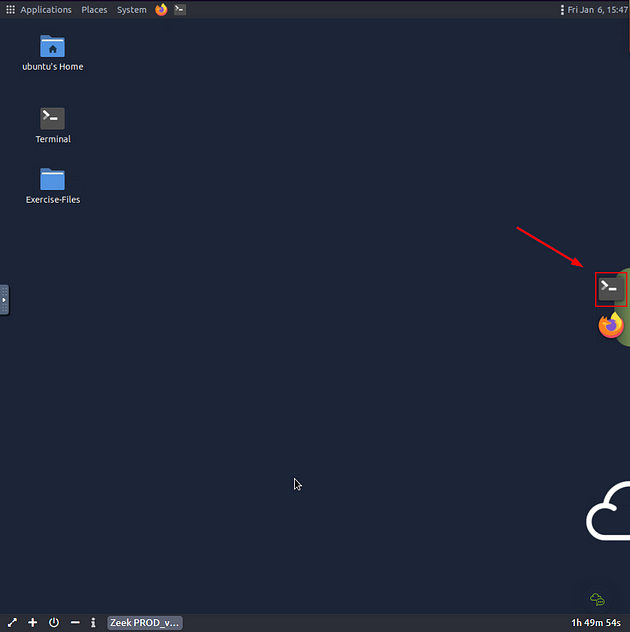
On the VM, you will see a terminal icon in the middle of the VM screen on the right. Click on it.
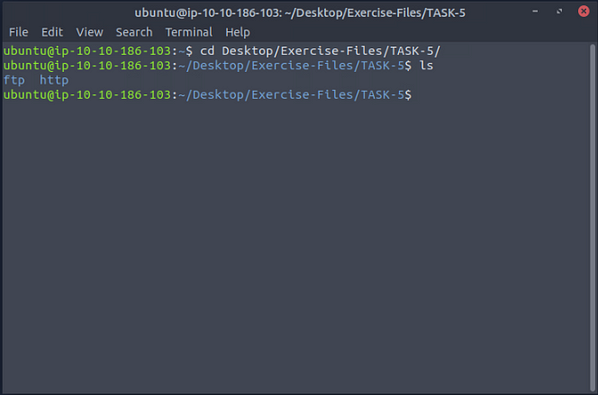
A terminal window will pop-up, time to move to the TASK-5 directory. To do this we will use the cd command, which stands for change directory. We will using this command in combination with Tab completion. With Tab complete, you only have to press Tab after starting to type, and if it only has one entry that matches, it will auto complete it. So let’s type out the command cd Desktop/Exercise-Files/TASK-5, then press enter to run the command. Follow up with the ls command to see the contents of the directory.
Investigate the http.pcap file. Create the HTTP signature shown in the task and investigate the pcap. What is the source IP of the first event?
We need to move over to the http directory first, so using the command cd http/, and press enter to move forward into the directory. Then use the command ls to list the contents of the directory.
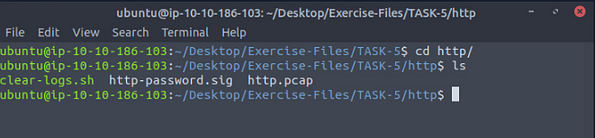
Time to open up the http-password.sig file in nano, use the command nano http-password.sig, then press enter.

The signature file will open in nano and you are just about ready to write the signature file.
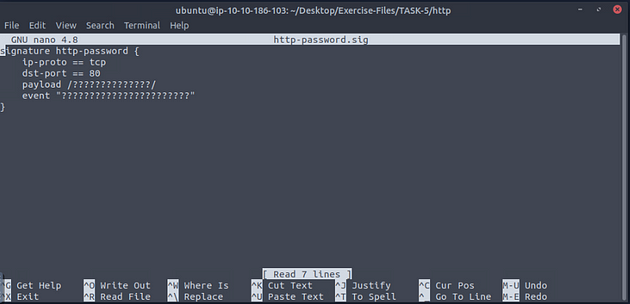
| On the left side with the tasks, scroll up to the **Example | Cleartext Submission of Password**, you will see a carot with View Signature next to it. Click on an part of that to drop down the simple signature. |

The code block will drop down, and you will see what we will be typing into the signature file in nano.
Going back to the VM type in the payload and event as shown in the example. After you are done press ctrl + s to save what you have typed.
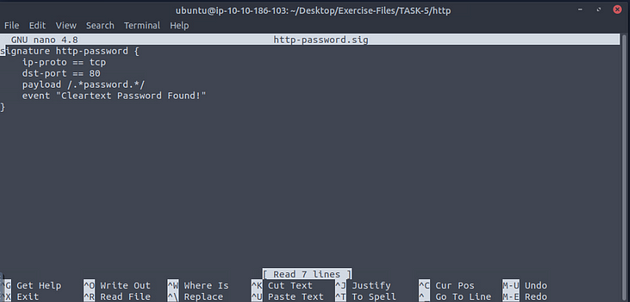
Then press ctrl + x to close out of nano and go back to the terminal.

Time to run our signature against, to do this we will use the command zeek -C -r http.pcap -s http-password.sig, then press enter to run Zeek. Then use the ls command to see the content of the directory.

Let’s find the source IP address of the first event, to do this we will use the command cat signatures.log | zeek-cut src_addr sig_id, then press enter for it to be output to the screen.

The answer will be the IP address that appears in the output. Type it into the TryHackMe answer field, then click submit.

Answer: 10.10.57.178
What is the source port of the second event?
The answer to this can be found by running almost the same exact command, we just need to change one of the field in zeek-cut. So the command is cat signatures.log | zeek-cut src_port sig_id, then press enter. In the output look at the second result, that is the answer you are looking for. Type it into the TryHackMe answer field, then click submit.

Answer: 38712
Investigate the **conn.log.
**What is the total number of the sent and received packets from source port 38706?
This took some trial and error, but in the end when it comes to using zeek-cut, its all about having the right field. So when you figure out the proper field that’s when you are able to answer the question easliy.
For this one the fields was want to look at are the id.orig_p (port), orig_pkts (sent packets), and resp_pkts(recieved packets). So the command is cat conn.log | zeek-cut id.orig_p orig_pkts resp_pkts | grep 38706, then press enter to run. In the output will be the three fields, the one in red is the port that we grepped for. So the other two are the packets sent and recieved, add these two numbers together and you will have your answer to the question. Type it into the TryHackMe answer field, then click submit.

Answer: 20
Create the global rule shown in the task and investigate the ftp.pcap file.
First we need to move over to the ftp directory, to do this we must move backward with cd .., then forward with cd ftp/. Now we are in the ftp directory, we can list the contents of said directory with the lscommand.

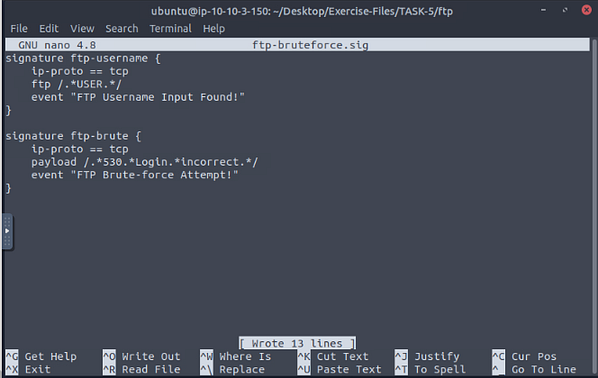
Now open the signature file with nano ftp-bruteforce.sig, and press enter.

| Go back to the left side of the page with the taskes on it, scroll up to the **Example | FTP Brute-force.** Then scroll down till you see the third View Signature and click on it. This will drop-down the code box, now we just need to copy two sections of this over to our signature file. Those sections being the ftp section in the ftp-username signature and the payload in the ftp-brute signature. |
Go back to the VM and type the ftp and payload as shown in the example. After you are done press ctrl + s to save what you have typed.
Then press ctrl + x to close out of nano and go back to the terminal.

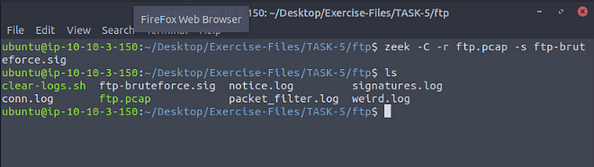
Time to run our signature against, to do this we will use the command zeek -C -r ftp.pcap -s ftp-bruteforce.sig, then press enter to run Zeek. Then use the ls command to see the content of the directory.
Investigate the notice.log. What is the number of unique events?
To achieve this we need to preform several pipings, so the command is cat notice.log | zeek-cut uid | sort | uniq | wc -l, then press enter. So after we get the results from zeek-cut we pipe that into sort, where it is sorted alphabetically. Then we pipe the sorted results through uniq which will get rid of the dupicates. Finally we pipe the uniq results through wc -l which will count the number of lines, or in our case the number of results from uniq, and thus giving us the answer to the question. Type it into the TryHackMe answer field, then click submit.

Answer: 1413
What is the number of ftp-brute signature matches?
To best figure this out we will look at the signatures.log file. Time to use zeek-cut once again, this time the command being cat signatures.log | zeek-cut sig_id | grep "ftp-brute" | wc -l, then click enter to run. So we are pulling the sig_id field with zeek-cut. We then pipe the results of that into grep, where we search for the string ftp-brute. Finally we pipe the grep results into wc -l, which will count the number of lines, or in our case the number of results from grep. The number that it outputs is the answer to the question, type it into the TryHackMe answer field, then click submit.

Answer: 1410
Task 6 Zeek Scripts | Fundamentals
Zeek Scripts
Zeek has its own event-driven scripting language, which is as powerful as high-level languages and allows us to investigate and correlate the detected events. Since it is as capable as high-level programming languages, you will need to spend time on Zeek scripting language in order to become proficient. In this room, we will cover the basics of Zeek scripting to help you understand, modify and create basic scripts. Note that scripts can be used to apply a policy and in this case, they are called policy scripts.
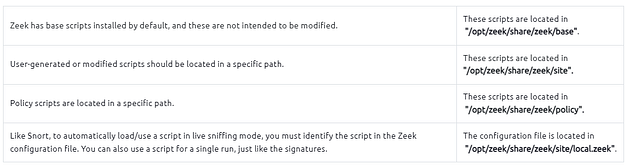
- Zeek scripts use the “.zeek” extension.
- Do not modify anything under the “zeek/base” directory. User-generated and modified scripts should be in the “zeek/site” directory.
- You can call scripts in live monitoring mode by loading them with the command
load @/script/pathorload @script-namein local.zeek file. - Zeek is event-oriented, not packet-oriented! We need to use/write scripts to handle the event of interest.
running Zeek with signature
ubuntu@ubuntu$ zeek -C -r sample.pcap -s sample.sig
GUI vs Scripts
Have you ever thought about automating tasks in Wireshark, tshark or tcpdump? Zeek provides that chance to us with its scripting power. Let’s say we need to extract all available DHCP hostnames from a pcap file. In that case, we have several options like using tcpdump, Wireshark, tshark or Zeek.
Let’s see Wireshark on the stage first. You can have the same information with Wireshark. However, while this information can be extracted using Wireshark is not easy to transfer the data to another tool for processing. Tcpdump and tshark are command-line tools, and it is easy to extract and transfer the data to another tool for processing and correlating.
extracting hostnames with tcpdump and tshark
1
2
3
4
5
6
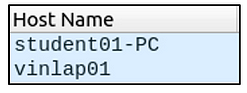
ubuntu@ubuntu$ sudo tcpdump -ntr smallFlows.pcap port 67 or port 68 -e -vv | grep 'Hostname Option' | awk -F: '{print $2}' | sort -nr | uniq | nl
1 "vinlap01"
2 "student01-PC"
ubuntu@ubuntu$ tshark -V -r smallFlows.pcap -Y "udp.port==67 or udp.port==68" -T fields -e dhcp.option.hostname | nl | awk NF
1 student01-PC
2 vinlap01
Now let’s see Zeek scripts in action. First, let’s look at the components of the Zeek script. Here the first, second and fourth lines are the predefined syntaxes of the scripting language. The only part we created is the third line which tells Zeek to extract DHCP hostnames. Now compare this automation ease with the rest of the methods. Obviously, this four-line script is easier to create and use. While tcpdump and tshark can provide similar results, transferring uncontrolled data through multiple pipelines is not much preferred.
1
2
3
4
event dhcp_message (c: connection, is_orig: bool, msg: DHCP::Msg, options: DHCP::Options)
{
print options$host_name;
}
Now let’s use the Zeek script and see the output.
extracting hostnames with tcpdump and tshark
1
2
3
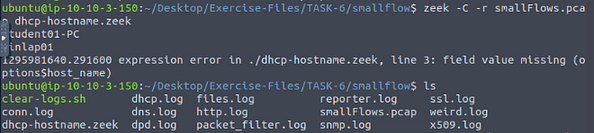
ubuntu@ubuntu$ zeek -C -r smallFlows.pcap dhcp-hostname.zeek
student01-PC
vinlap01
The provided outputs show that our script works fine and can extract the requested information. This should show why Zeek is helpful in data extraction and correlation. Note that Zeek scripting is a programming language itself, and we are not covering the fundamentals of Zeek scripting. In this room, we will cover the logic of Zeek scripting and how to use Zeek scripts. You can learn and practice the Zeek scripting language by using Zeek’s official training platform for free.
There are multiple options to trigger conditions in Zeek. Zeek can use “Built-In Function” (Bif) and protocols to extract information from traffic data. You can find supported protocols and Bif either by looking in your setup or visiting the Zeek repo.

Answer the questions below
Each exercise has a folder. Ensure you are in the right directory to find the pcap file and accompanying files. Desktop/Exercise-Files/TASK-6
So we first have to take two steps back, then one step forward. We do this with preforming the command cd .. twice, followed by cd TASK-6. Finally we check the contents of the directory with the ls command.

Investigate the smallFlows.pcap file. Investigate the dhcp.log file. What is the domain value of the “vinlap01” host?
Move into the smallflow directory with cd smallflow/, then us ls to view the contents of the directory.

Now we are going to run Zeek against the smallflows.pcap with the dhcp-hostname.zeek, we do this with the command zeek -C -r smallFlows.pcap dhcp-hostname.zeek, then press enter to run it. Use ls to view the content of the directory now that Zeek has run.
Now time to widdle down some results with zeek-cut and piping, so after we cat dhcp.log we then pipe it into zeek-cut. With zeek-cut we just need the host name (host_name) and domain name (domain). We then pipe those results into grep, since we know the host name is vinlap01, that is what we are using in grep. The results from that will be the host name in red and the domain name in white, which will be your answer. Type it into the TryHackMe answer field, then click submit.

Answer: astaro_vineyard
Investigate the bigFlows.pcap file. Investigate the dhcp.log file. What is the number of identified unique hostnames?
We have to move over to the bigflow directory, to do this we first back out of the current directory with cd .., then forward with cd bigflow/. Then use ls to see the contents of the directory.

Now we are going to run Zeek against the bigFlows.pcap with the dhcp-hostname.zeek, we do this with the command zeek -C -r bigFlows.pcap dhcp-hostname.zeek, then press enter to run it. This is a bigger file so give time to finish.
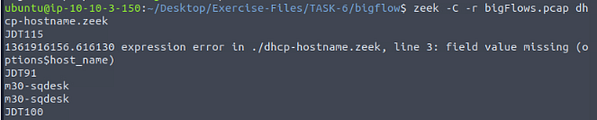
When finished, use lsagain to view the contents of the directory.

Now usinging zeek-cut and piping let’s get this answer. The command we want to use is cat dhcp.log | zeek-cut host_name | sort -nr | uniq, then press enter. We will pipe the results of zeek-cut through sort, sorting it numerically and recursivly. Then use uniq to remove any dupicates, then all we have to do is count the output except the last one which isn’t a valid host name. The total number of the count is the answer to the question. Once you figure it out, type the answer into the TryHackMe answer field, then click submit.
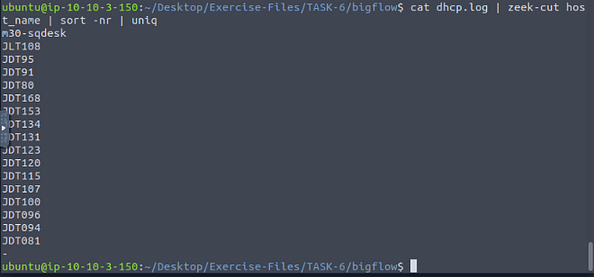
Answer: 17
Investigate the dhcp.log file. What is the identified domain value?
Time to widdle down with zeek-cut and piping. The command we want to run is cat dhcp.log | zeek-cut domain | sort | uniq, then press enter. As before, after we get the results from zeek-cut we pipe that into sort, where it is sorted alphabetically. Then we pipe the sorted results through uniq which will get rid of the dupicates. You will have two outputs, one of which is clearly the answer. Once you figure it out, type the answer into the TryHackMe answer field, then click submit.

Answer: jaalam.net
Investigate the dns.log file. What is the number of unique queries?
Now usinging zeek-cut and piping let’s get this answer. The command we want to use is cat dns.log | zeek-cut query | sort -nr | uniq | grep -v -e ‘*’ -e ‘-’ | wc -l, then press enter. We will pipe the results of zeek-cut through sort, sorting it numerically and recursivly. Then we pipe the sorted results through uniq which will get rid of the dupicates. Now we use grep not to find but to filter with the -v command, and the -e is for adding more or more filtering parameters/strings. Then finally we use wc -l which will count the number of lines, or in our case the number of results from grep, and thus giving us the answer to the question. Now type the answer into the TryHackMe answer field, then click submit.

Answer: 1109
| You have finished these tasks, and can now move onto Task 7 Zeek Scripts | Scripts and Signatures, Task 8 Zeek Scripts | Frameworks, Task 9 Zeek Scripts | Packages, & Task 10 Conclusion. |